This Article Contains
Being photographed can be split into "six areas"
When you feel "I'm not good at photos" or "I can never get a good shot," the cause is rarely just one thing. Insufficient preparation, day-of tension, forced expressions, posture problems, a mismatch with the use case, uncertainty in selecting — these combine to produce the disconnect you see in photos.
Separating these six things makes it possible to find specific conditions you can change. ① Preparation (use case, outfit, briefing the photographer). ② On the day (nerves, breathing, on-site communication). ③ Expressions (cheeks, eyes, mouth). ④ Posture (feet, hips, shoulders, chin, eye line). ⑤ Use case (profession, medium, context). ⑥ Selection (narrowing down from candidate photos).
A Field Guide to Being Photographed organizes these six areas chapter by chapter. Making progress is faster if you open only the area where you feel stuck, rather than trying to solve everything with a single article.
Not fixing on one cause makes it easier to untangle
If you decide "the reason I'm not good at photos is my face," there's nowhere to go next. Your face can't be changed, so making it the cause closes off the path to solutions.
Conversely, when you split being photographed into six areas, you find places where "this is something I can change." Shooting distance and lens choice (see FIG.081), posture (see FIG.028), matching use case to expression (see FIG.002) — all of these are specific conditions you can work with.
What you decide in preparation, what you pay attention to during the shoot, and what you evaluate afterward are separate tasks. Organizing them like a map makes it easier to put words to exactly where you feel lost right now.
FIG. 160An educational diagram for thinking through the challenges of being photographed, from preparation through photo selection.
Start reading from wherever you feel stuck
This field guide does not need to be read in order. Decide which article to open based on where your current uncertainty lies.
Before a shoot, turn to articles on preparation — deciding your use case and outfit. During a shoot, turn to articles on expressions and posture. After a shoot, turn to articles on selection. There are diagrams prepared for each of these areas. Read one, try it, and when the next uncertainty appears, open a different area — this is how you move forward.
Every article is designed so that you can return to "where will I use this photo," "what do I need to confirm," and "how do I select." Simply placing your uncertainty back in the right box is enough to make your next step smaller.
Trying to solve everything on the day leads to failure
A common mistake is trying to resolve everything on the day of the shoot. If uncertainty about your use case or outfit is still unresolved, there's less mental space for expressions. What you should focus on during the shoot is posture and expressions. Everything else should be decided the day before.
Another mistake is selecting photos after the shoot based solely on "do I like this or not?" "The shot I like best of myself" and "the shot that fits the use case" often don't match. You need to look at them separately: does it fit where I'll use it, and does it communicate what the viewer needs?
Distributing your decisions lets you focus on each stage in turn. Deciding in preparation, acting on the day, judging in selection — treat these three as separate tasks.
When you feel lost, look at which of the six areas — preparation, on the day, expressions, posture, use case, or selection — is where you've stopped.
How to find the right place for your current uncertainty
Start by writing down your current uncertainty in one short phrase. "I can't decide what to wear," "my smile looks stiff," "my eyes look tense," "my full body looks distorted," "I can't choose" — writing it out makes the uncertainty concrete.
Next, place that uncertainty into one of the six areas. "Can't decide what to wear" belongs in preparation. "Smile looks stiff" belongs in expressions. "Full body looks distorted" may belong in both preparation (distance and lens) and on the day (briefing the photographer). Once you know where it belongs, you can narrow down which articles to read and what to try.
Finally, do a test placement in the context where you'll use the photo. Don't rely only on personal preference — check whether it reads well at the actual display size. For an SNS icon, crop it into a circle; for a website, view it at display size — how it looks in the real context is the last thing to judge.
- The challenges of being photographed are easier to organize when split into six areas: preparation, on the day, expressions, posture, use case, and selection.
- When you feel lost, start reading from whichever area you're currently stuck in. You do not need to read in order.
- Do not try to solve everything on the day of the shoot. Treat preparation, the shoot itself, and selection as separate tasks.
References
Related Diagrams
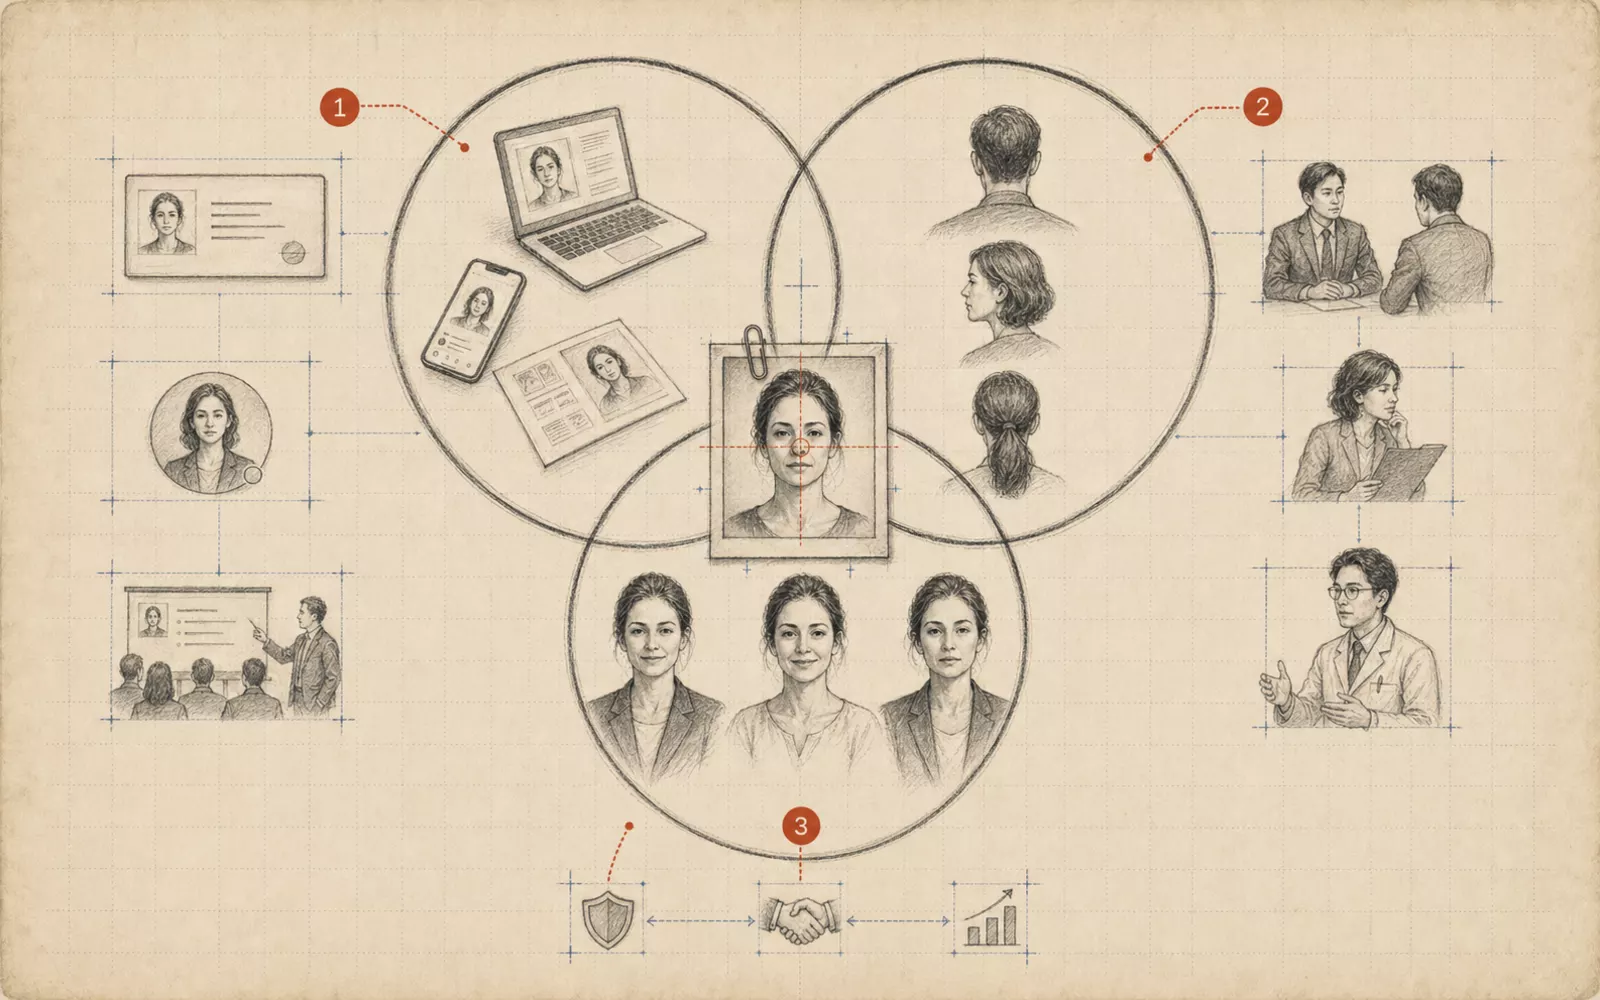 FIG.002Three Questions to Ask Yourself Before a Profile ShootWhere will you use it, who will see it, and how do you want to be perceived? Organizes the three questions to settle before a shoot.
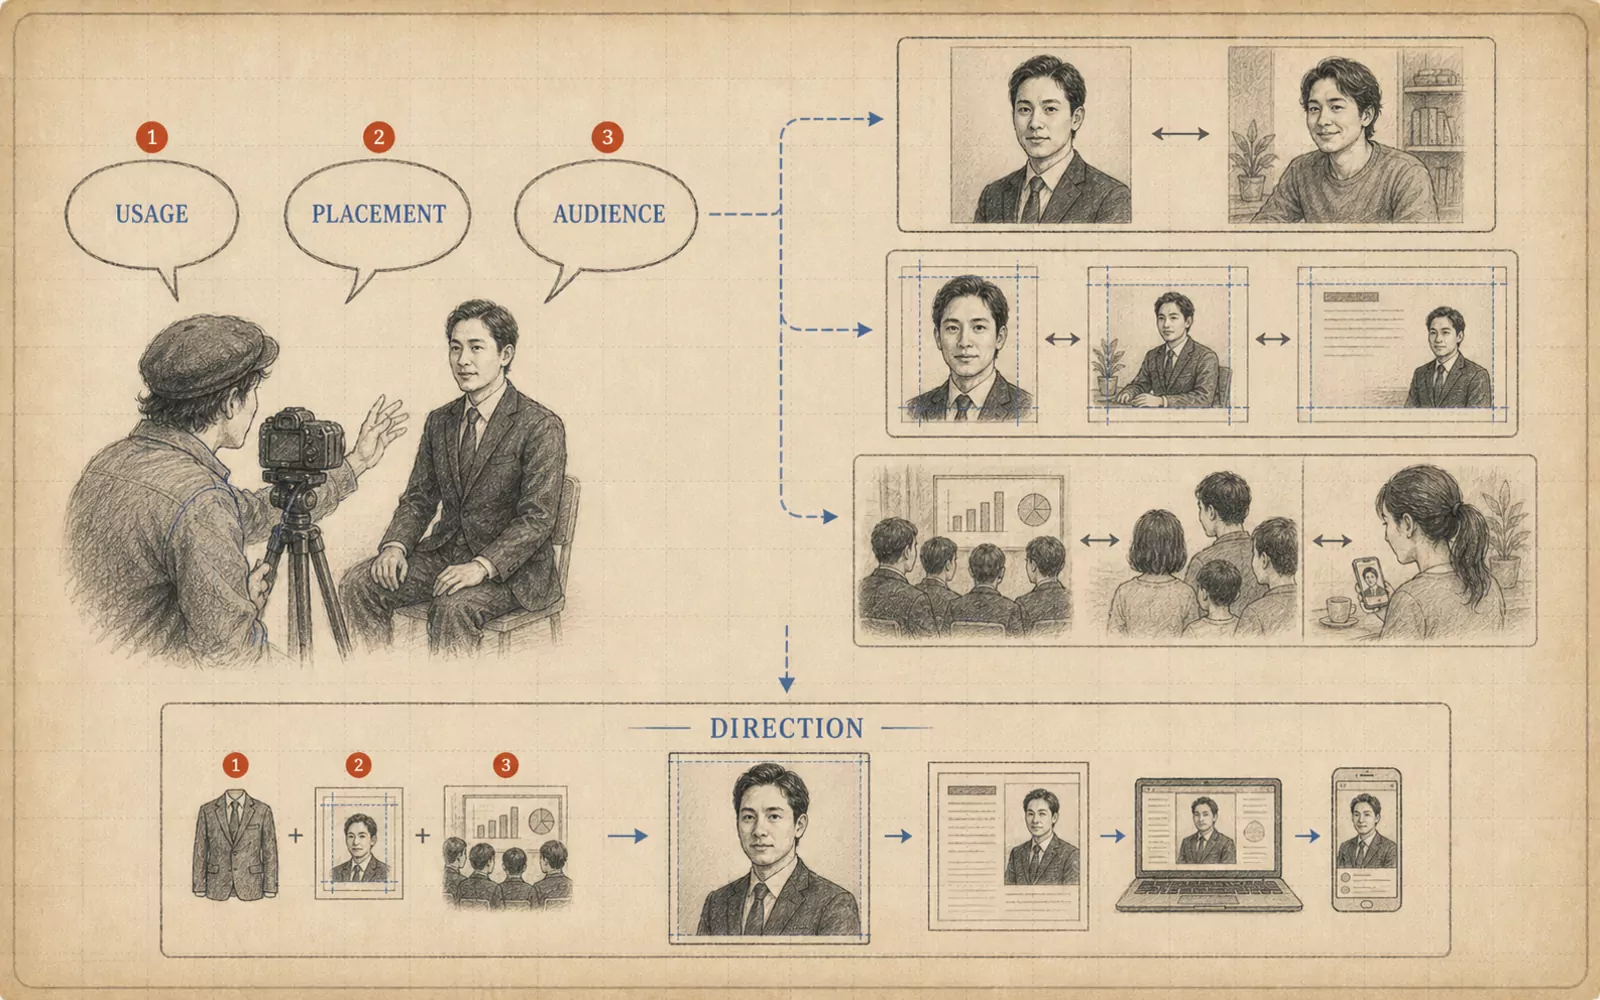 FIG.080Three Questions to Ask Your Photographer at the StartA great profile shoot starts with asking about use case, audience, and the impression you want to create.
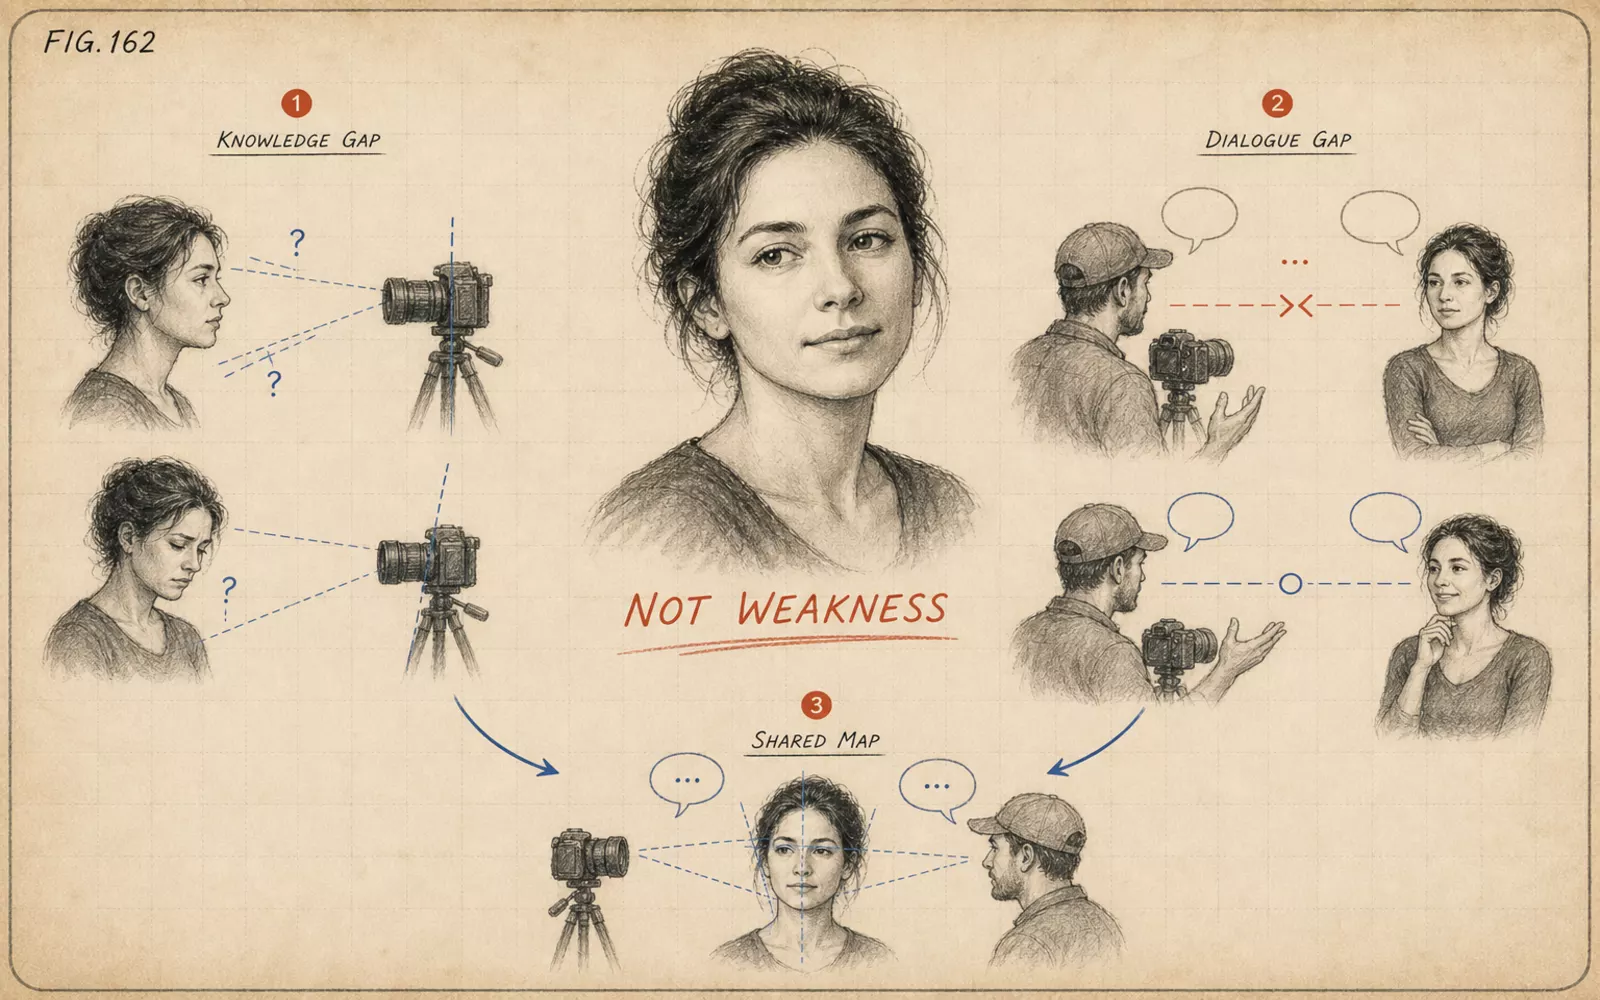 FIG.162The Philosophy of Ending Camera Aversion: Editorial Policy of A Field Guide to Being PhotographedReframes camera aversion not as a personal weakness, but as something arising from a lack of knowledge and dialogue.