This Article Contains
Shape Your Smile with Conditions, Not Willpower
"Just smile naturally" does not work for most people in a photo shoot. In everyday life a smile rises spontaneously in response to another person or the mood of the moment — but the instant a camera is pointed at you, that spontaneity disappears.
A photo-ready smile has specific conditions that do not rely on mood.
- Lift the cheeks (below the eyes) — Rather than pulling the mouth corners sideways, raise the area around the cheekbones. When the cheeks lift, natural fine lines appear around the eyes too.
- Show about 3 mm of upper teeth — Do not open wide enough to show your gums. Stop once just a hint of white is visible.
- Capture the moment tension releases — Instead of freezing on the "1" of a "3-2-1" countdown, the split second right after — when tension slightly drops — tends to yield a more natural expression.
Simply keeping these three in mind reduces the number of shots where you look stiff and awkward.
The Structural Reason "Please Smile" Tends to Freeze
When asked to smile, almost everyone does the same thing: pulls the mouth corners sideways — the "E" sound movement, where only the mouth is performing a smile.
The problem is that this movement barely lifts the cheeks. With the cheeks stationary, the smile never reaches the eyes. The result is "mouth smiling, eyes not smiling."
Making matters worse, while waiting for the photographer's countdown, people "prepare and lock in" their smile — making the expression even stiffer. The human face is not built to hold the same expression for many seconds straight; after ten or more seconds, the cheek muscles tire and the eye area hardens even as the mouth keeps smiling.
The majority of smiles that look "manufactured" trace back to these two causes: a mouth-corners-only movement, and holding the expression for too long.
FIG. 012A diagram comparing a frozen "please smile" expression with a natural smile shaped by cheeks, teeth, and timing.
Rehearsing the 3 mm Smile in a Mirror
Running through the following practice the day before your shoot makes it much easier to reproduce on the day.
- First, make the "E" smile — Pull your mouth sideways and notice: this is what a "cheeks not moving" smile feels like.
- Now, without moving your mouth, lift only the cheeks — Imagine gently pressing upward on the soft area below the eyes. If you notice a subtle movement around the eye area, you are doing it right.
- From that position, show 3 mm of upper teeth — It will feel almost too subtle in the mirror. That is exactly right.
This 3 mm smile may look understated in a mirror, but it reads as warm in a photo — and it is the right level of intensity for a professional context without sacrificing trustworthiness. It is particularly well-suited to business profiles, legal, medical, and executive photography.
Why Holding a Smile Too Long Makes It Worse
The harder you try to maintain a solid smile throughout a shoot, the more you lock your expression in place. But the face's muscles are not designed to hold a single expression for tens of seconds.
After more than about ten seconds, the cheek muscles fatigue, and even while the mouth keeps smiling, the eye area stiffens. This is why "trying to hold a smile longer" tends to work against you.
The solution is to treat your smile not as "one sustained hold" but as "one short take you can repeat as many times as needed." Make a smile before the countdown, let it go after the shutter fires, then make it again. This rhythm produces more natural expressions than trying to sustain one.
A smile is built in order — cheeks, then teeth, then timing — not through sheer effort.
Useful Phrases and Requests to Use on Set
Having a few phrases ready for when things are not going well can save you on set.
Things to tell your photographer: "Am I pulling my mouth too far sideways?" / "Is this amount of teeth okay?" / "Could you shoot a few frames right after the countdown too?" These are specific, actionable cues your photographer can actually respond to.
Things to remind yourself: "Cheeks before mouth corners" / "Do not freeze the smile" / "Let go a little right after the '1'." If something feels off during the shoot, take a breath and rebuild from the cheeks.
When reviewing delivered photos, do not look only at the mouth — check the outer corners of the eyes too. Keep the photos where the cheeks are lifted, the eye area has a soft fine line, and the upper teeth are showing modestly. Those are the photos that will look natural wherever you place them.
- Shape your smile by lifting the cheeks and showing about 3 mm of upper teeth, rather than pulling the mouth corners sideways.
- Do not freeze the smile — after the shutter fires, let tension release for a moment, and keep that frame as a candidate too.
- When selecting photos, check the outer eye corners and cheek movement alongside the mouth.
Related Diagrams
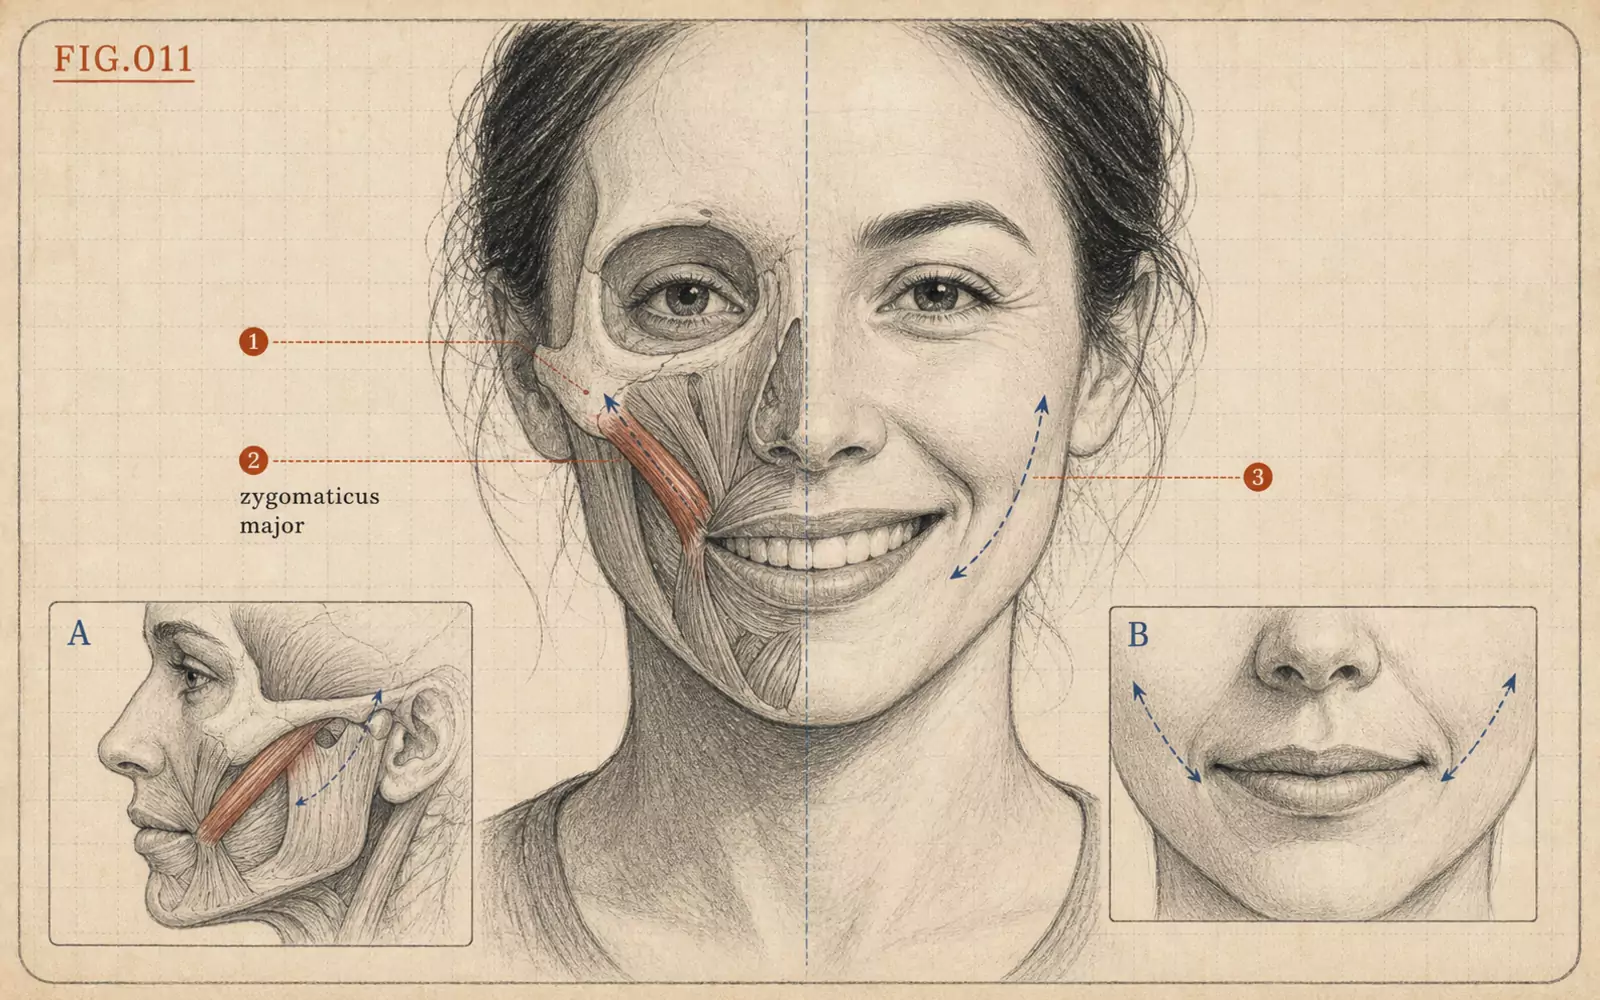 FIG.011Build Your Smile from the Cheekbones, Not the MouthA photo smile starts by lifting the cheeks below the eyes, not by pulling the mouth corners sideways. Showing 3 mm of upper teeth is the benchmark for professional photos.
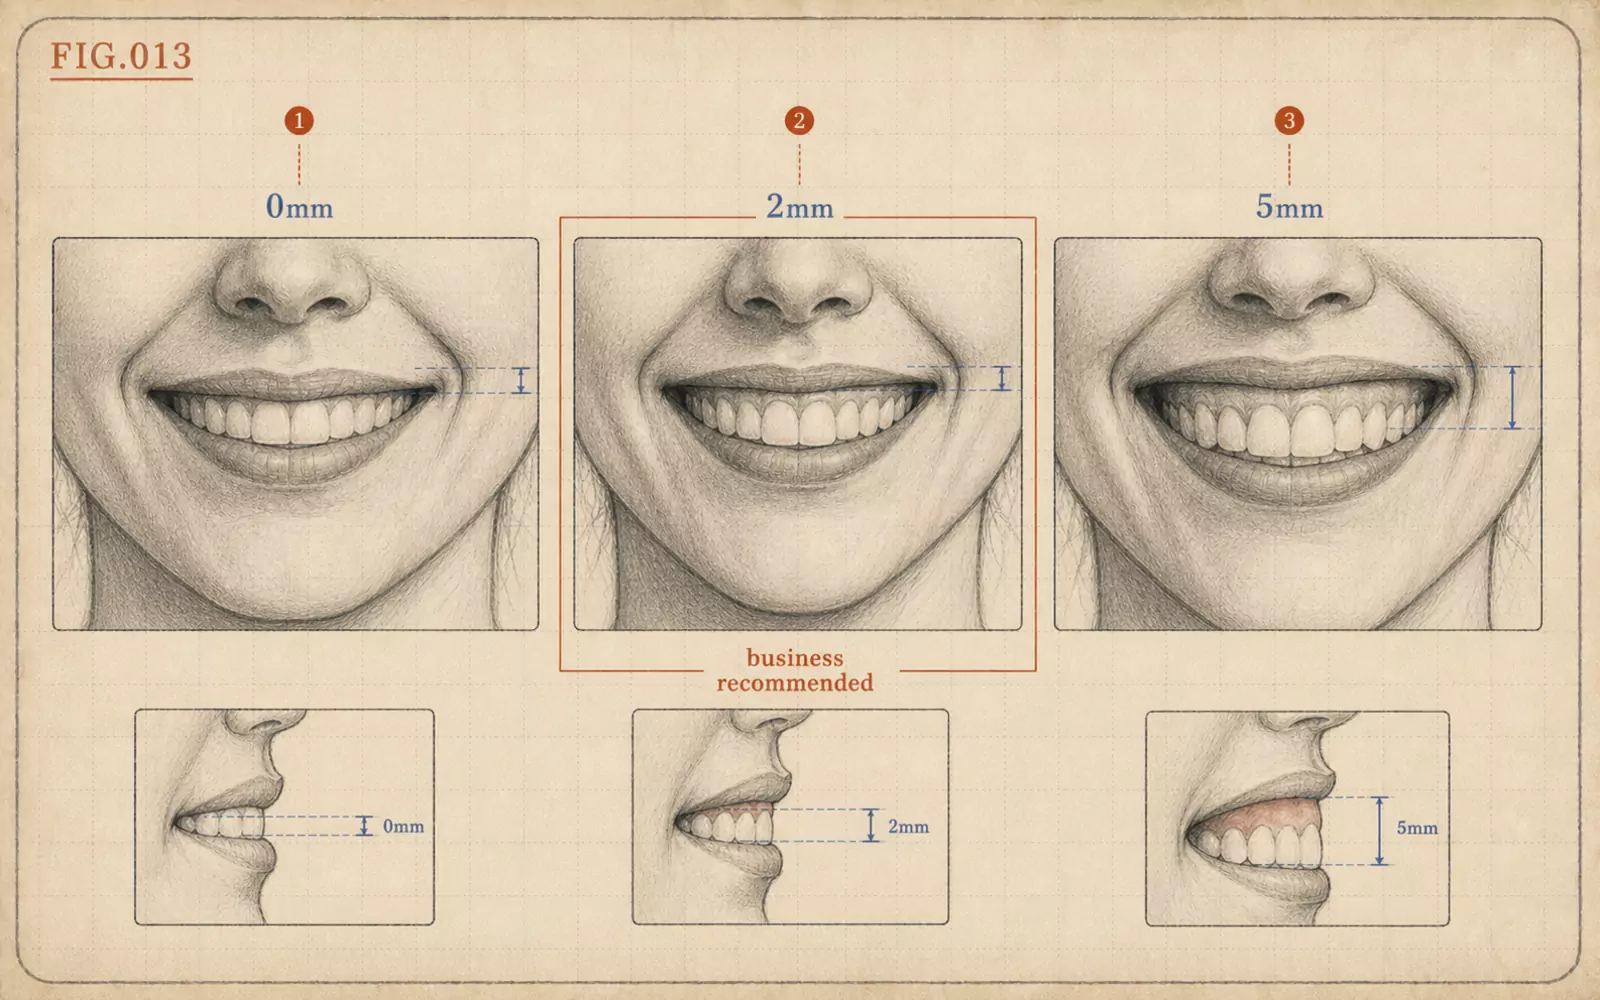 FIG.013The Gummy Smile 2 mm RuleRather than hiding a gummy smile, adjust the amount of smile for the context. For professional photos, 3 mm of upper teeth with minimal gum showing is the benchmark.
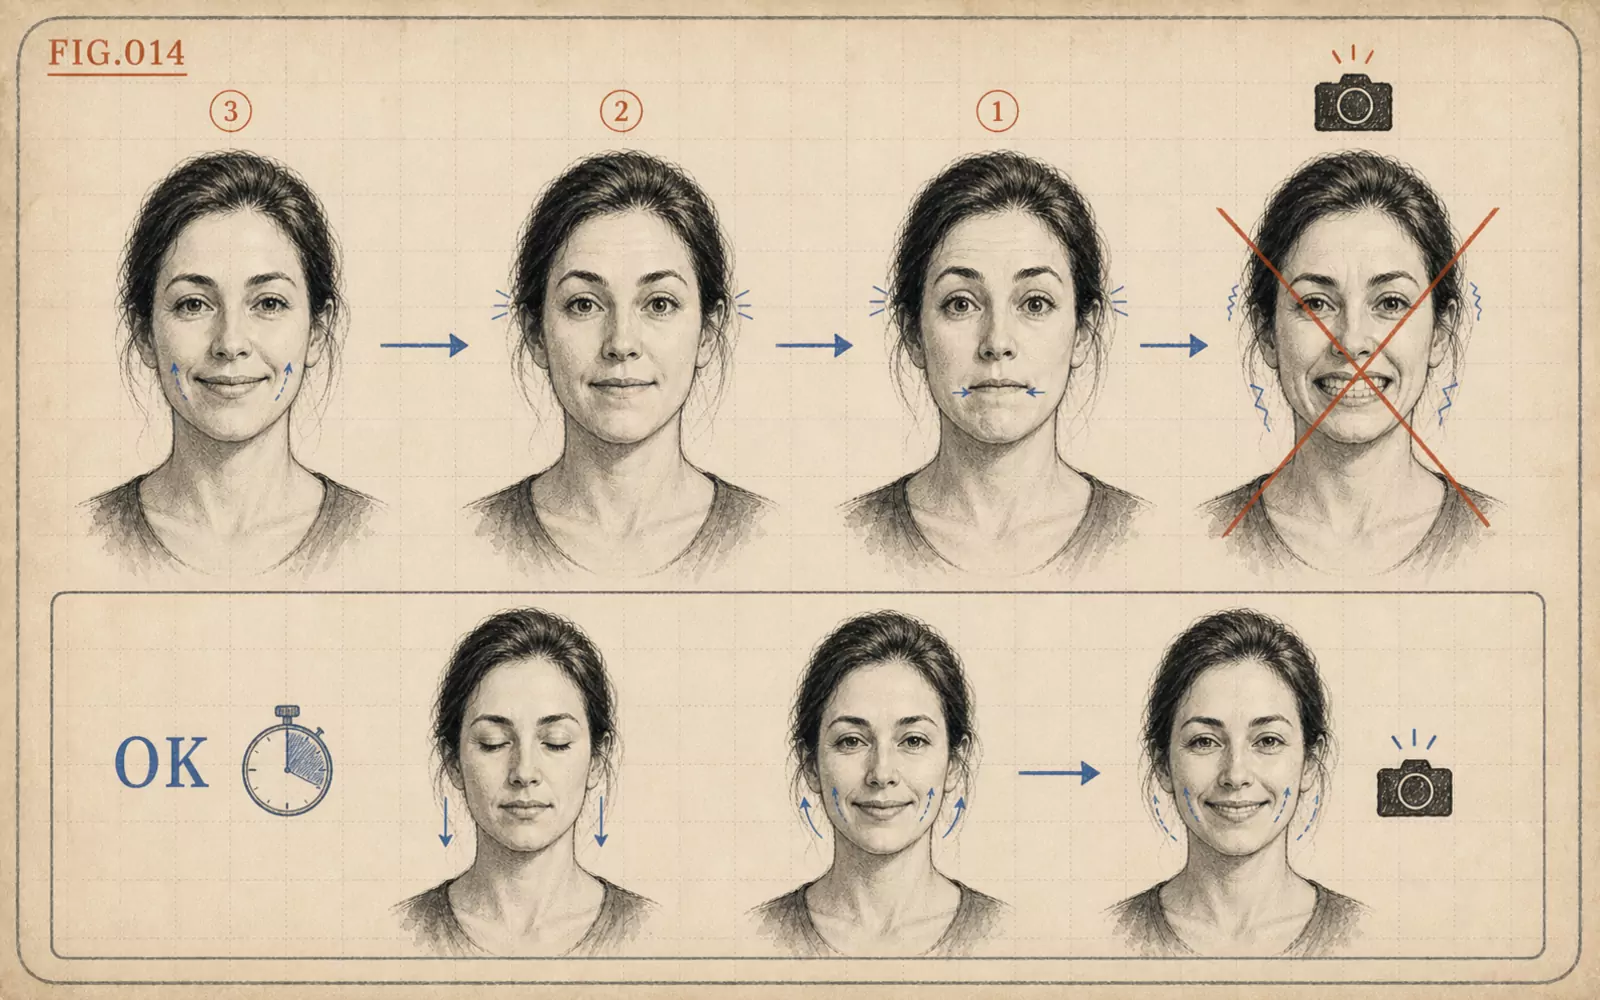 FIG.014The Countdown 3-2-1 TrapThe moment of "1" is the peak of tension. A great smile is more likely to appear in the split second right after, when tension releases.