This Article Contains
The First Thing to Check by a Window
The first thing to do when shooting by a window is to check the intensity of the light. Before asking "is it bright enough?", ask "are the shadows soft?"
When strong sunlight hits your face directly, hard shadows appear under the nose, under the eyes, and below the cheekbones. These shadows can give the viewer the impression that you look tired or that your expression is gloomy. It is a quality-of-light problem, not a face problem.
The check is simple: look at the shadow under your nose. If its edge is crisp and well-defined, it is a sign that the light is too harsh. If it is soft and blurry, the light is in a usable range.
Why Direct Sunlight Creates Hard Shadows on Your Face
Sunlight arrives as soft, dispersed light when it comes from across the whole sky, but when it enters a room through a window it becomes a small, intense beam. The smaller the light source, the sharper the shadow edges.
Hanging a sheer curtain or thin white fabric over the window turns the entire window surface into a broad emitting plane. The wider the light source, the softer the shadows become, and the more natural the contours of the face look. This is the same principle as a cloudy day outdoors. Faces look natural in outdoor overcast light because the clouds become the light source and the shadows spread out and soften.
You don't need specialized studio lighting. Simply changing how you use the window changes the quality of the light.
FIG. 023A diagram showing where to stand by a window so that direct sunlight is softened before it reaches your face.
Choosing Your Distance from the Window and Where to Stand
First, decide whether you want the window as a background element or purely as a light source. For most profile shots, light is the goal, so you will face the window rather than stand with it behind you.
Turn both your face and your chest toward the window. If you turn only your face while your body stays at an angle, tension creeps into your shoulders. Aligning the direction of your face, chest, and body toward the window lets you receive the light in a natural posture.
Adjust your distance from the window based on the intensity of the sunlight. On a bright day, move slightly further back. Too close and the side facing the window blows out while the shadow side goes very dark, creating excessive contrast. A distance of roughly 1–2 m is a manageable range in most situations.
If you have a white wall, white paper, or a reflector nearby, place it on the shadow side (the side away from the window). This prevents one side of your face from falling too dark and keeps the overall brightness of your face more even.
The Myth That Standing Right Next to a Bright Window Is Best
A common problem with window-side photography is the assumption that "standing right next to the window means better photos." In practice, the light is often too strong, causing squinting and a frozen expression.
Another issue is prioritizing the look of the window background over the quality of light on the face. Even if the background looks beautiful, hard shadows on the face make the shot difficult to use as a profile photo. When shooting by a window, check the softness of the shadows on your face before thinking about the atmosphere of the location.
Shooting next to a window with direct sunlight and no diffusion often produces the reaction "my face looks dark somehow" or "my expression looks tired" when you see the result. Adjusting brightness in post-processing afterward does not change how hard the shadows are. Softening the light before you shoot is the most effective solution.
Shooting by a window is the work of creating soft light, not just finding brightness.
From Pre-Shoot Setup to Photo Selection
Before you start shooting, check the shadows under your nose and under your eyes. If the shadows are deep, diffuse the light by hanging a sheer curtain, a thin piece of fabric, or white paper over the window.
During the shoot, angle your chest — not just your face — toward the light. If only your face turns toward the window, your neck and shoulders twist and your posture becomes unnatural. When your face and chest both face the window together, you receive the light in a natural form.
When selecting from candidate photos, check the softness of the shadows before you evaluate skin brightness. Keep candidates where the shadows under the nose and eyes are soft and a small highlight (catchlight) remains in the eyes. A photo with good light quality — even with the same expression — tends to hold up better over time.
- When shooting by a window, softening the direct sunlight takes priority over finding a bright spot. Use a sheer curtain or fabric to diffuse the light.
- Turn your face and chest toward the window and stand roughly 1–2 m away for the most manageable light.
- When selecting candidate photos, choose based on soft shadows under the nose and eyes rather than overall skin brightness.
Related Diagrams
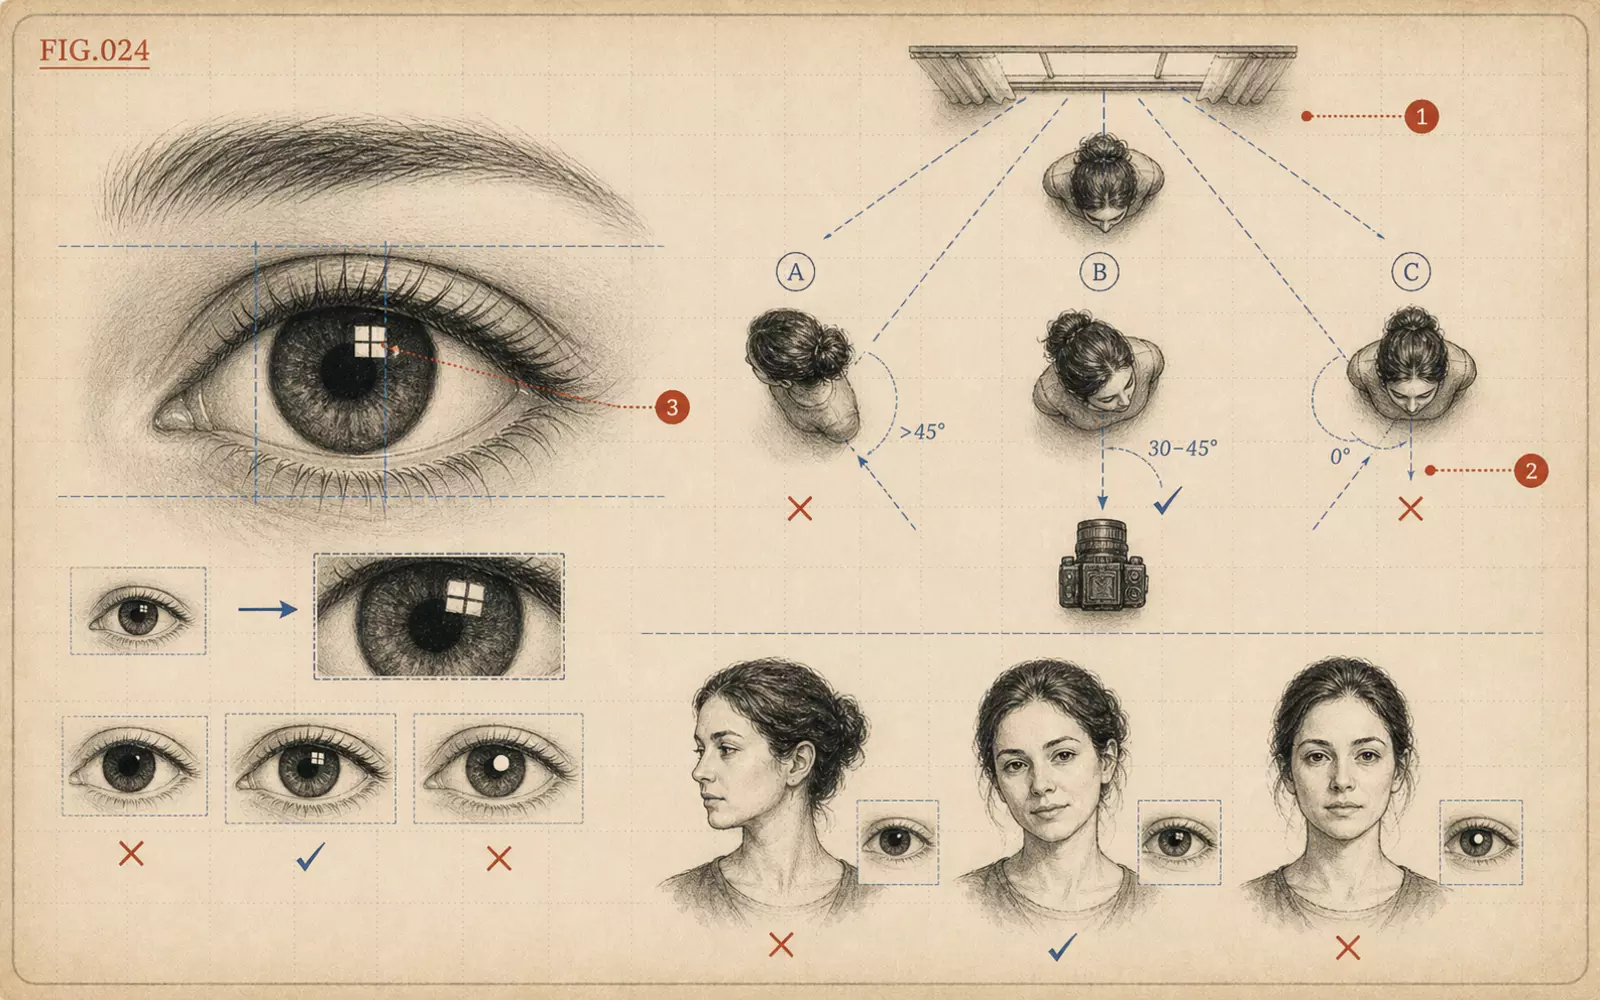 FIG.024How to Orient Your Body to Get Catchlights in Your EyesCatchlights are the small reflections of light in the pupils. Angling your chest toward the light, not just your face, makes them easier to achieve.
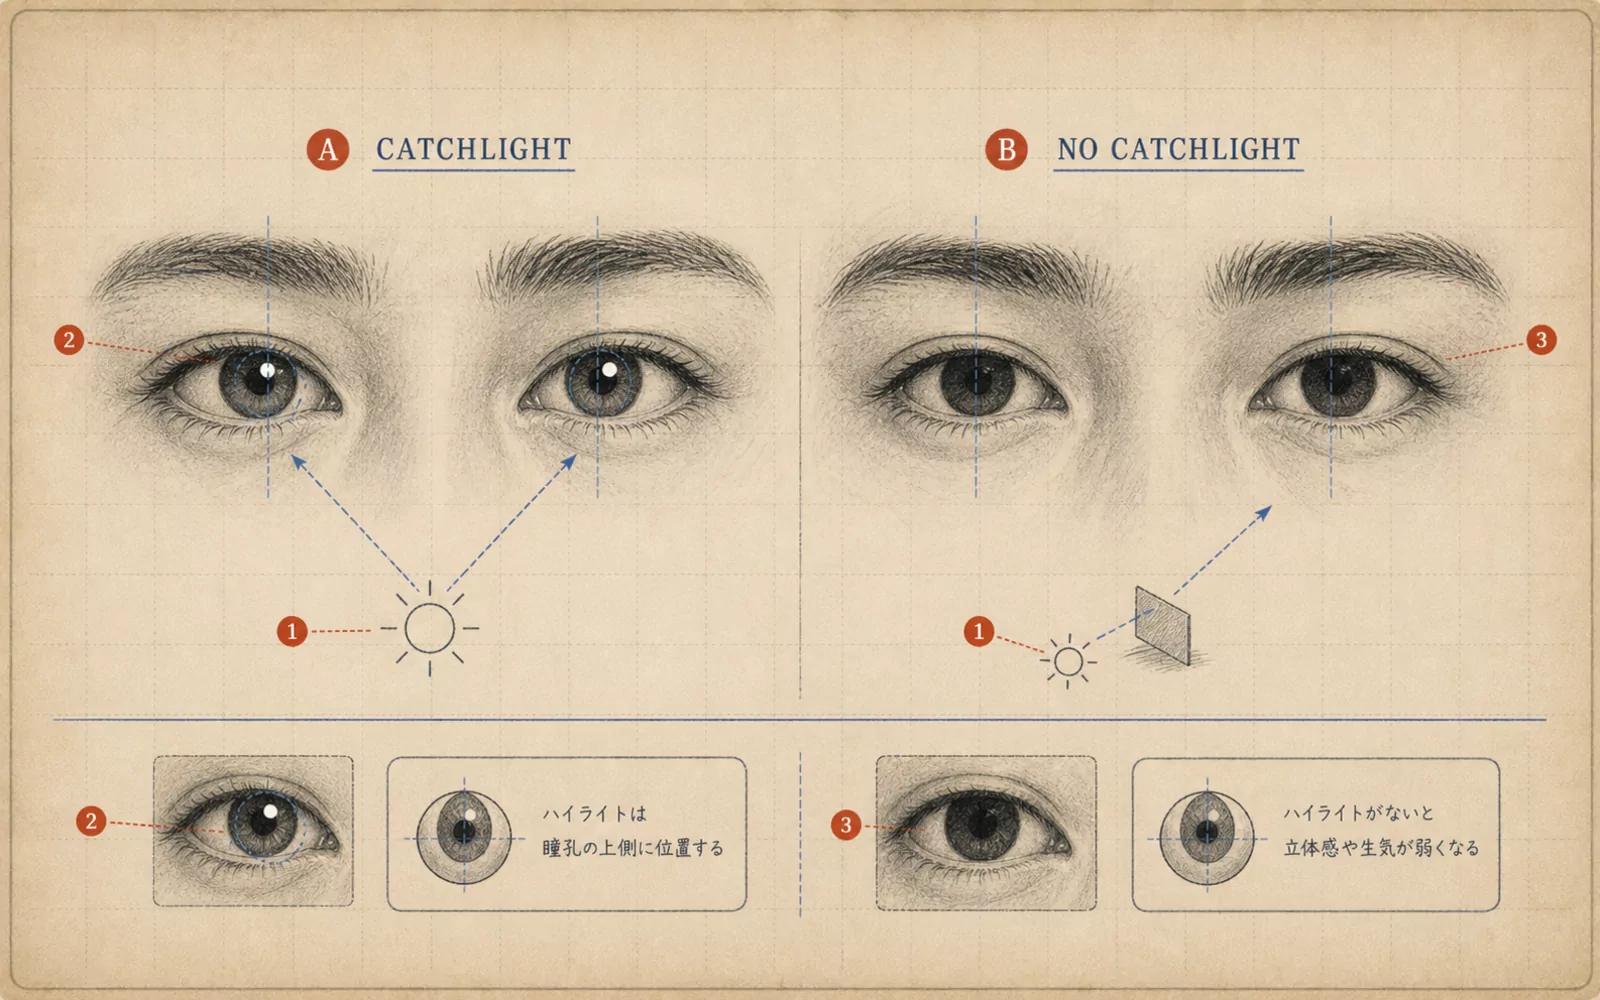 FIG.061Checking Whether the Light Has Entered Your EyesThe final step in photo selection is looking at the light in the pupils. Photos with a small white point in each eye have a sense of vitality.
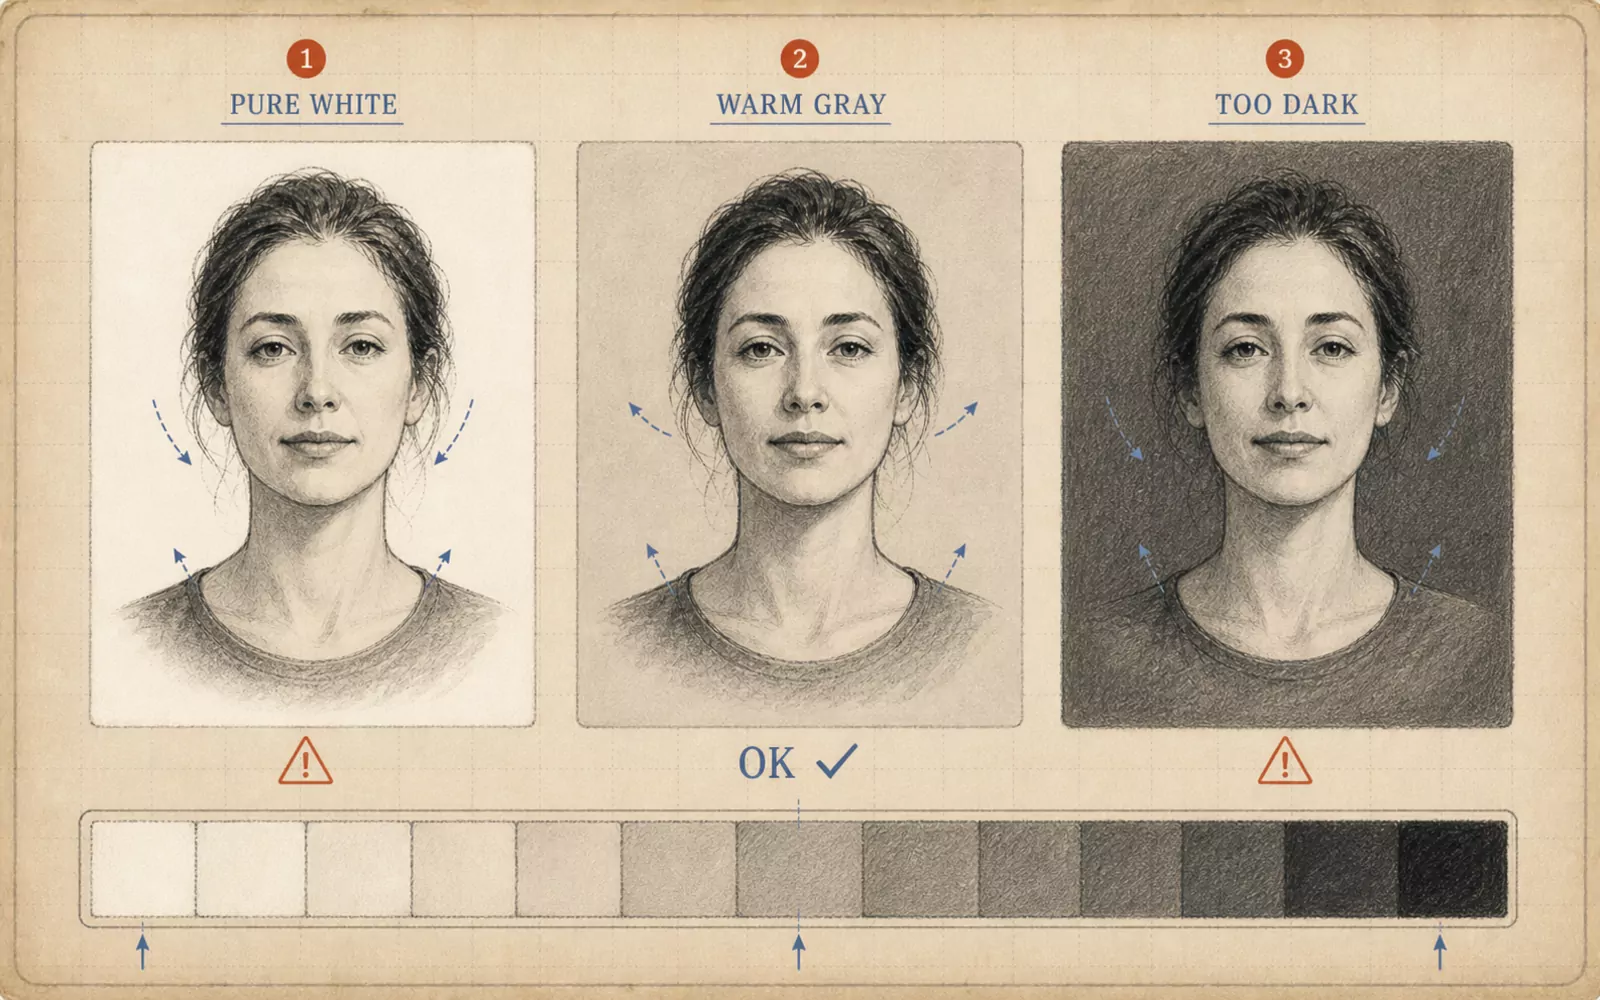 FIG.064A White Background Is Not Pure WhiteA white background blends more naturally with the face when it contains a slight hint of grey. Watch out for over-clipping.