This Article Contains
How the Light in the Pupils Sustains the Vitality of a Photo
A catchlight is a small point of light reflected in the pupil. It comes from window light, a strobe, or light bouncing off a white wall — these light sources create a tiny reflection inside the pupil.
When this light is present, the eyes in the photo feel as if they are "looking at something beyond." Viewers find it natural to read the expression in the eyes. Without light, the direction of the gaze and the emotion are harder to read, leaving a flat impression.
Check for catchlights as the final step after confirming all other elements. When conditions are otherwise equal, prioritize the photo where both pupils have light.
Why the Absence of Light Makes Eyes Look "Sunken"
Pupils are black (or dark) in color. Without catchlights, a uniform, unvarying darkness spreads across the pupil with no movement. This is the source of impressions like "eyes look sunken," "looks tired," or "looks low-energy."
This darkness is not a facial feature problem — it is a question of how light enters. Even with the same face and the same expression, the impression of the eyes changes completely between a photo with light and one without.
Whether this light is present almost always has more influence on the impression of the eyes than eye size or eyeliner thickness.
FIG. 061A diagram summarizing how to check for the presence of catchlights when selecting a photo.
Situations Where Catchlights Are More Likely to Appear
Catchlights are more likely to appear when the face (and chest) are turned toward a bright surface. Photos taken facing a window or light naturally have catchlights.
If only the face is turned toward the light while the chest points away, the neck twists and light may have difficulty reaching the pupils. Aligning the face and chest together toward the light is the basic approach to consistently getting catchlights (see FIG.024).
Bigger catchlights are not necessarily better. The most natural look is a small, clean point in each pupil that does not interfere with the expression of the eyes. Multiple irregular points scattered across the pupil are harder to work with than a single clear point.
What You Miss When You Select Only by Skin Brightness
When selecting photos based only on skin brightness, you can easily overlook the light in the eyes. Even if the skin is uniformly bright, sunken pupils leave a low-energy impression.
Over-whitening only the eyes in retouching is also a problem. When the natural highlight point is made too large or added in an unnatural position, the result looks more retouched than realistic. Getting the light in naturally through the direction of light and body orientation during the shoot looks better than adding it in post-processing.
There is no need to immediately write off a dark-looking photo as an expression or facial feature failure. If the only issue is insufficient light in the eyes, correcting the direction of light in a reshoot can improve the result.
The final step in photo selection is looking at the small white point inside the eyes.
The Verification Procedure When Selecting Photos
First, reduce the candidate photos to the display size. Keep as candidates photos where the eyes do not look sunken even at SNS icon size or as a small face on a business card. A photo where the light in the eyes remains visible even when small will be stable wherever it is actually used.
Next, place two photos side by side and compare the pupils. If only one eye is dark, it can create a subtle sense of instability. Prioritize photos where both eyes are even.
When expression, posture, and background are otherwise equal, choose the one with light in the pupils. This final point can change the impression of the photo.
- A catchlight is the small point of light reflected in the pupil that sustains the vitality of the eyes. Without it, the eyes look sunken.
- When conditions are otherwise equal, prioritize photos where both pupils have catchlights.
- Getting light in naturally by turning the face and chest toward the light source during the shoot is more effective than adding it in retouching.
Related Diagrams
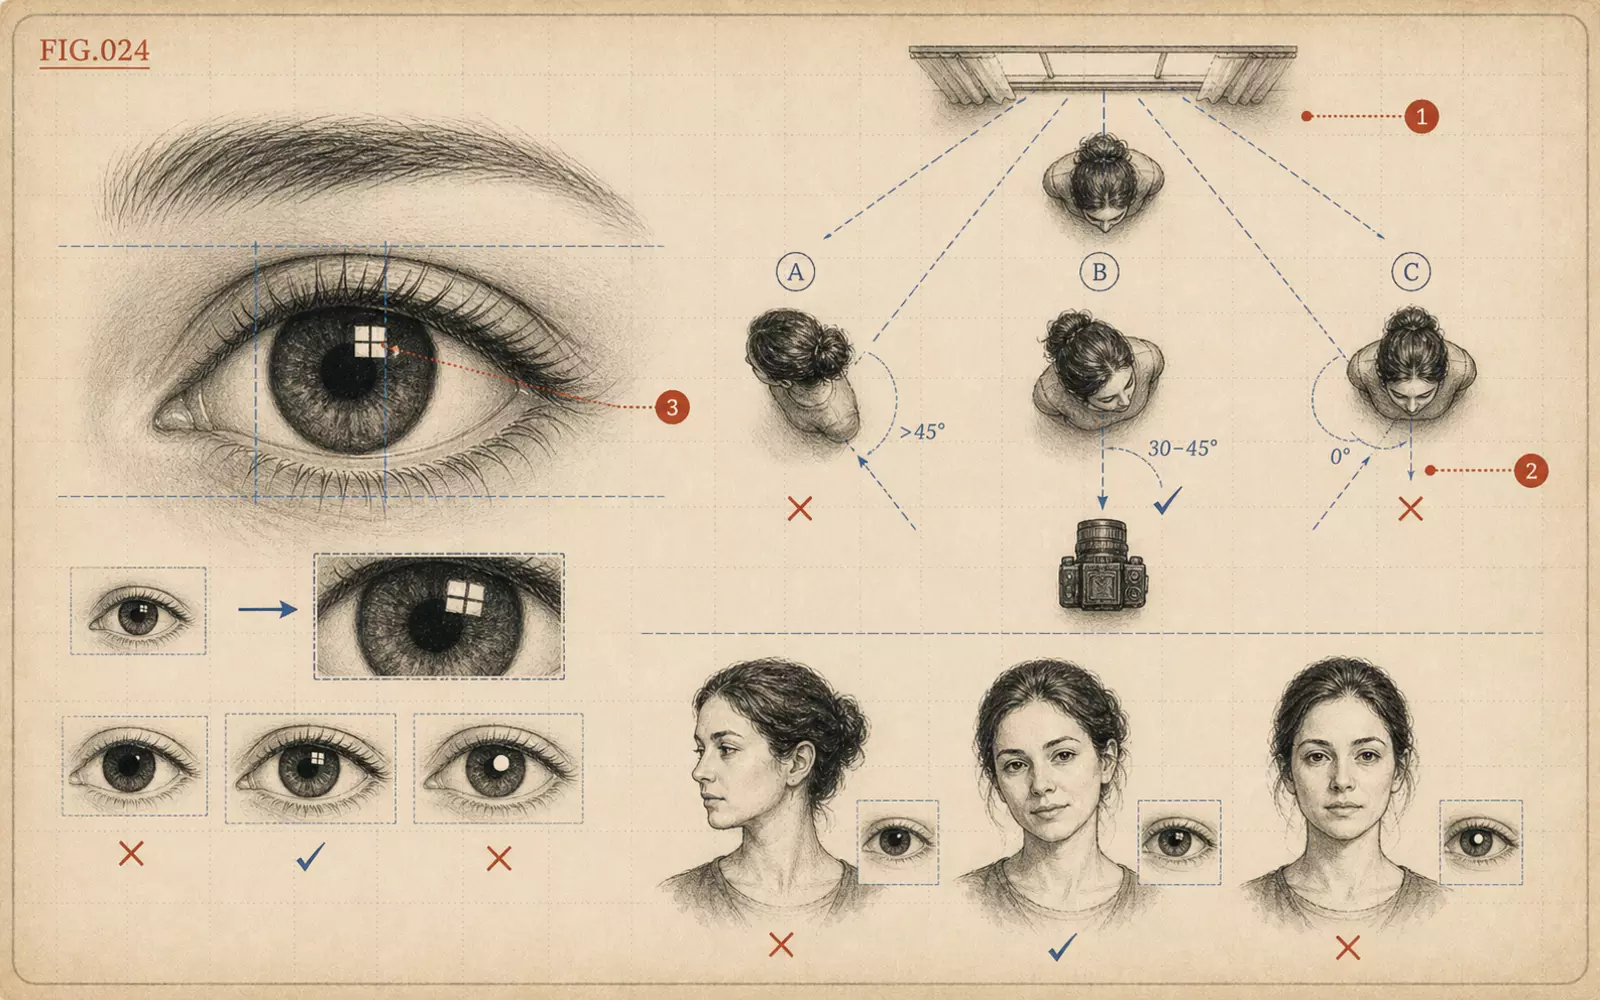 FIG.024How to Orient Your Body to Get Catchlights in Your EyesCatchlights are the small points of light reflected in the pupils. Angling not just your face but also your chest toward the light makes it easier to get them.
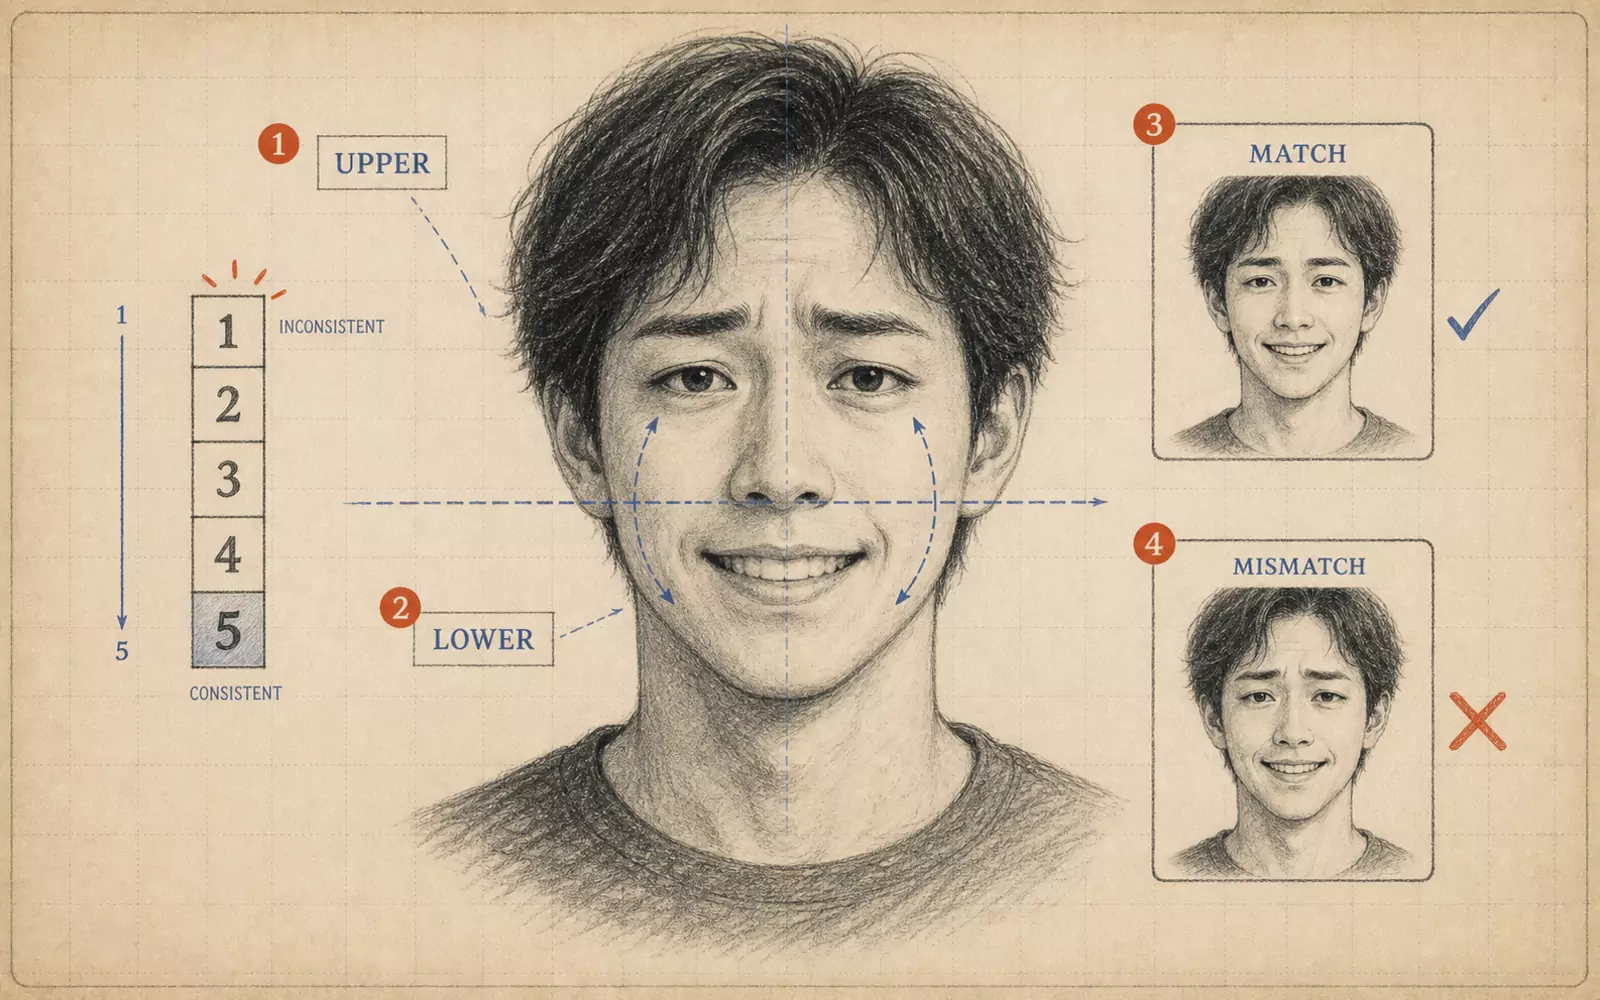 FIG.060Are the Upper and Lower Halves of Your Face Expressing the Same Emotion?When selecting photos, examine the upper and lower halves of the face separately. If only the eyes are wide open and the mouth is smiling, exclude it from your candidates.
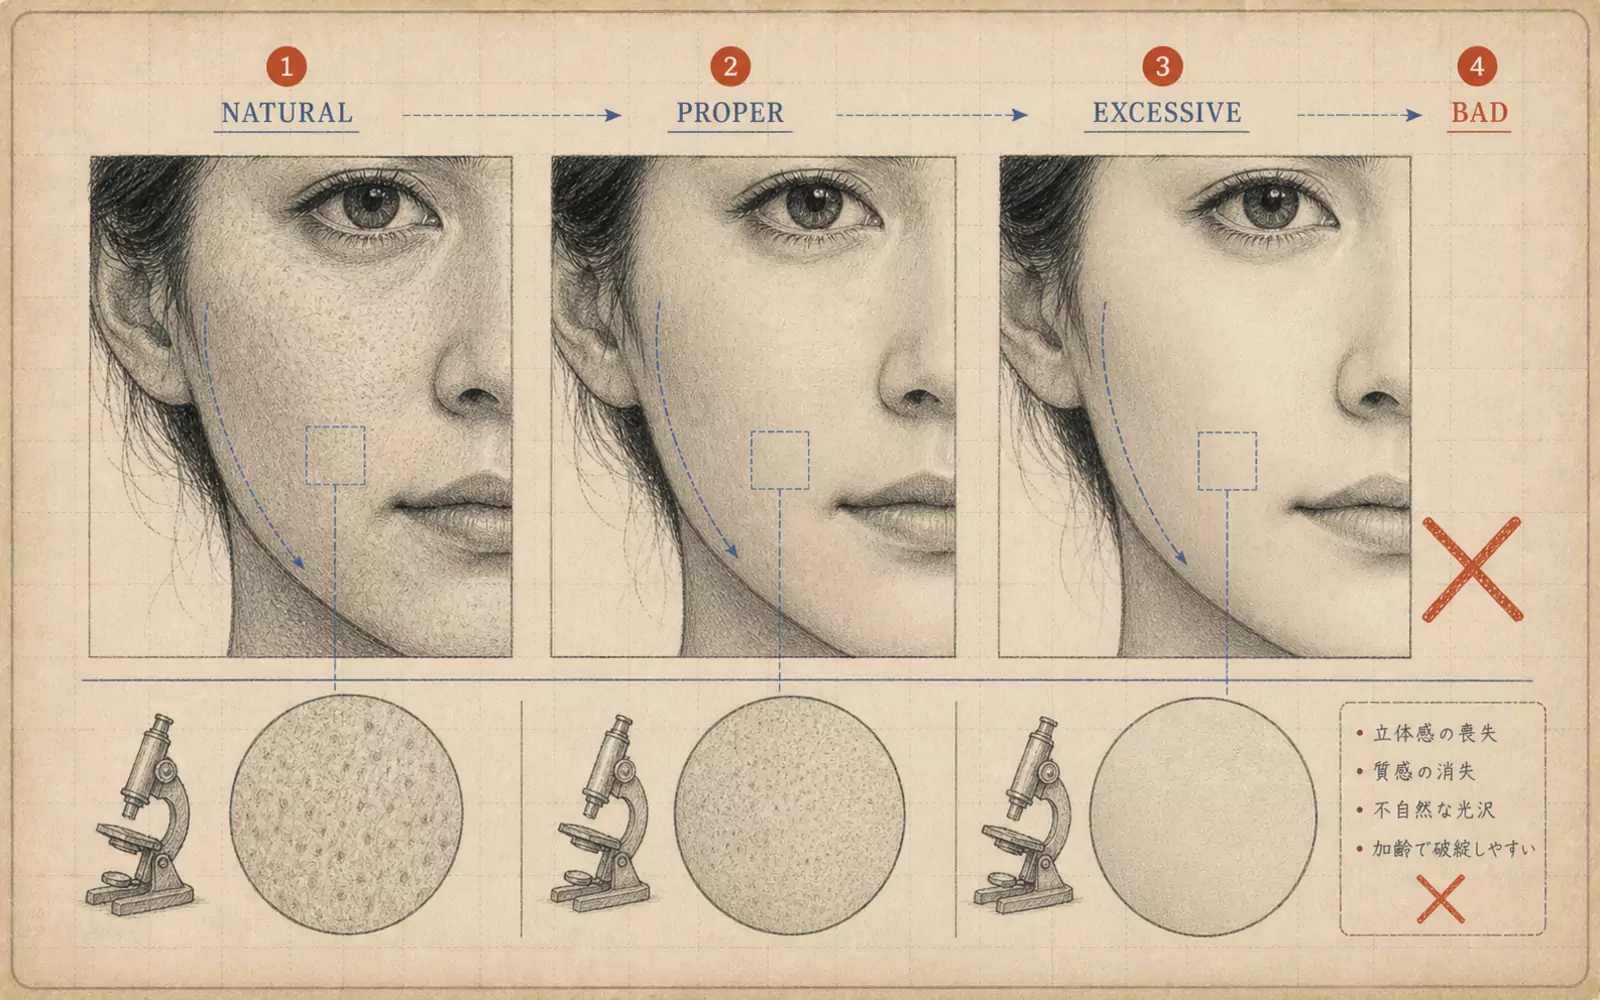 FIG.063The Plastic Skin TrapSmoothing out every bit of skin texture makes people disappear from the photo. Use a three-level approach: remove, reduce, or retain.