This Article Contains
Why "Stand Naturally" Is Impossible to Follow
"Just stand naturally" is one of the most common instructions on set — and one of the hardest to act on. Trying to aim for "natural" without knowing what steps to take usually causes the body to lock up instead.
Standing the way you normally would tends to let your everyday habits show. Weight shifted onto one leg, hips pulled back, shoulders raised — none of these are noticeable in daily life, but they stand out in photographs.
A "natural" stance for photos is something you consciously construct. No advanced technique is required: simply working through feet, hips, shoulders, chin, eye line, and expression in that order produces a pose that looks relaxed and reads well on camera.
Build from the Bottom and the Top Falls into Place
The reason to start with the feet is that the lower body determines where the upper body faces. Once your feet and hips are set, your shoulder angle follows naturally. With your shoulders in place, you can turn your face toward the camera without needing to wrench your neck.
Working the other way — starting with your face — concentrates the effort in your neck and shoulders. Trying to adjust your feet while your expression is already fixed means your facial muscles tire out first. This is one reason why you can feel like you're smiling properly yet the photo looks strained.
Saving the expression for last is specifically to avoid holding a smile too long. If you build everything from the hips and shoulders first, the time between making your expression and the shutter click stays short — keeping the expression fresh.
FIG. 027A diagram explaining the photo stance built from the feet up — for when you're not sure how to stand.
The 6 Steps in Practice: From Feet to Expression
Here is the sequence in concrete terms.
- Feet — Place them at a slight angle to the camera. Turning your body roughly 30 degrees from straight-on makes your shoulders and torso appear narrower. Turning too far sideways looks guarded, so 30 degrees is a useful benchmark.
- Hips — Point them the same direction as your feet. Your lower body becomes stable as soon as the hips follow the feet.
- Shoulders — Once aligned with your hips, bring only the shoulders slightly back toward the camera. You don't need the full torso facing forward — one shoulder angling a little toward the lens is enough.
- Chin — Pull the chin back about one centimetre. Keep the back of your head lifted; it is the tip of the chin that moves, not the whole neck downward (see FIG.003).
- Eye line — Look toward the camera. Check not just your eyes but whether the front of your face is pointing at the lens.
- Expression — Finally, lift your cheeks slightly into a smile. Don't hold it; make the expression at the last moment before the shutter.
Working through this sequence connects the direction of your whole body with the direction of your face. Once it becomes familiar, the time spent guessing on set shrinks considerably.
Common Problems — Awkward Hands and a Twisted Neck
Two problems come up repeatedly on set.
The first is turning only the face toward the camera while leaving the feet in place. When the lower body stays pointing sideways but the face swings to the front, only the neck twists — which can cause creasing on the opposite side of the neck and tension that makes the whole pose look stiff.
The second is not deciding where the hands go. Without a plan, arms tend to fold, fingers tense, or hands unconsciously grip clothing. If your hands feel spare, decide in advance on something to lightly touch — the back of a chair, the edge of a desk, a pen — and the rest of the pose settles around it.
Trying to look natural by doing nothing tends to let your habits show. The natural quality of a photo pose is the result of deliberately working through the sequence.
Knowledge you can actually use on set only becomes useful once you can put into words exactly which part of your body to move, in what order, and by how much.
How to Practice at Home and What to Ask on the Day
To practice at home before a shoot, prop up your phone and take three shots: straight on, at 30 degrees, and at 45 degrees. Comparing all three helps you find the angle that works best for you, so you arrive on the day already knowing the answer to "which way should I face?"
If a photographer's instructions feel too vague, ask in concrete terms. Questions like "Are my feet at the right angle?" or "Should I bring just my shoulders a little more toward the camera?" — phrased around specific body parts — are much easier to answer than "Am I doing this right?"
If something feels off during the shoot, don't try to fix only your upper body. Go back to the feet and rebuild. Whenever the overall balance breaks down, the feet are always the starting point.
- Build your stance from the ground up: feet, hips, shoulders, chin, eye line, expression. Starting with the face concentrates strain in the neck and shoulders.
- Angling roughly 30 degrees and bringing the shoulders back toward the camera makes the shoulder width look natural and eases pressure on the neck.
- When something feels wrong, don't adjust only the upper body — go back to the feet and rebuild from there.
Related Figures
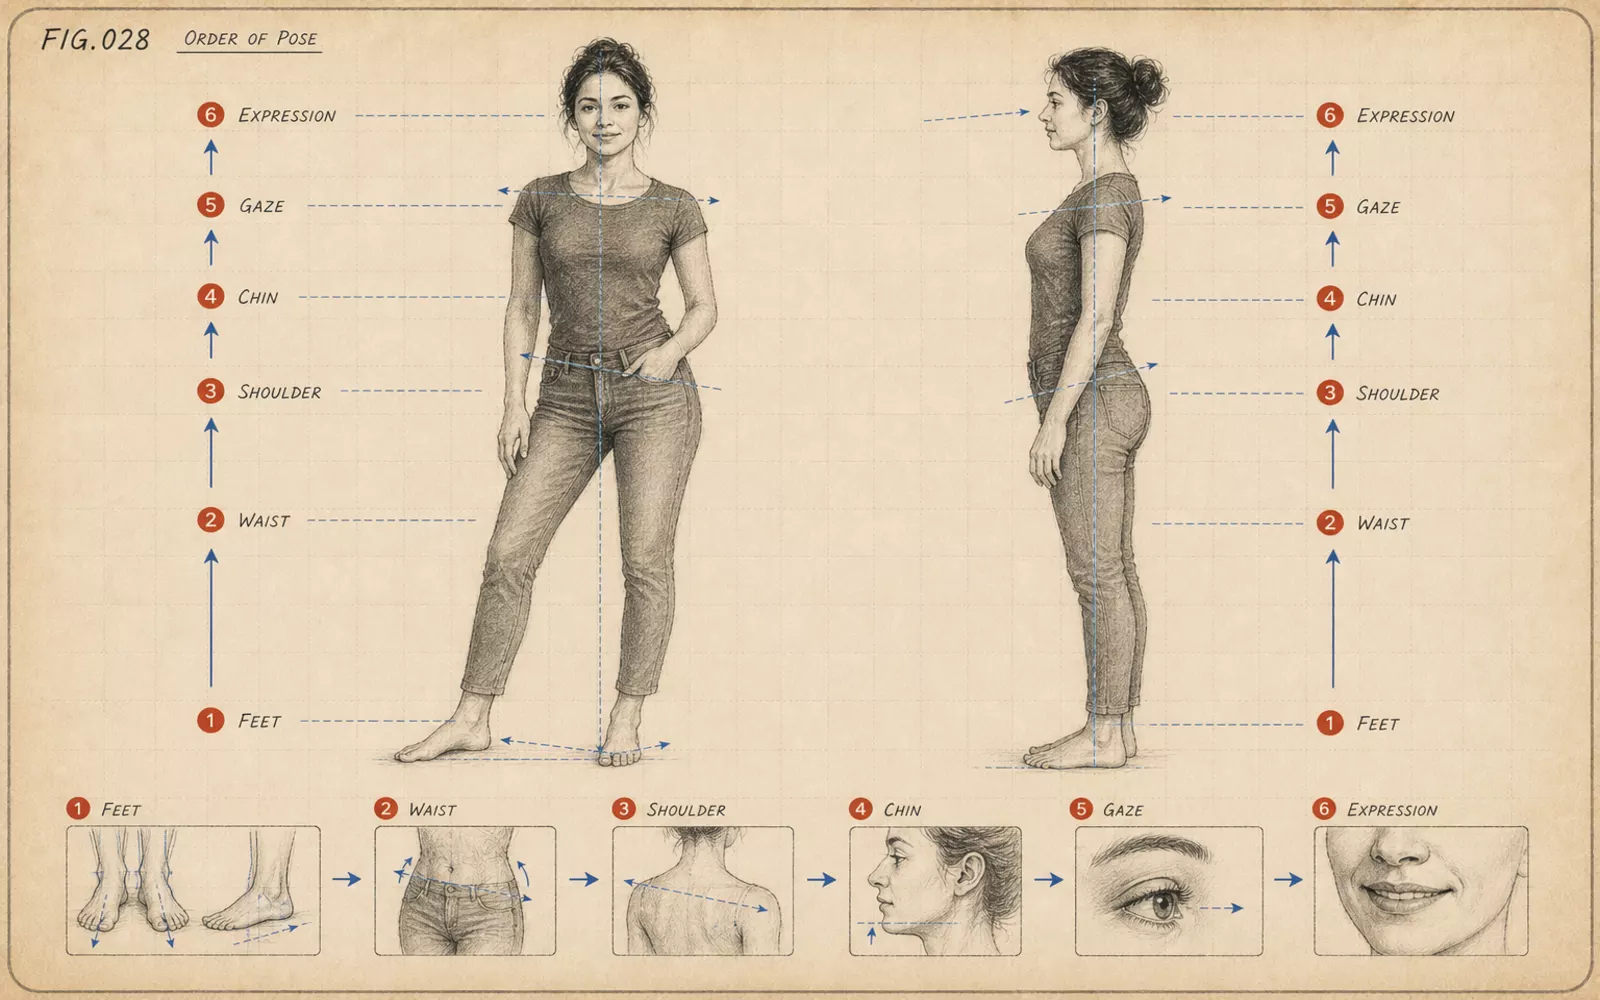 FIG.028The Order to Build Your Pose: Feet → Hips → Shoulders → Chin → Eye Line → ExpressionBuild your pose starting from the feet, then hips, shoulders, chin, eye line, and expression last. Saving the expression prevents facial fatigue.
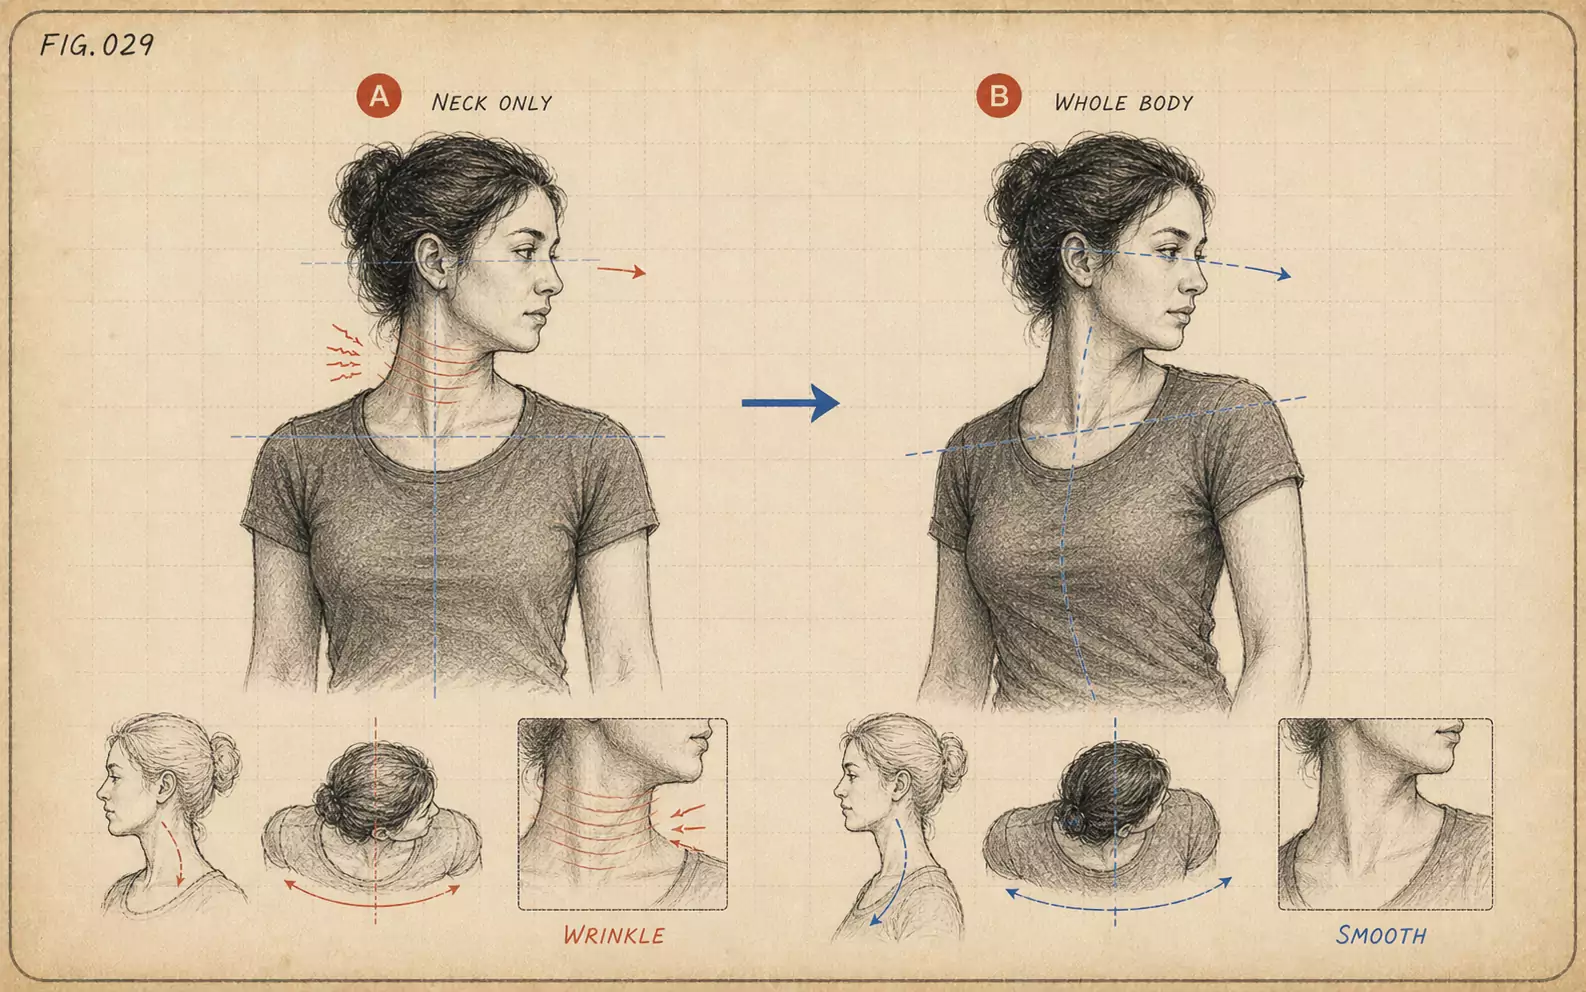 FIG.029Twisting Only the Neck Causes CreasesTurning only your face back toward the camera causes creases on the opposite side of the neck. Building the direction from the feet and shoulders is the fix.
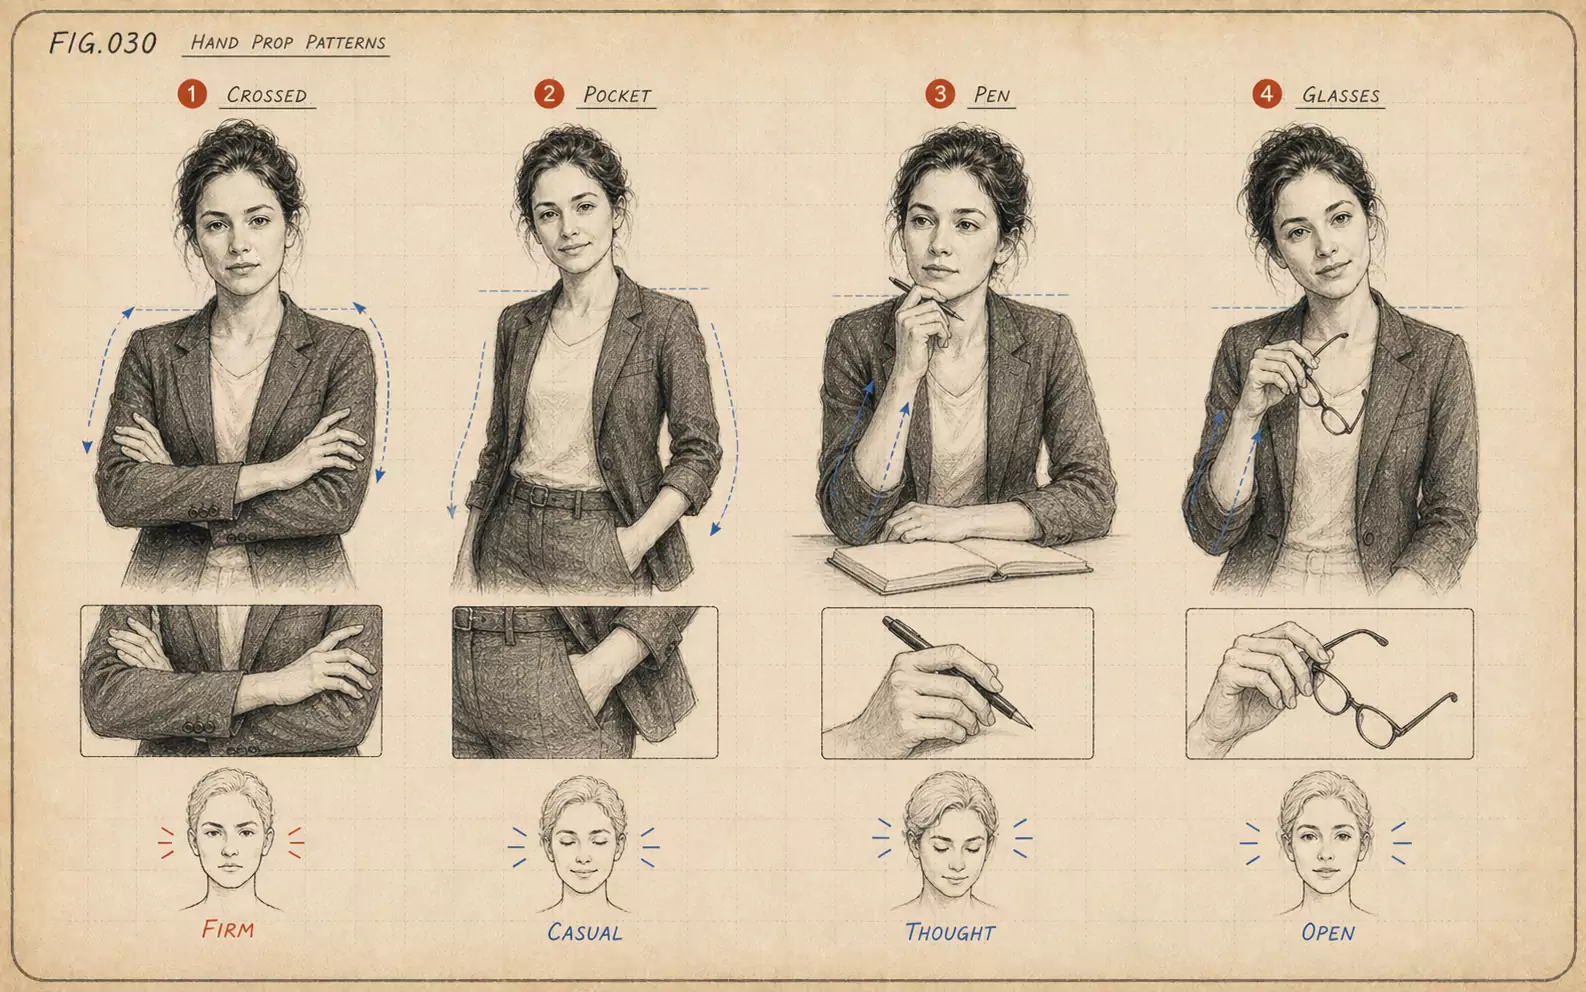 FIG.030Props for People Who Don't Know What to Do with Their HandsIf your hands feel spare, use a work-related prop instead of folding your arms. A pen, notebook, or laptop gives your hands a purpose.