This Article Contains
Why a Pose Has an Order
Trying to fix a photo stance all at once is difficult. Without knowing where to start, moving one thing tends to knock something else out of place. Having a sequence makes it clear exactly where to direct your attention at each step.
The sequence runs from bottom to top: feet, hips, shoulders, chin, eye line, expression. Once the foundation — your feet — is set, the direction of your hips follows. Once the hips are set, your shoulder angle tends to fall into place on its own. The higher up you go, the less adjustment is needed.
This order is not just about looking good; it is also a checklist for not getting lost on set. Knowing where to begin when a photographer gives you an instruction takes a lot of the urgency out of the moment.
Build from the Bottom and the Top Follows
When your feet and hips are settled, the direction of your shoulders is decided. With your shoulders aligned, you can bring your face toward the camera without having to twist the neck dramatically. The less the neck moves, the less unnecessary force it carries, and the more stable the chin angle becomes.
If you try to set the face before the lower body is in place, the strain concentrates in the neck and shoulders. The body as a whole ends up pointing one way while the face points another, producing the classic "the expression is good but the stance is a shame" result.
Simply deciding where the feet point makes everything above them considerably easier to manage.
FIG. 028A diagram showing the sequence for building a photo stance, from feet to expression.
The 6 Steps Right Before the Shutter
Here is how the sequence plays out on set.
- Feet — Place them at a slight angle to the camera. Roughly 30 degrees from straight-on is a useful starting point.
- Hips — Point them the same direction as your feet. The lower body alignment locks in.
- Shoulders — From your hip direction, bring only the shoulders back slightly toward the camera. One shoulder angling a little toward the lens is enough.
- Chin — Keep the back of your head lifted and pull the tip of your chin back about one centimetre. Dropping the whole neck causes a double chin to appear.
- Eye line — Look toward the camera. Check not just the eyes, but whether the tip of your nose is pointing at the lens.
- Expression — Finally, lift your cheeks slightly. Don't hold the smile; make it right before the shutter.
Once your body learns this flow, you will never be at a loss for where to begin on set. Even when the photographer is giving you direction, having this sequence in your head makes their instructions much easier to receive and act on.
What Happens When You Smile First
A common pattern in photo shoots is making the smile first and then continuing to adjust the body. Every time you shift your feet or shoulders, the expression shifts with it — and the muscles around your cheeks and eyes are tiring the whole time. By the moment the shutter fires, the smile may still be there but the eyes have gone hard.
Another version of the same problem is trying to change the overall impression through expression alone. With feet and shoulders not yet settled, no amount of effort in the face produces a stable-looking photograph. The expression is the final layer of finish; without the foundation, it has nothing to rest on.
When the pose starts to drift, don't start correcting from the face — go back to the feet first.
The later in the sequence you make the expression, the less tired it looks in the photograph.
How to Reset When the Pose Goes Wrong
If something feels "a bit off" during a shoot, check the feet. If they have drifted to face the camera straight on, angle them back slightly, then work back up through hips, shoulders, and chin. Trying to fix only the upper body while the lower body remains out of position won't bring the whole pose back into balance.
When the expression starts to feel tired, release the face completely, take a breath, and rebuild the smile. Cycling through "one shot, reset, smile again" consistently outperforms trying to hold a single expression for a long session.
After the photos are delivered, check not just the expressions but the alignment of the neck and shoulders too. A photo where the expression is natural but the neck is straining into a twist tends to be harder to use. Prioritise photos where the face, shoulders, and neck all connect naturally.
- Build the pose from the ground up: feet, hips, shoulders, chin, eye line, expression. Settling the lower body first makes the upper body easier.
- Saving the expression for last prevents the smile from being held too long. Making it right before the shutter keeps it looking fresh.
- When the pose goes wrong, don't start from the face — rebuild from the feet.
Related Figures
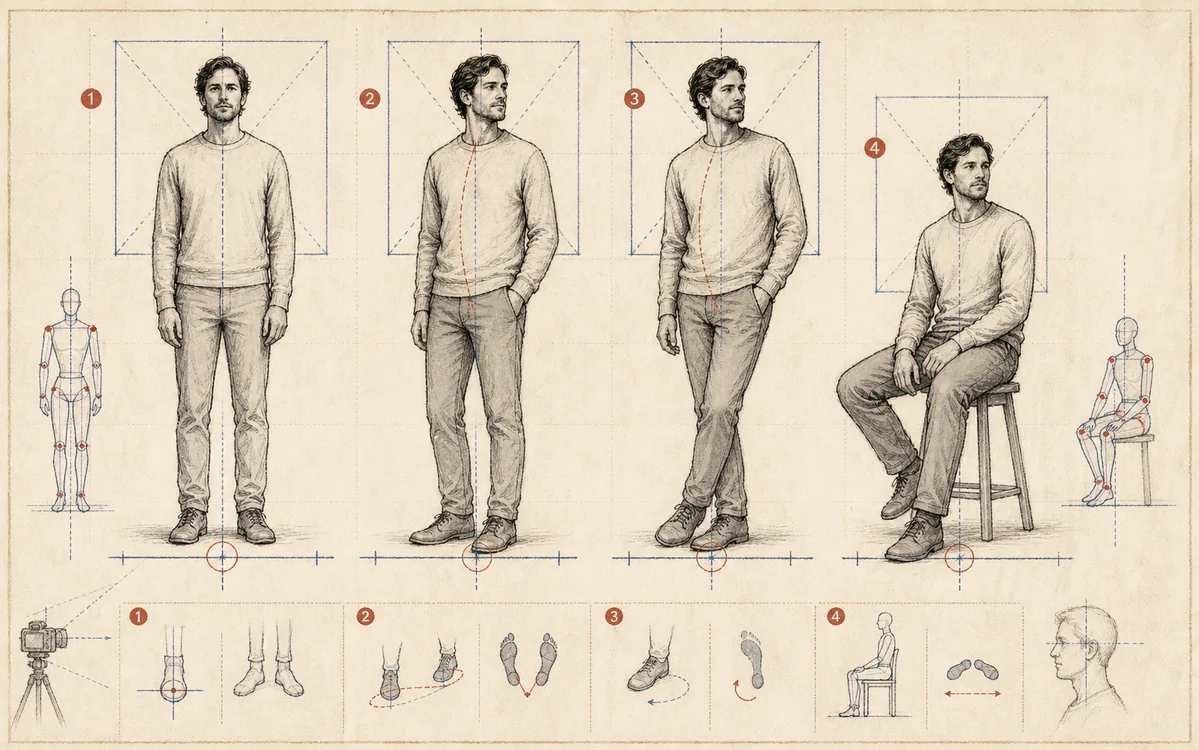 FIG.027When You're Not Sure How to Stand, Build Your Pose from the Feet UpThere is an order to how you stand. Work through feet, hips, shoulders, chin, eye line, and expression and you won't get lost.
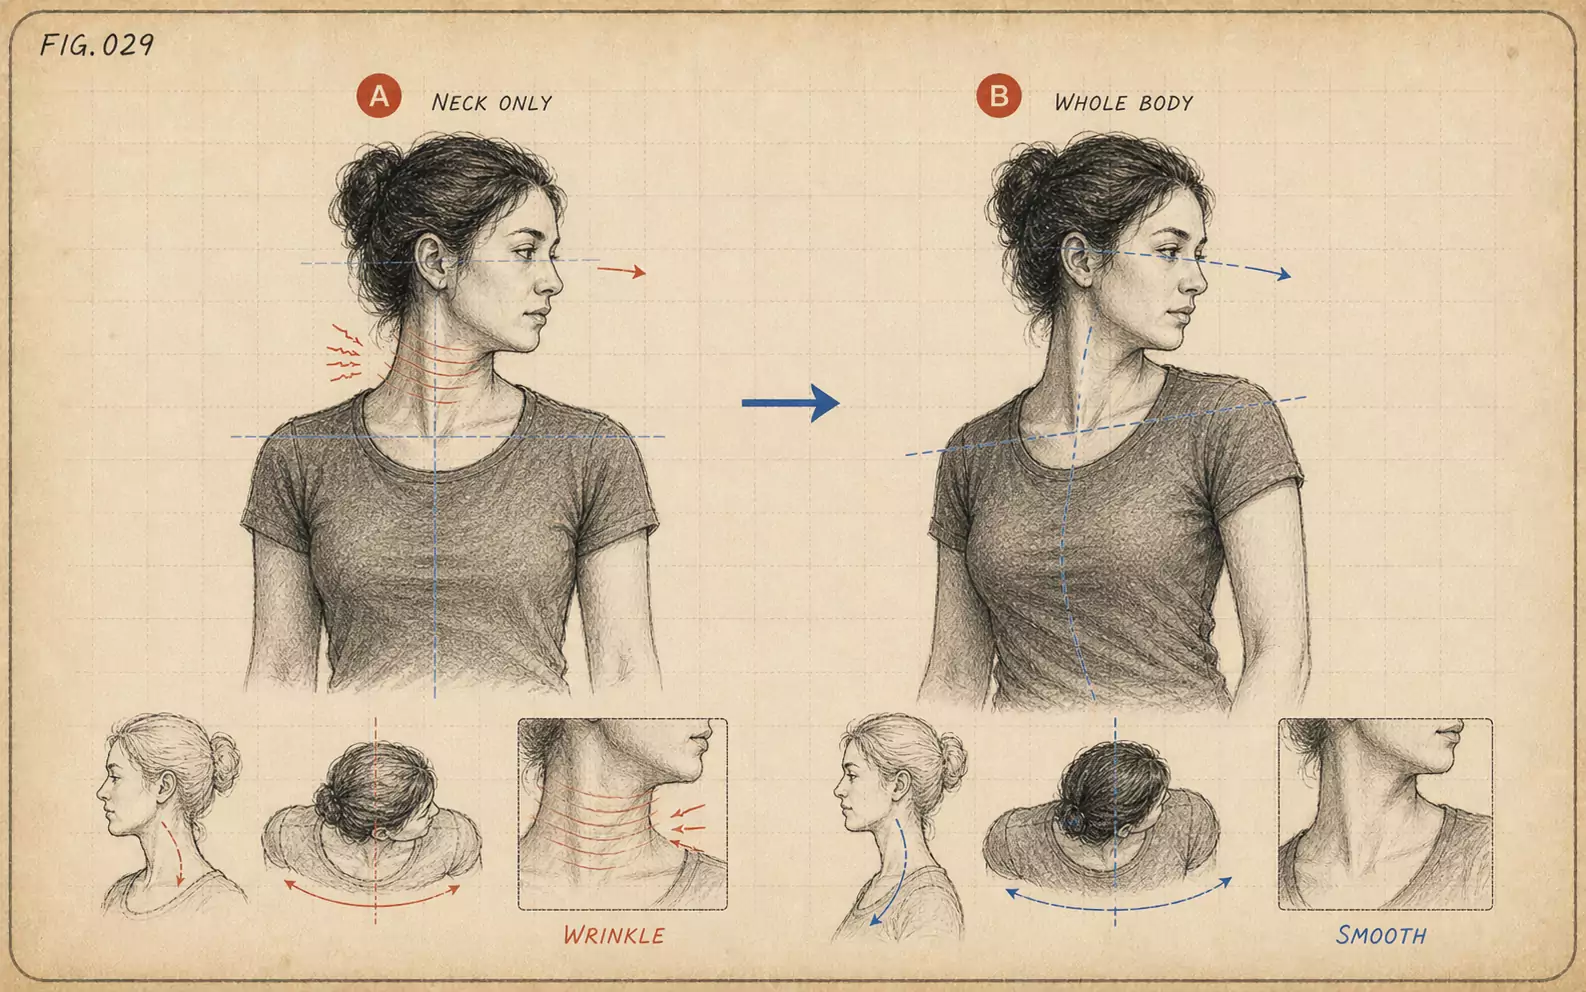 FIG.029Twisting Only the Neck Causes CreasesTurning only your face back toward the camera causes creases on the opposite side of the neck. Building the direction from the feet and shoulders is the fix.
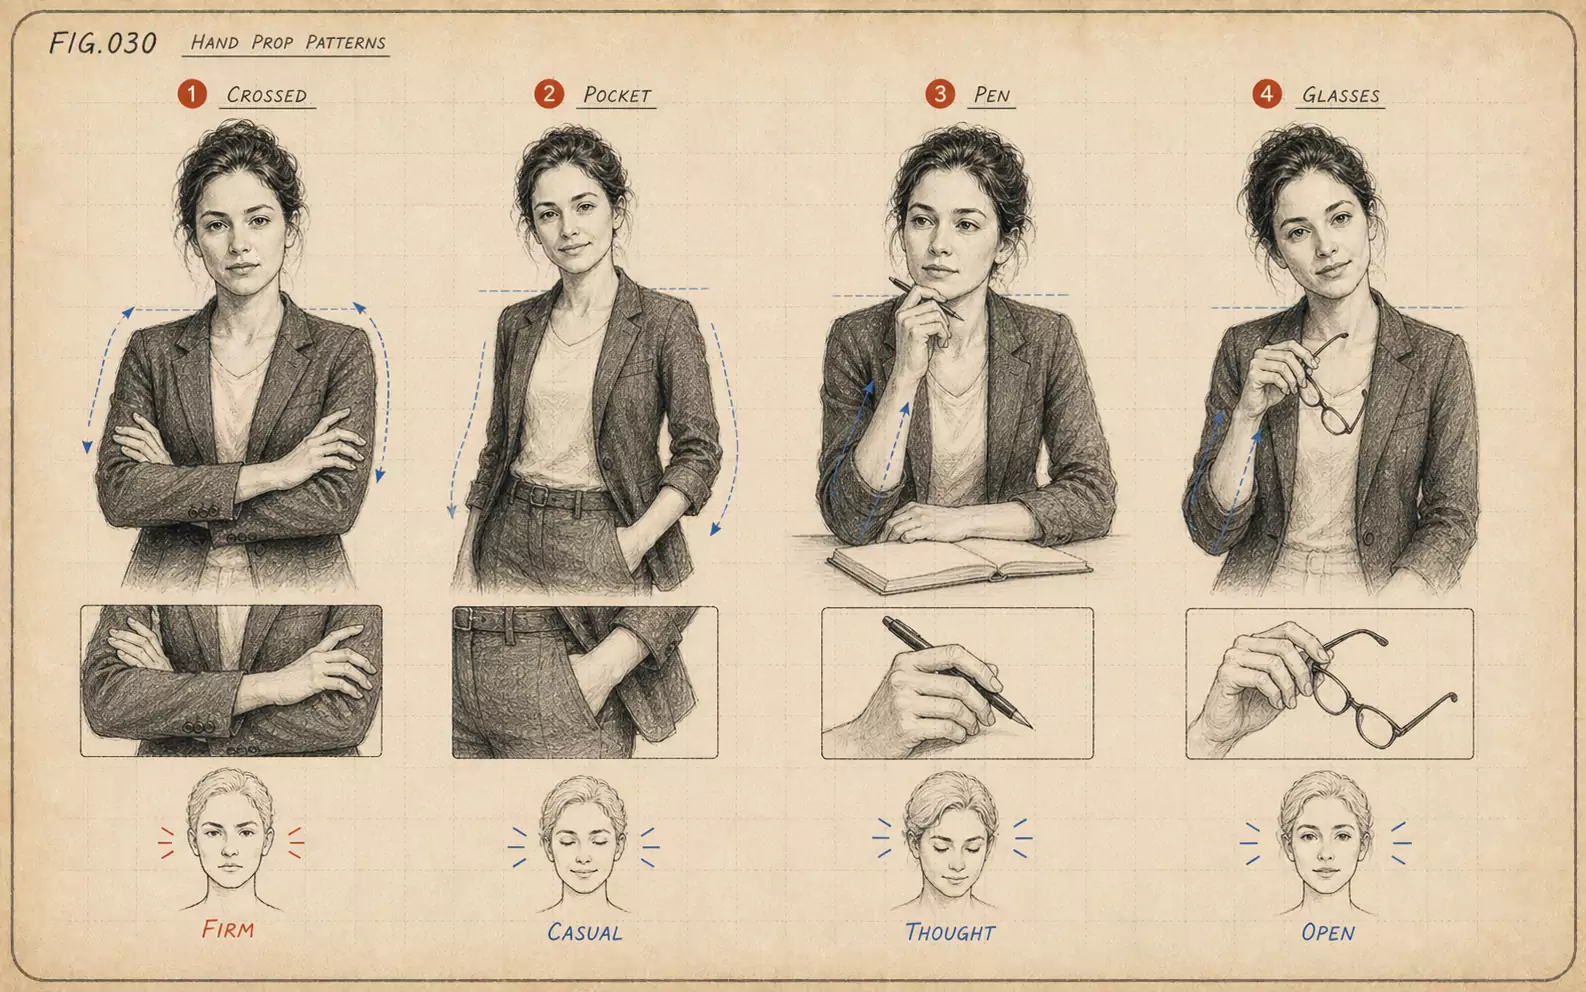 FIG.030Props for People Who Don't Know What to Do with Their HandsIf your hands feel spare, use a work-related prop instead of folding your arms. A pen, notebook, or laptop gives your hands a purpose.