This Article Contains
What Is Really Happening When You Freeze in Front of a Camera
The moment a camera is pointed at you, many people experience the sensation of "being watched" and "being evaluated." This is the same mechanism that happens when presenting in front of an audience or talking with someone for the first time — it is a natural response the body produces on its own.
When this response kicks in, breathing becomes shallow, the shoulders rise, and the eyes lock onto the lens in a fixed stare. Even if you try to form an expression, the whole body is stiff, so unnatural tension enters the mouth and the eyes.
Freezing is not a failure. It is not a sign that you are a nervous person. Recognizing it as a normal response to "being observed" helps you see what action to take next.
How Tension Manifests in the Body
There are typical patterns for how tension shows up in the body. Shoulders creeping toward the ears, breath moving only shallowly in the upper chest, clenching the back teeth, gaze locking onto the lens — these tend to appear together.
This tension shows up in photos in small ways. A smile where only the mouth corners are pulled sideways, tension around the neck, shoulders raised and the neck compressed — these are difficult to fix by addressing expression alone. They need to be released from deeper in the body.
Also, the more someone is told to "smile naturally" or "relax," the more the freezing can intensify. Words that try to change the state directly do not tell the body what specifically to move, which can actually concentrate the awareness more.
FIG. 110A diagram organizing the reasons the body tends to freeze when a camera is pointed at it, and the step-by-step procedure for resetting through breath, shoulders, and gaze.
Separating Breath, Shoulders, and Gaze Makes It Manageable
When you freeze and try to fix everything at once, your attention scatters. Having a procedure that separates the problem into "breath, shoulders, gaze" and resets them in sequence makes the situation much more manageable.
First, exhale a long breath. Prioritizing the exhale over the inhale lets the body soften slightly. Next, lift the shoulders once and then slowly drop them. The "fall" from fully raised shoulders helps you find the position where the tension has left. Finally, look away from the lens briefly — to the photographer's face or something slightly to the side — and then return your gaze to the lens.
These 3 steps take less than 10 seconds. They are a short enough procedure to try between one shutter click and the next. Practicing this sequence once before the shoot makes it easier to recall on set.
Before Concluding "I Am Just Not Photogenic"
When you look at a stiff photo of yourself and think "I am just not photogenic," your body starts to brace itself before the next shoot too. Storing a past frozen photo as "a problem with my face" makes the same reaction appear first in the next shoot.
Most of what people describe as "bad photo results" can be broken down into shooting conditions (distance, angle, light, posture) and selection issues, rather than facial features. Even a photo that looks stiff can produce a completely different impression when the distance and lens are changed (see FIG.115).
The freezing response can fade with familiarity, but there is no need to eliminate it completely. If you have a recovery procedure, you can freeze and still come back on the very next shutter click.
Having even one recovery procedure ready before a shoot makes it much easier to reset in front of the camera.
How to Reset Before and During the Shoot
Before the shoot, jot down the reset procedure briefly: "① exhale ② drop shoulders ③ return gaze." Three lines are enough. Telling the photographer "please say something if I seem to freeze" makes it easier to find the moment to reset.
If you feel yourself freezing during the shoot, start from step ①. Checking your breath comes before trying to rebuild your expression. Even as the shutter keeps firing, try the 3 steps before the next frame.
When selecting photos afterward, check not just the expression but the state of the neck and shoulders too. A photo where the shoulders are dropped and the neck area has no compression tends to look natural in the expression as well. Look at a frozen photo not as "a problem with my face" but as "the state my body was in at that moment."
- Freezing is not a failure — it is the body's defense response to being evaluated. It is separate from personality or appearance.
- The 3 steps "① exhale ② drop shoulders ③ return gaze" make it easier to recover during a shoot.
- When selecting photos, check the state of the neck and shoulders as well as the expression.
Related Diagrams
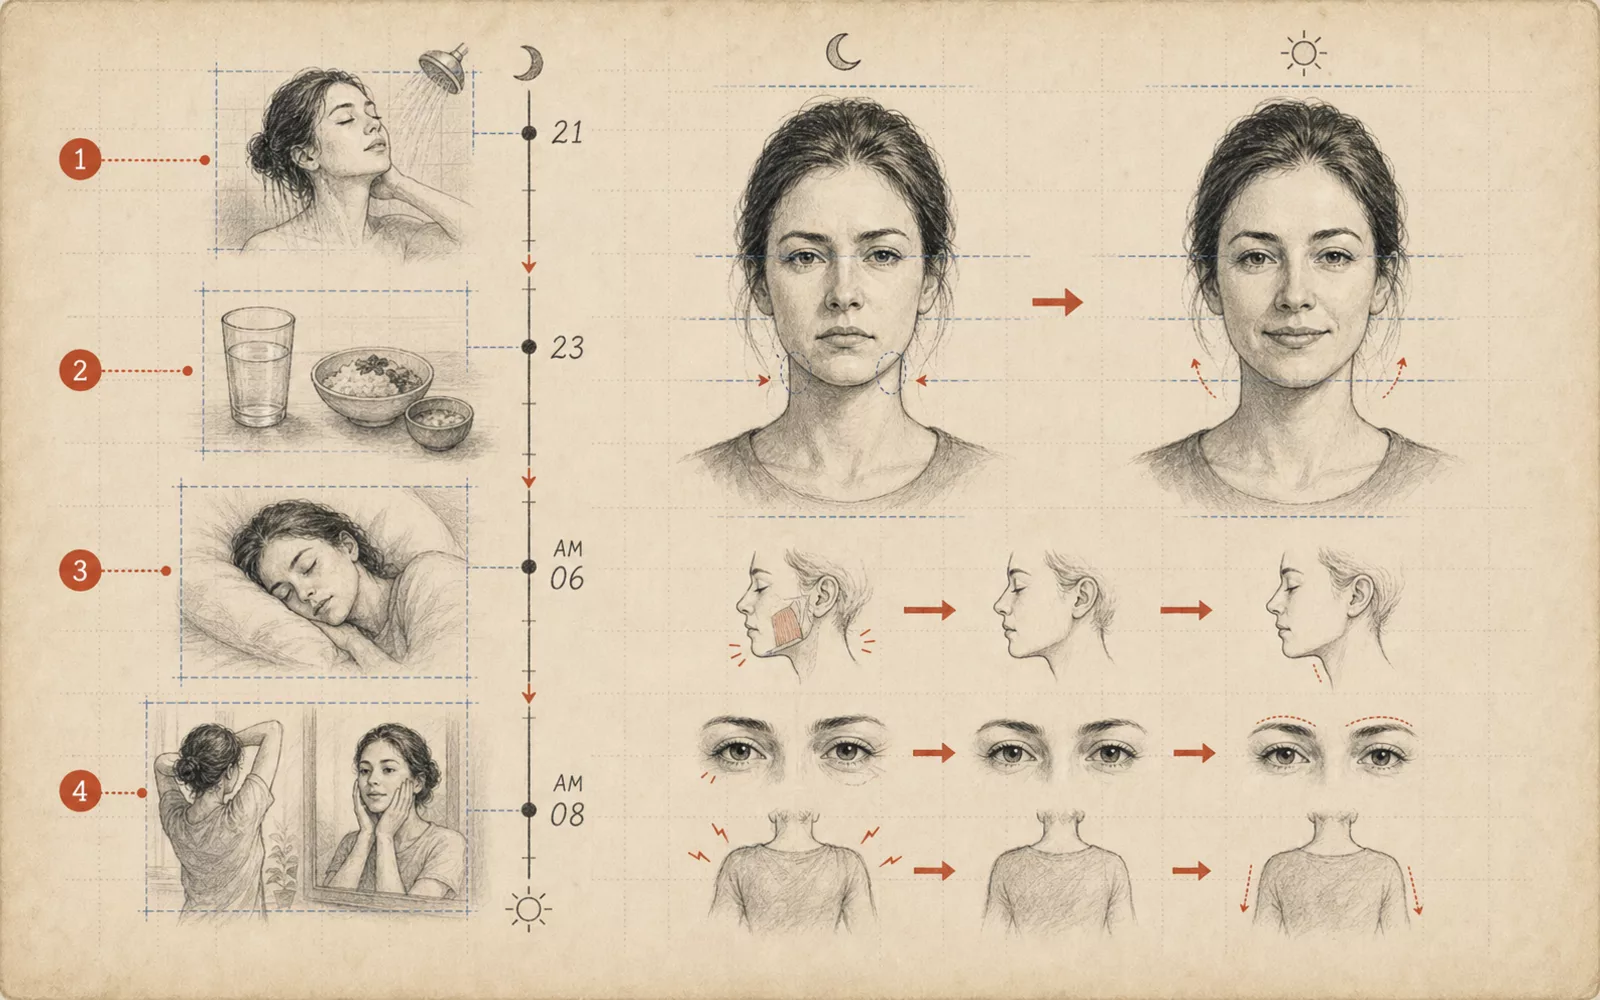 FIG.111Dealing with Pre-Shoot Anxiety the Night BeforePre-shoot anxiety is eased not by adding more preparation, but by reducing decisions. Lock in your outfit, belongings, and questions the day before.
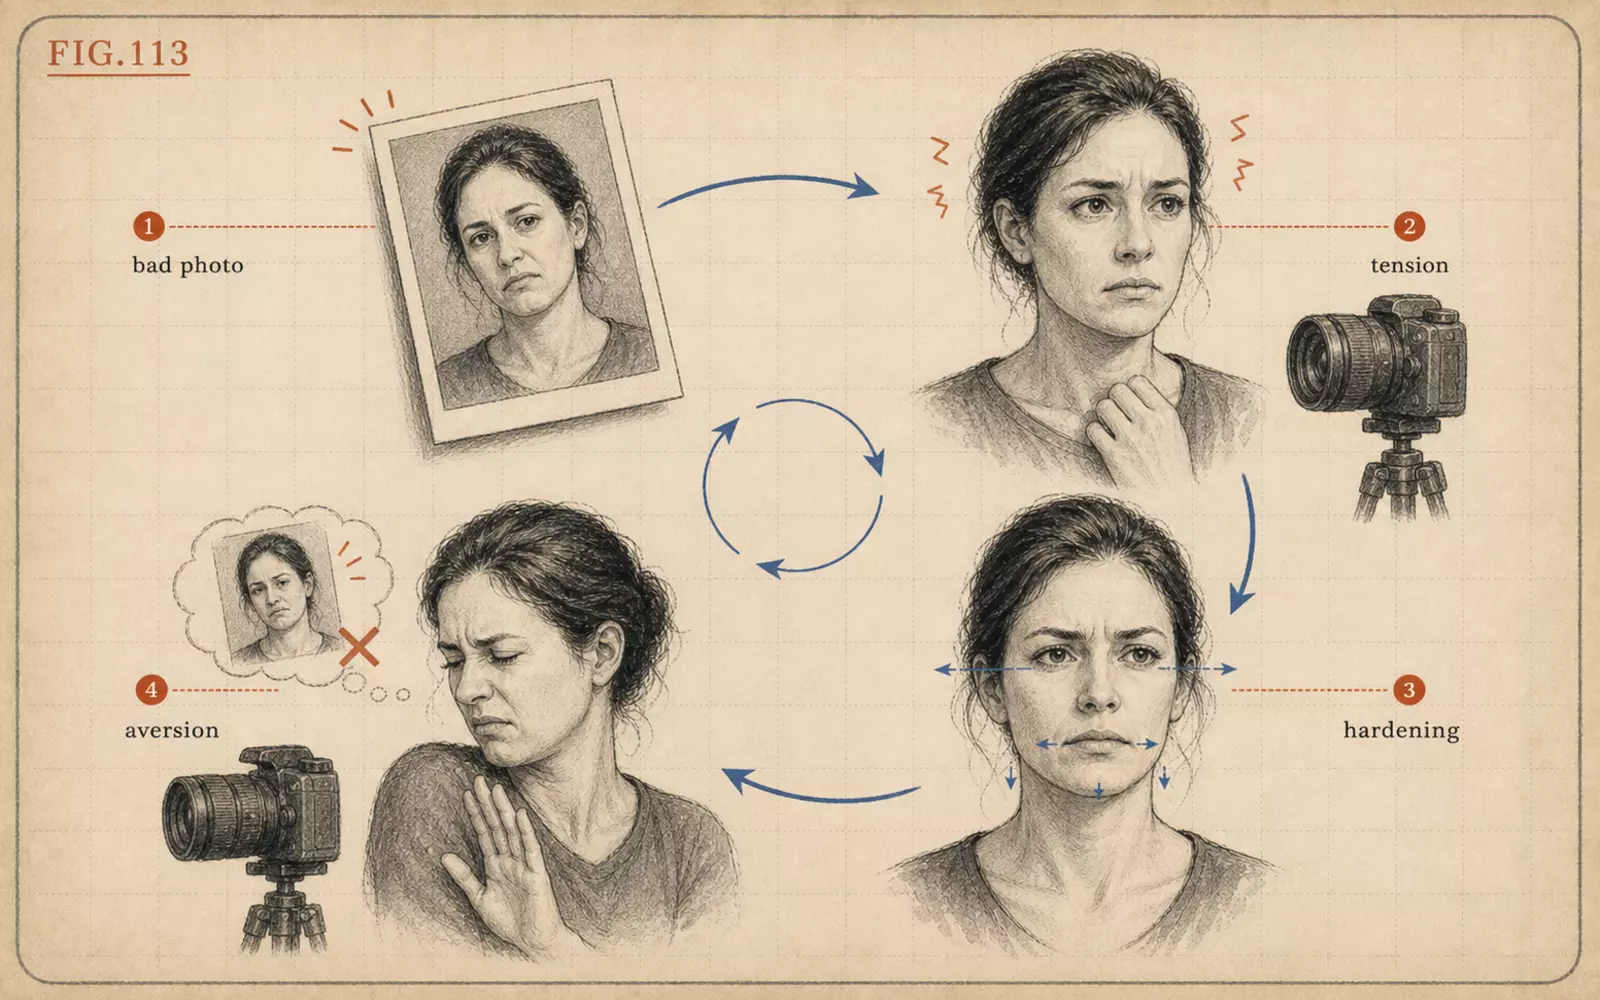 FIG.113The Psychology of Disliking Photos: How a Past Bad Shot Lingers into the Next ShootPhoto aversion is not a personality trait — it grows stronger when you carry one bad photo forward into every new shoot.
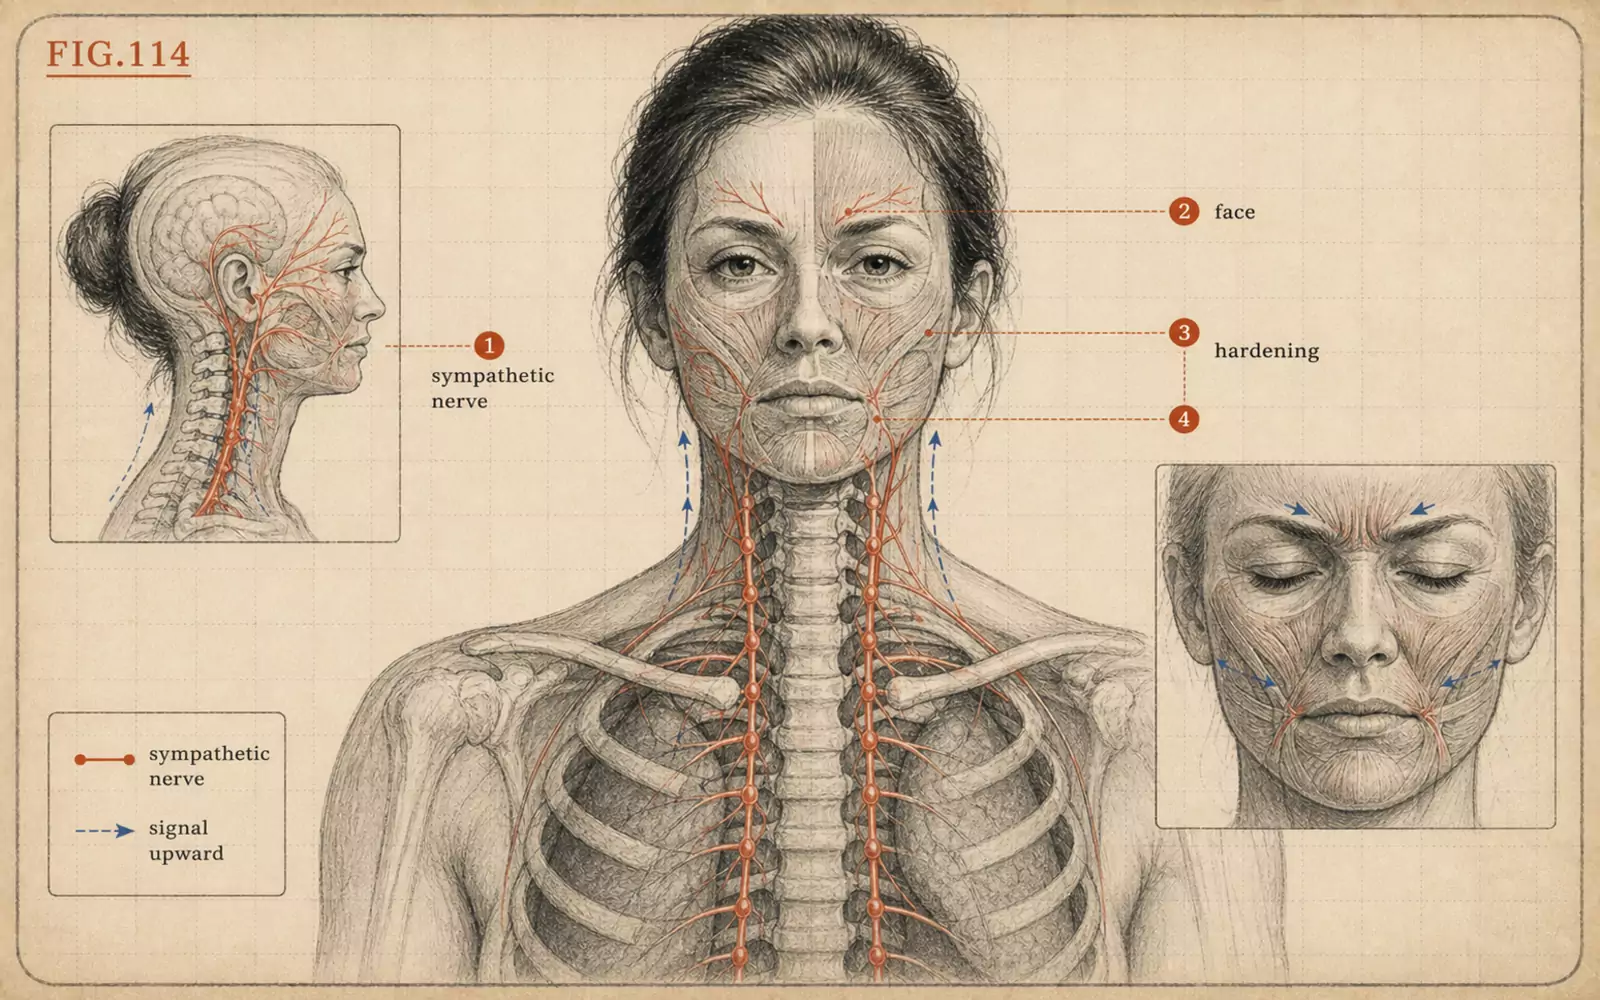 FIG.114How Tension Freezes Your Expression: Releasing a Smile Through the Cheeks and ShouldersWhen tension makes it impossible to smile, do not force it through the mouth — release it through the cheeks and shoulders instead.