This Article Contains
Three Conditions That Emphasize an Oblong Face
When an oblong face is emphasized in photos, three conditions usually overlap: (1) the chin is raised, (2) the camera is below eye level, and (3) there is too much headroom above the subject.
Condition (1) creates an angle that points the lower half of the face toward the camera, making the distance from chin to cheek appear longer. Condition (2) creates an upward-looking angle that makes the entire face appear to stretch vertically. Condition (3) emphasizes the vertical proportion of the face within the frame.
These are not facial feature problems — they are compositional conditions. Changing the conditions changes the impression.
The Relationship Between Chin, Camera Position, and Headroom
When the chin is raised, the lower half of the face (from chin to cheekbone) moves closer to the camera. Due to the perspective effect where closer parts appear larger (see FIG.081), the distance from chin to cheek tends to look longer.
When the camera is below eye level, it creates a composition that looks up at the subject. This orientation has the effect of making the entire face appear vertically elongated. Placing a smartphone flat on a desk for a selfie easily creates this situation.
When there is too much headroom above the subject, the overall vertical quality of the frame is strengthened. The more space there is above the face, the more the face's proportions appear to stretch vertically. Leave only as much headroom as the purpose requires, and crop the rest.
FIG. 121A diagram summarizing how to adjust chin angle, camera position, and headroom for an oblong face type.
Shooting Slightly Above Eye Level to Reduce Vertical Length
Placing the camera slightly above eye level (about 5–10 cm) and shooting creates a slight downward-looking angle. In this orientation, the vertical proportion of the face settles down. The area above the cheekbones tends to appear relatively larger, and the flow of gaze toward the chin changes.
Pulling the chin slightly inward strengthens this effect. The correct way to pull the chin is not to lower the whole neck, but to keep the back of the head up and draw just the chin tip slightly back (see FIG.003). This movement makes the distance from chin to cheek appear shorter.
For bust-up shots, tighten the headroom above the subject. For SNS profile icons, almost no headroom is needed — place the face at the center. For website banners, allow a little more space. Adjust according to the intended use.
What Happens When You Pull the Chin in Too Far
When you pull the chin in too strongly trying to soften the oblong impression, the neck area looks cramped and the posture appears uncomfortable. While pulling the chin inward softens the vertical impression, pulling it too far introduces a separate problem: "an unnatural posture with the whole neck dropped."
A good guideline for pulling the chin is having the chin tip move back about 3–5 mm from where it naturally sits when standing. If the neck doesn't look cramped when you check in a mirror, you're within the appropriate range. Pulling further than this tends to make the posture problem more noticeable than any reduction in face size.
Also pay attention to selecting shots with too much headroom. If using the photo in a profile section, check candidates where the space above the face isn't too wide. The amount of headroom is ultimately determined by the layout of where the photo will appear.
An oblong face softens when chin angle, camera position, and headroom are aligned.
Pre-Shoot and On-Set Checklist
Before the shoot, decide where the photo will be used and how much headroom is needed. The amount of headroom differs depending on whether it's for an SNS icon, a website banner, or a business card photo. If the use requires headroom, check both the space above and the space at the sides.
During the shoot, check the chin position, camera height, and headroom above the subject one at a time. Start with the chin, then the camera height, and finally the headroom. Trying to pay attention to all three at once causes the expression to tense up, so address them one at a time in sequence.
When selecting photos, scale down the candidates to the actual size of where they will be used and check them. Confirm that the vertical impression hasn't strengthened when reduced. Keep photos where the facial proportions look settled and the expression comes through clearly.
- Photos where an oblong face is emphasized typically have overlapping conditions: a raised chin, a low camera, and too much headroom.
- Pulling the chin slightly, placing the camera a little above eye level, and tightening the headroom above the subject settles the vertical impression.
- Pulling the chin in too far makes the neck look cramped and the posture unnatural. Pulling modestly is key.
References
Related Diagrams
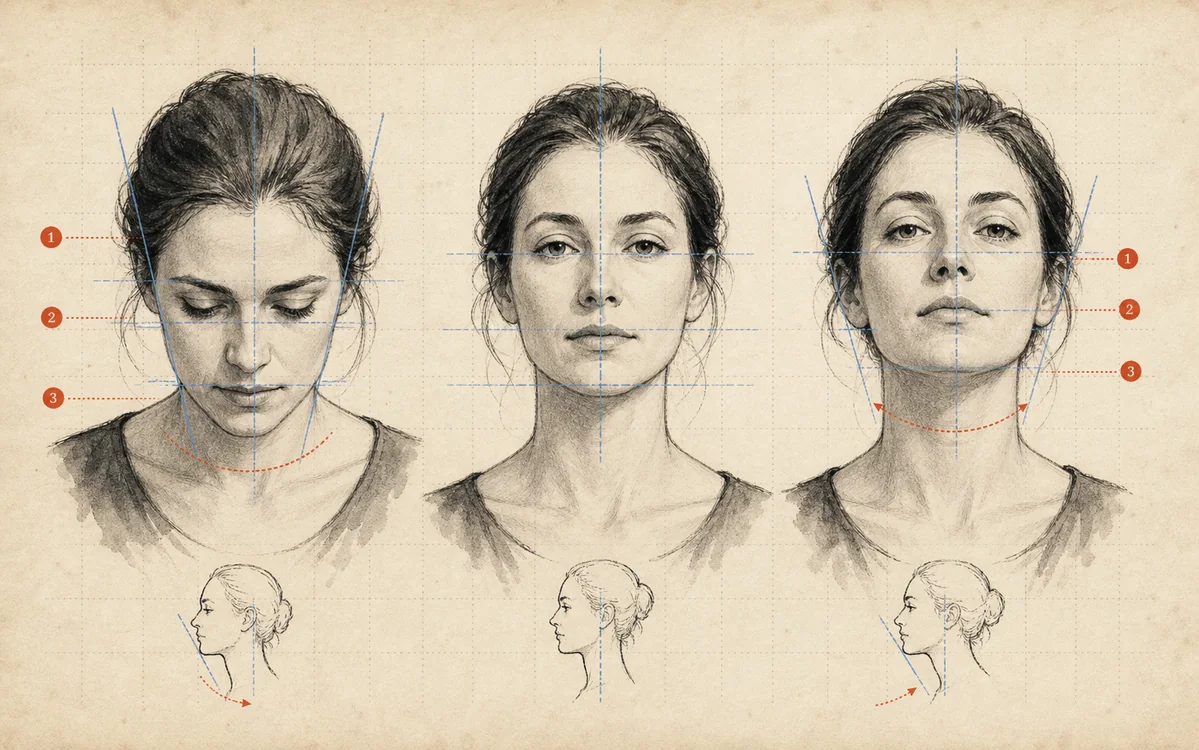 FIG.003Pull the Chin 1cm and the Jawline Looks Cleaner in PhotosWithout lowering the whole neck, keeping the back of the head up while drawing just the chin tip back makes the jawline and neck area easier to define.
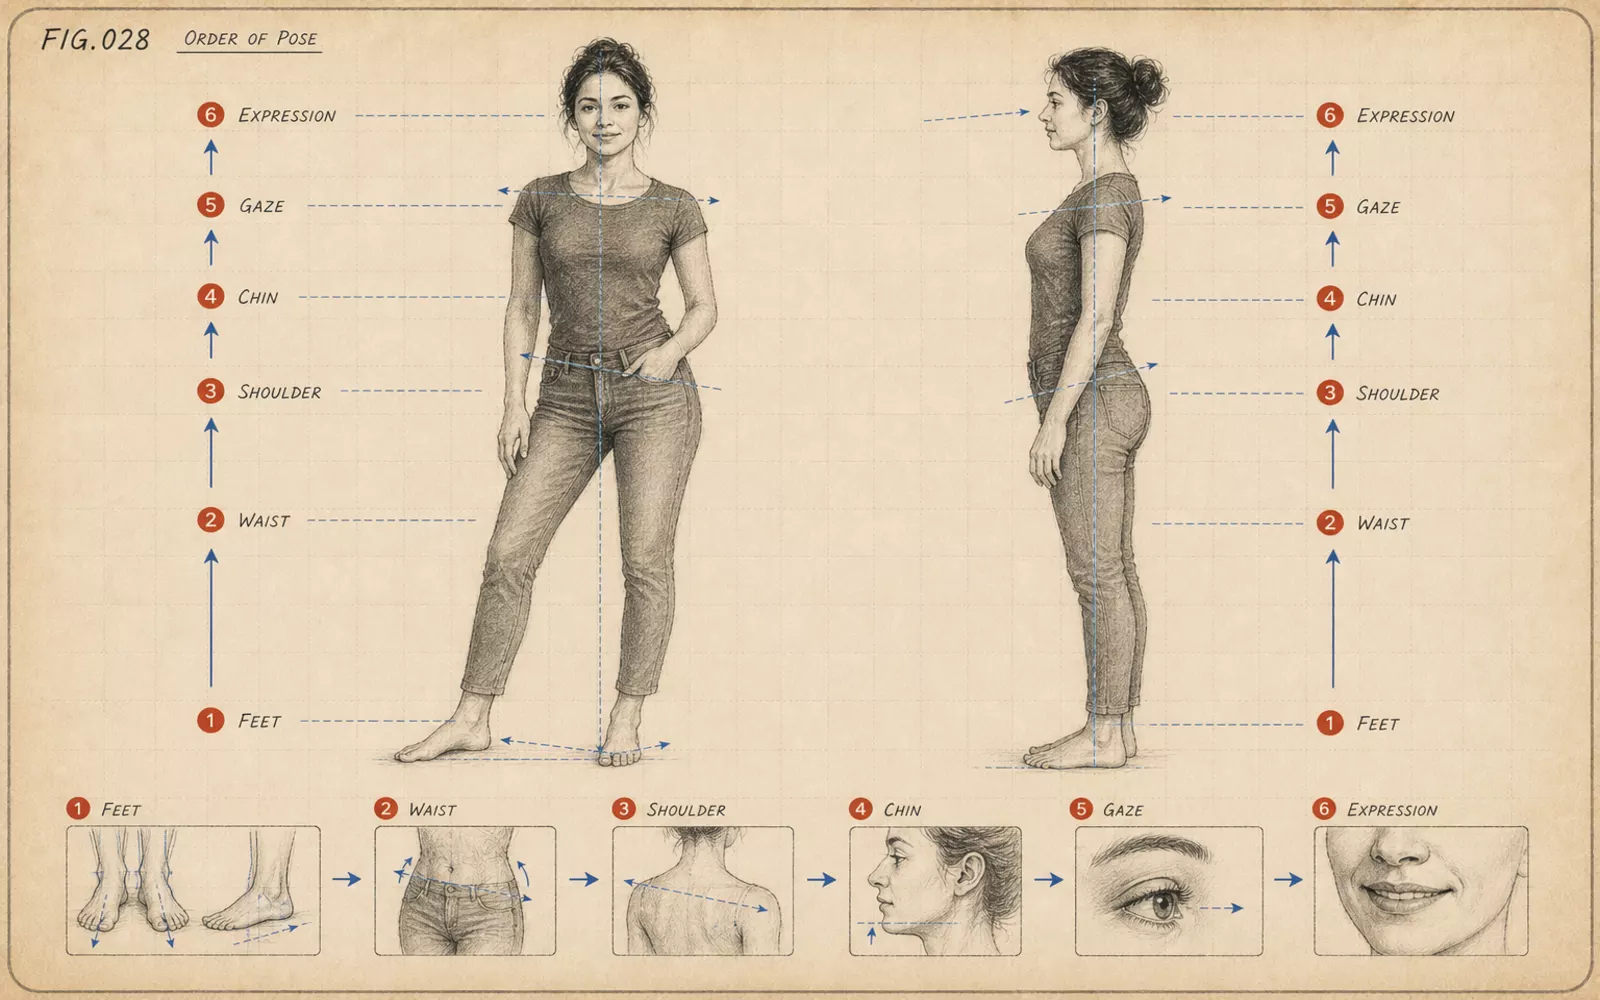 FIG.028The Order to Compose a Pose: Feet → Hips → Shoulders → Chin → Gaze → ExpressionBuild your pose in order: feet, hips, shoulders, chin, gaze, then expression. Leaving expression last prevents facial fatigue.
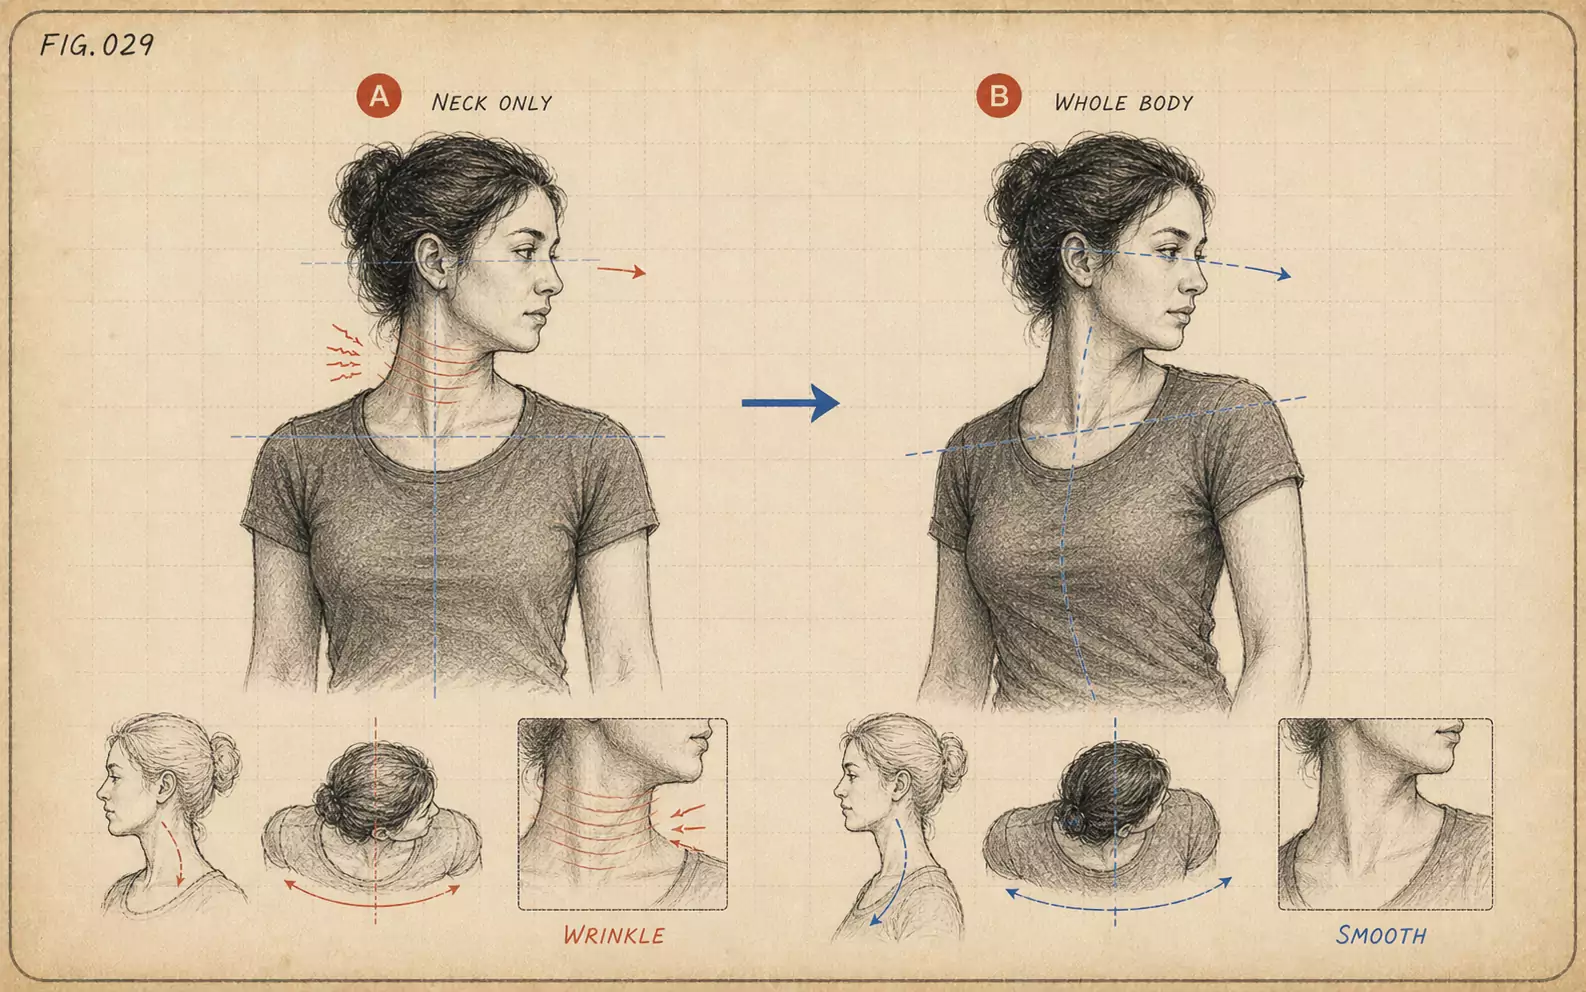 FIG.029Twisting Only the Neck Creates WrinklesTurning only the face back toward the camera creates wrinkles on the opposite side of the neck. The solution is to build the direction from the feet and shoulders.