This Article Contains
Why to Shift Direction Rather Than Hide the Jaw
The first thing people with a square jaw think about is "hiding the outline." But hiding has its limits. Covering with hair makes expressions hard to read; covering with hands brings unnatural elements to the fore first.
Changing direction makes the problem easier to solve. The jaw line reads most as width in the frame when the shoulders and face are both squared in the same direction straight-on. Simply shifting direction a little changes how the same face appears.
Offsetting the direction puts part of the outline in shadow and creates depth. As a result, the viewer's gaze shifts more easily from the width toward the facial expression.
Why Front-On, Uniform Light Emphasizes Width
When the shoulders and face point straight forward and uniform light hits, two problems overlap: (1) the width around the face becomes maximum in the frame, and (2) uniform light erases the depth (shadow) from the outline. This combination causes only the width to read strongly.
In a photo with depth, the viewer's eye moves from the outline toward the expression. When shadow disappears the face looks flat, and the width enters the eye "as-is." Just as with a round face, shadow is an important element for defining the impression of the outline (see FIG.120).
Even when the shooting environment makes uniform light unavoidable, changing the angle can still create a subtle shadow on one side of the face.
FIG. 122A diagram summarizing how to offset the shoulder and face direction to create depth for a square jaw face type.
Angling the Shoulders and Turning Just the Face Back
Angle the shoulders slightly (about 5–15 degrees) and then turn just the face back toward the camera. This combination creates a state where the shoulder and face directions are offset, making it easier for the viewer's gaze to move toward the expression rather than the outline.
Rather than twisting only the neck sharply, it's important to build the direction from the feet and shoulders. Point the feet slightly diagonally, let the shoulders and body naturally follow at an angle, and then turn just the face toward the camera — this way neck wrinkles are less likely to form (see FIG.029). FIG.027 also explains in detail the procedure of building overall body direction first.
A modest diagonal angle is sufficient. Getting too close to a profile view creates a situation where "the face doesn't come through from the front" as a profile photo. An angle where both the chin and ear are visible from the camera's perspective is a good balance between front-on and diagonal.
What Happens When You Over-Conceal with Hair or Hands
When you cover a large area of the face's sides with hair to hide the outline, expressions and cleanliness become hard to convey. Especially in work photos, having the face clearly visible leads to trustworthiness. For medical professionals, legal professionals, and executives, having the outline visible is a given.
The same applies to poses covering the chin or cheeks with hands. If it doesn't look natural, an artificial or unnatural quality tends to come forward first. Rather than placing hands "near the face," it's easier to handle holding a work-related object (see FIG.030) or placing hands naturally on a desk.
Also, when you try to change the impression through expression alone while staying straight-on to hide the jaw, excess tension enters the expression. Setting the angle first and then forming the expression makes it easier to produce a natural expression.
Rather than hiding a square jaw, offset the shoulder and face direction to create depth.
Pre-Shoot and On-Set Checklist
Before the shoot, decide where the photo will be used and what impression you want to convey. If prioritizing trustworthiness (executives, legal professionals), prioritize an angle where the face is clearly visible without angling too far. If prioritizing approachability, a slightly more diagonal angle with a softer expression also becomes an option.
During the shoot, start by setting the shoulder direction. Point the feet slightly diagonally so the shoulders naturally angle, then turn just the face toward the camera. Then check whether there are neck wrinkles. Finally, set the expression.
When selecting photos, keep photos where the viewer's gaze moves toward the expression rather than the outline. Prioritize "is the expression easy to read?" over the narrowness of the outline. Finally, check whether the photo suits the intended purpose and impression.
- Rather than hiding the jaw, offsetting the shoulder and face direction makes it easier for the viewer's gaze to move toward expression rather than outline.
- Front-on, uniform light makes the outline width appear at its maximum. Angling the shoulders slightly and turning the face back toward the camera creates depth.
- A modest angle is sufficient. Getting too close to a profile view makes the face hard to read.
References
Related Diagrams
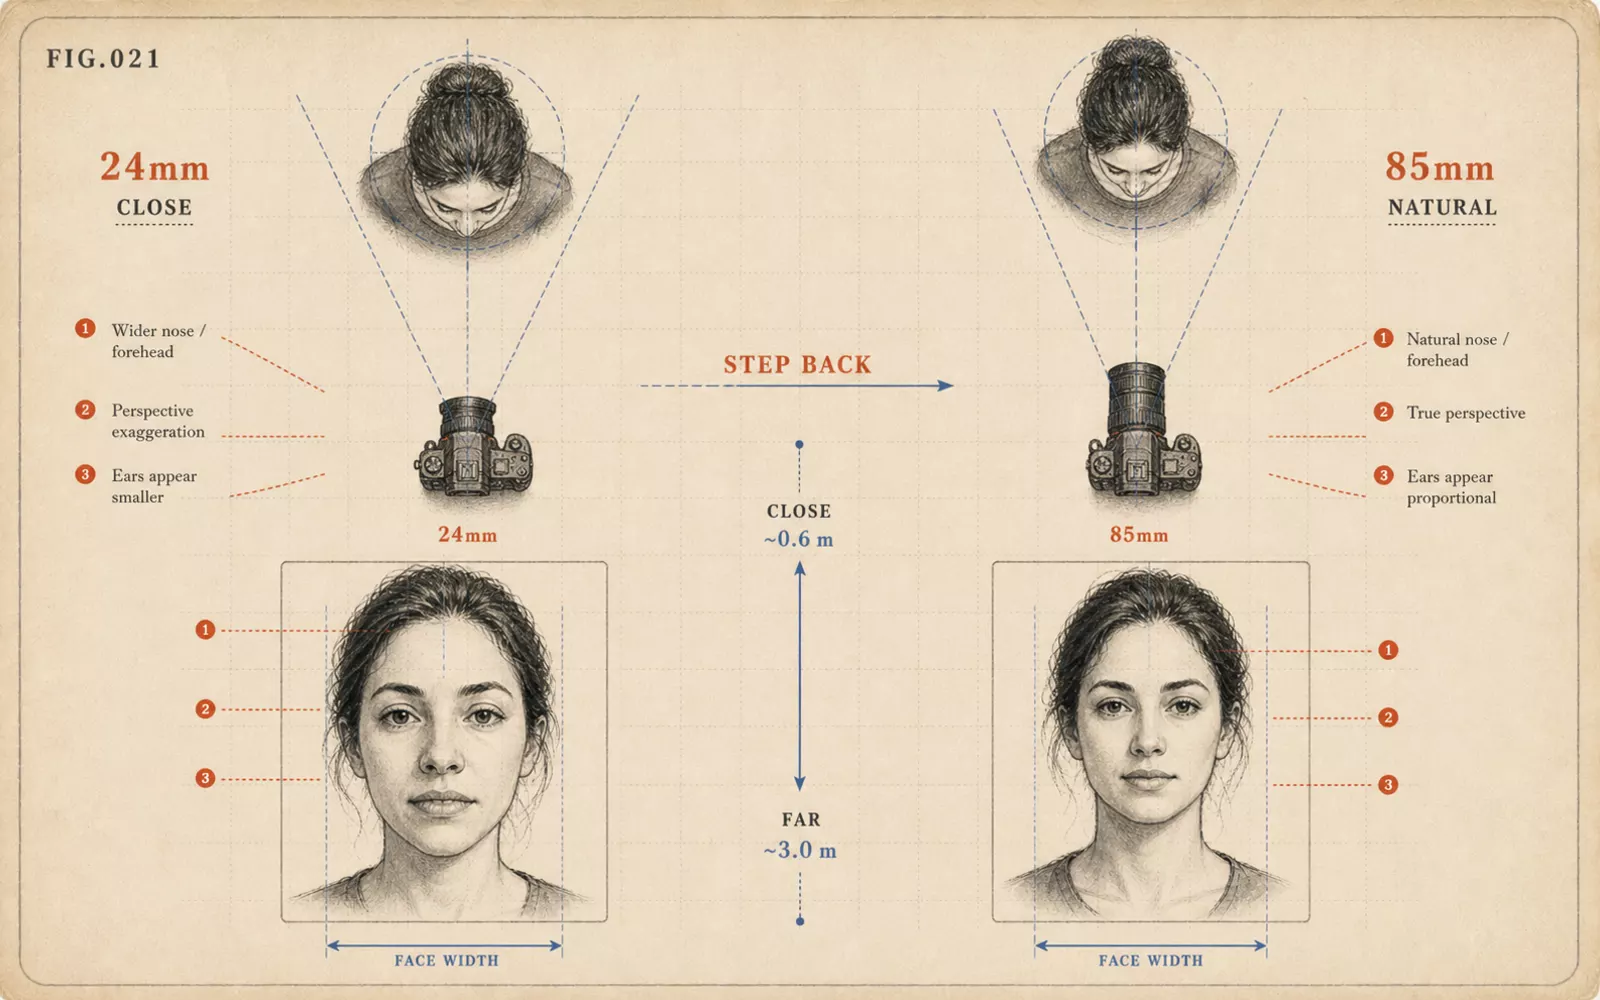 FIG.021The Courage to Ask the Photographer to "Take One Step Back"When the camera is too close, the face appears large and distorted. This explains the thinking behind stepping back to 85–135mm rather than shooting up close at 24mm.
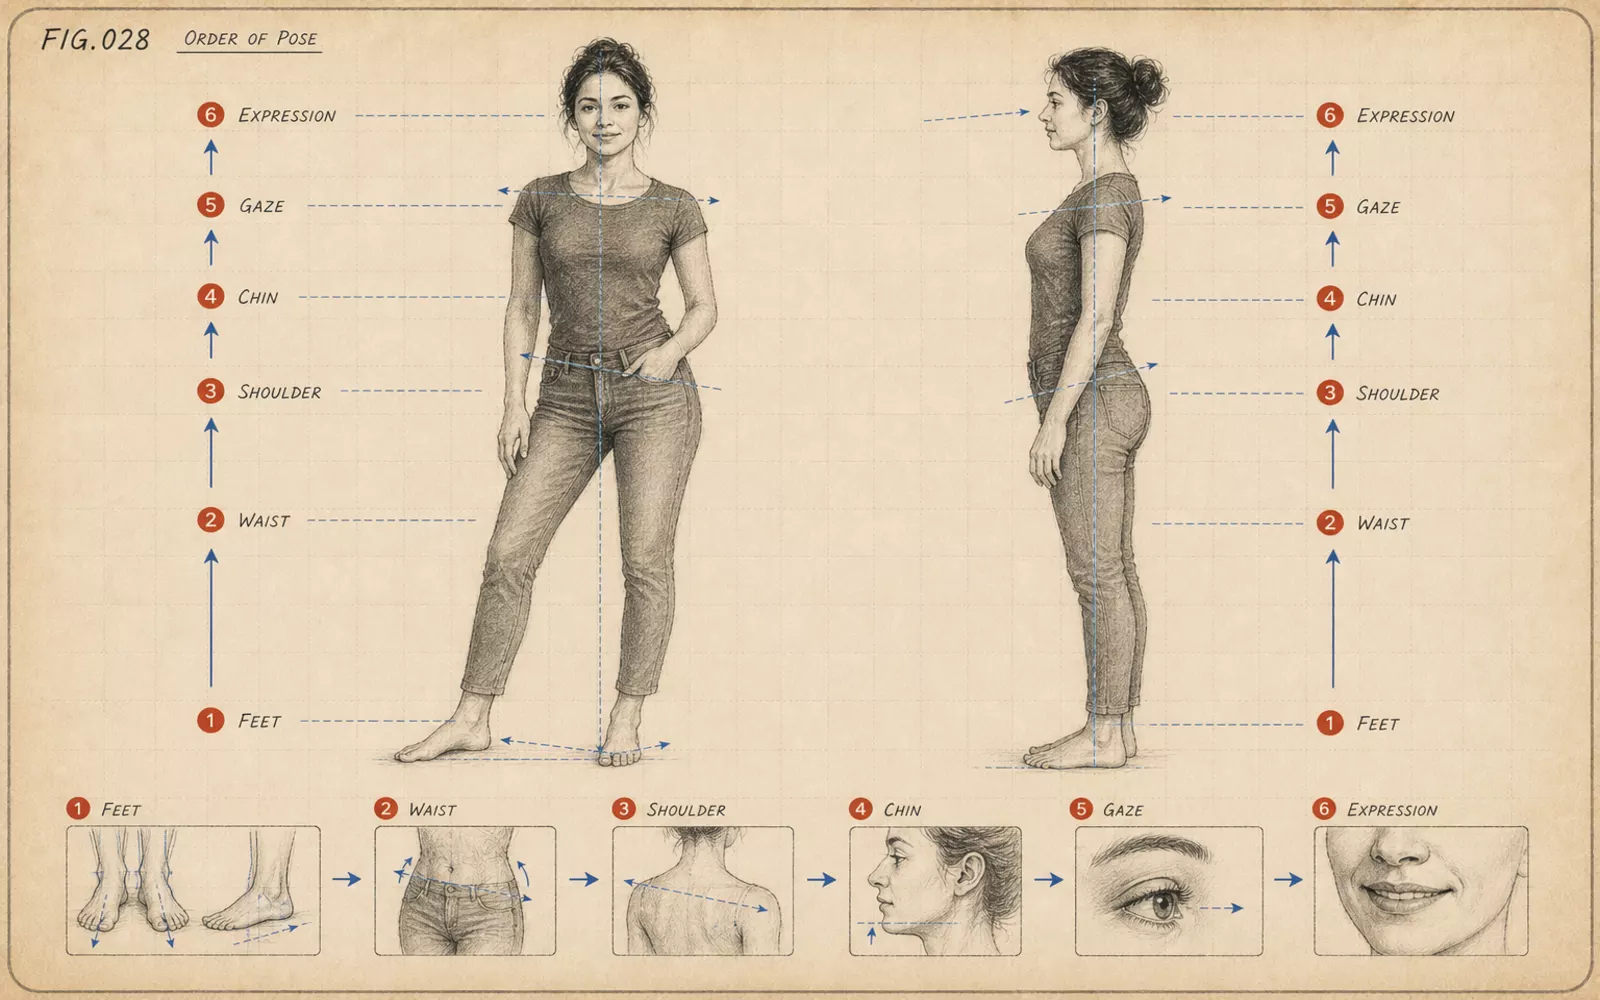 FIG.028The Order to Compose a Pose: Feet → Hips → Shoulders → Chin → Gaze → ExpressionBuild your pose in order: feet, hips, shoulders, chin, gaze, then expression. Leaving expression last prevents facial fatigue.
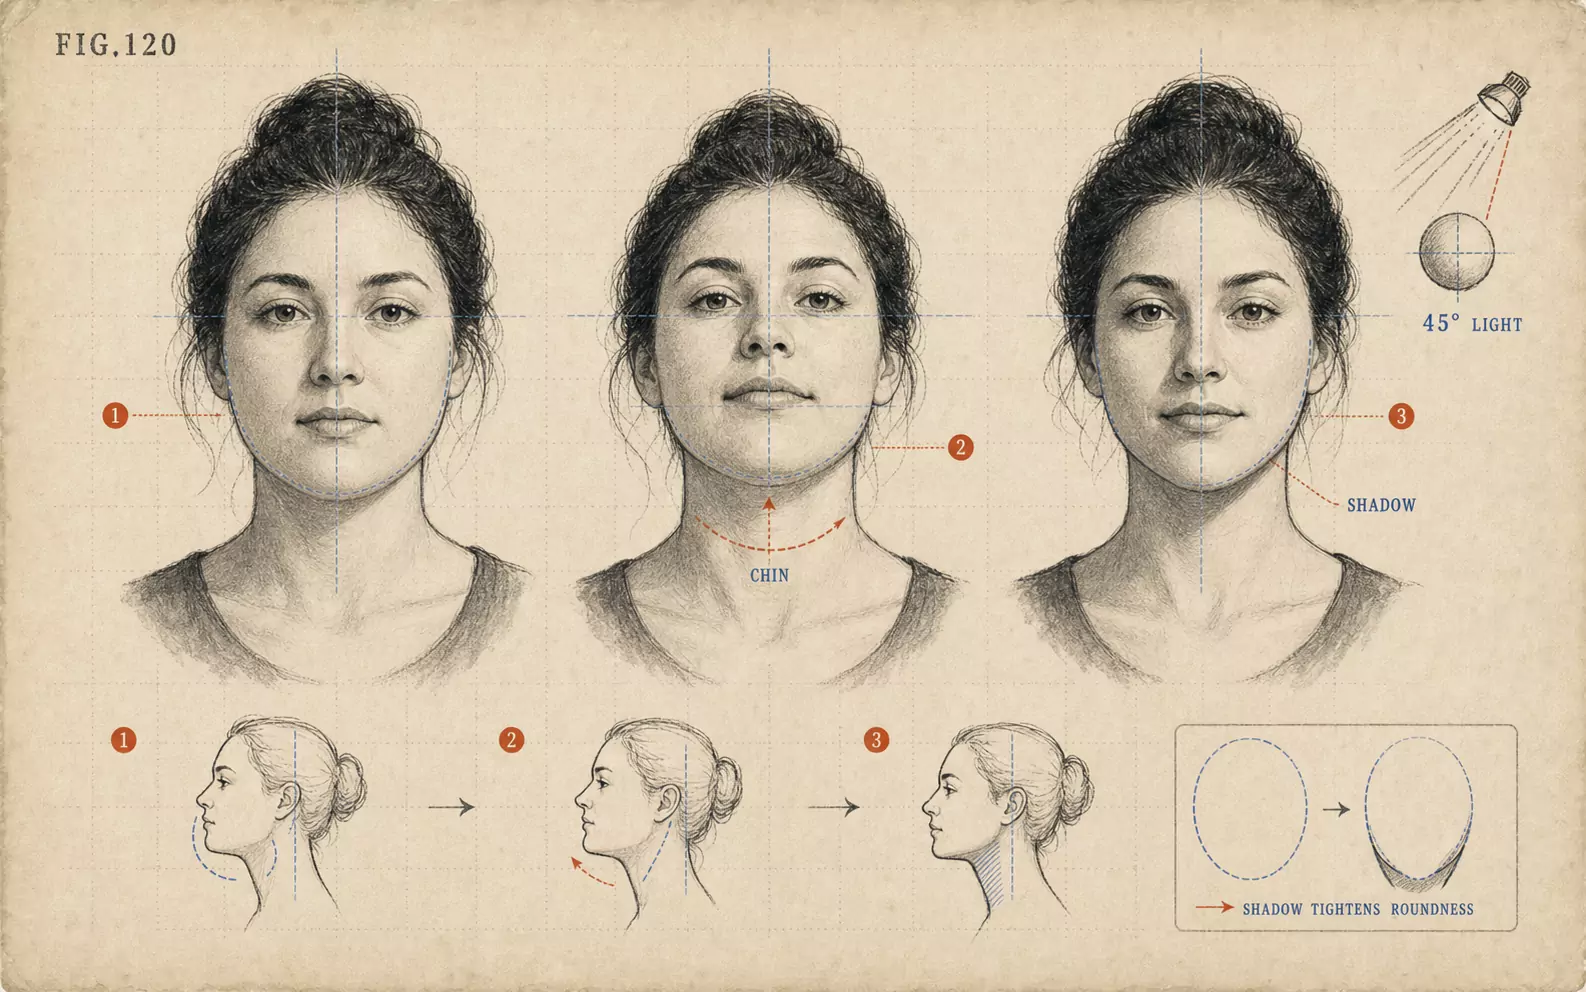 FIG.120How to Be Photographed with a Round Face: Using Shadow to Define the JawlineRather than making a round face look smaller, use light and angle to make the outline more readable.