This Article Contains
Why You Don't Need to Treat a Narrow Chin as a Weakness
For an inverted triangle face shape (narrow chin type), trying to hide the narrow chin as a weakness makes things harder. You can't change the chin itself, and hiding methods are limited.
Changing direction makes the problem easier to solve. A face with a narrow chin reads as "clean-featured" when the surrounding elements (shoulder width, gaze, expression) are stable. The problem is often less about the chin and more about insufficient stability.
Opening the shoulders slightly, steadying the gaze at the lens, and softening the mouth area — setting these three things makes the overall composure come through before the narrow chin.
Conditions and Patterns That Make the Lower Face Look Light
There is a pattern for when an inverted triangle face looks weak: (1) shoulders are hunched, (2) gaze is unsteady (unfocused), (3) the mouth is small and tight. When all three overlap, the narrow chin reads as "overall uncertainty."
When the shoulders hunch, the lower outline of the face appears small, and the upper portion of the face looks relatively larger. It emphasizes the difference between the wide top and narrow bottom of the inverted triangle shape. When the gaze is weak, viewers find it hard to sense "who this photo was taken for." When the mouth is small, the presence of the lower half of the face weakens.
All of these can be changed through the state of the body and expression during the shoot.
FIG. 124A diagram summarizing how to adjust shoulder width, gaze, and expression for an inverted triangle (narrow chin) face type.
Creating Stability Through Shoulders, Gaze, and Expression
Be conscious of keeping the shoulders slightly open. The image is not raising them but spreading them sideways. Build the direction from the feet and hips (see FIG.027), and let the shoulders fall and open naturally from that position — that is the basic posture. Even in bust-up photos, how open the shoulders are affects the impression of the face.
For gaze, decide clearly: either look at the lens or look at a position slightly off to the side. A photo with an unsteady gaze ends up somewhere in between and makes the impression hard to unify. For work photos, looking at the lens (gaze directed toward the camera) is the standard. Eye level the same as or very slightly below the camera (see FIG.014) looks composed.
Soften the mouth by gently lifting the cheeks (see FIG.011). Rather than just pulling the corners of the mouth horizontally, having the cheeks slightly lifted adds warmth to the lower half of the face. The upper front teeth showing about 3mm is a natural guideline for work photos.
Don't Hunch the Shoulders Too
Because of concern about the narrow chin, the shoulders can end up hunched too. When the whole body looks small and tight, the lightness at the lower chin stands out even more. The instinct to "avoid drawing attention" tends to have the opposite result.
Over-restraining expression causes the same problem. Pressing the mouth tightly shut and suppressing expression weakens the presence of the lower half of the face, which emphasizes the inverted triangle shape. Forming the expression firmly is the way to let the overall impression come through before the narrow chin.
When taking photos, the mindset of "hiding my weakness" creates tension in the body and expression. Instead, concentrating on specific checks — "shoulders, gaze, expression" — makes it easier to produce natural photos.
A narrow chin can be transformed into overall stability through shoulder width and gaze.
Pre-Shoot and On-Set Checklist
Before the shoot, decide where the photo will be used and what impression you want to convey. If prioritizing trustworthiness (executives, legal professionals), combine a gaze directed firmly at the lens with an open-shouldered posture. If prioritizing approachability (service industry, medical), an open-shouldered state with a softer expression works well.
During the shoot, check in this order: (1) openness of shoulders, (2) steadiness of gaze, (3) softness of mouth area. Rather than worrying about all three at once, start with the shoulder state. Building posture from the feet with open shoulders (see FIG.027) makes the subsequent checks easier.
When selecting photos, don't look only at the narrow chin — check whether there is an overall sense of stability. Keep photos where the shoulders are open, the gaze is steady, and the mouth area is soft. Even if you look at the chin alone and feel it's "narrow," if the overall impression is composed, that photo functions well as a profile image.
- Rather than trying to hide a narrow chin, creating stability through shoulder width, gaze, and expression is more effective.
- When shoulders are hunched, gaze is unsteady, and the mouth is small, it is overall uncertainty that comes through before the narrow chin.
- During the shoot, check in this order: shoulders → gaze → expression. Select by overall stability, not the chin alone.
References
Related Diagrams
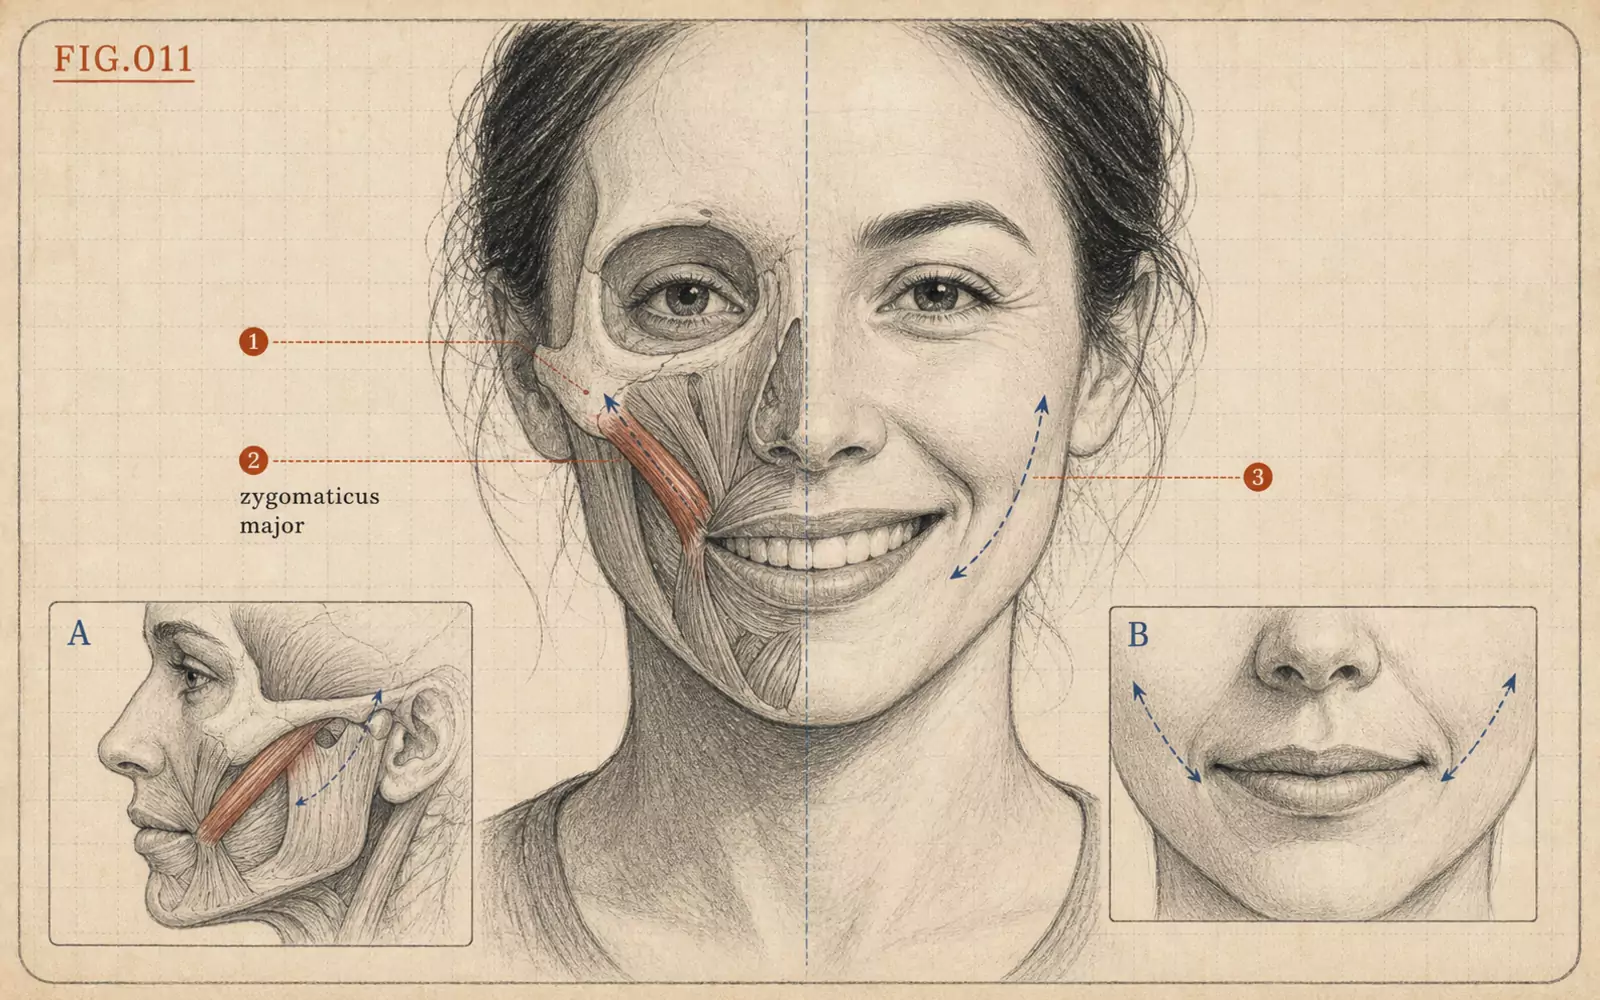 FIG.011Build a Smile from the Cheekbone Muscle, Not the MouthRather than pulling the corners of the mouth sideways, build a smile by lifting the cheeks below the eyes. Showing 3mm of upper front teeth is the guideline for work photos.
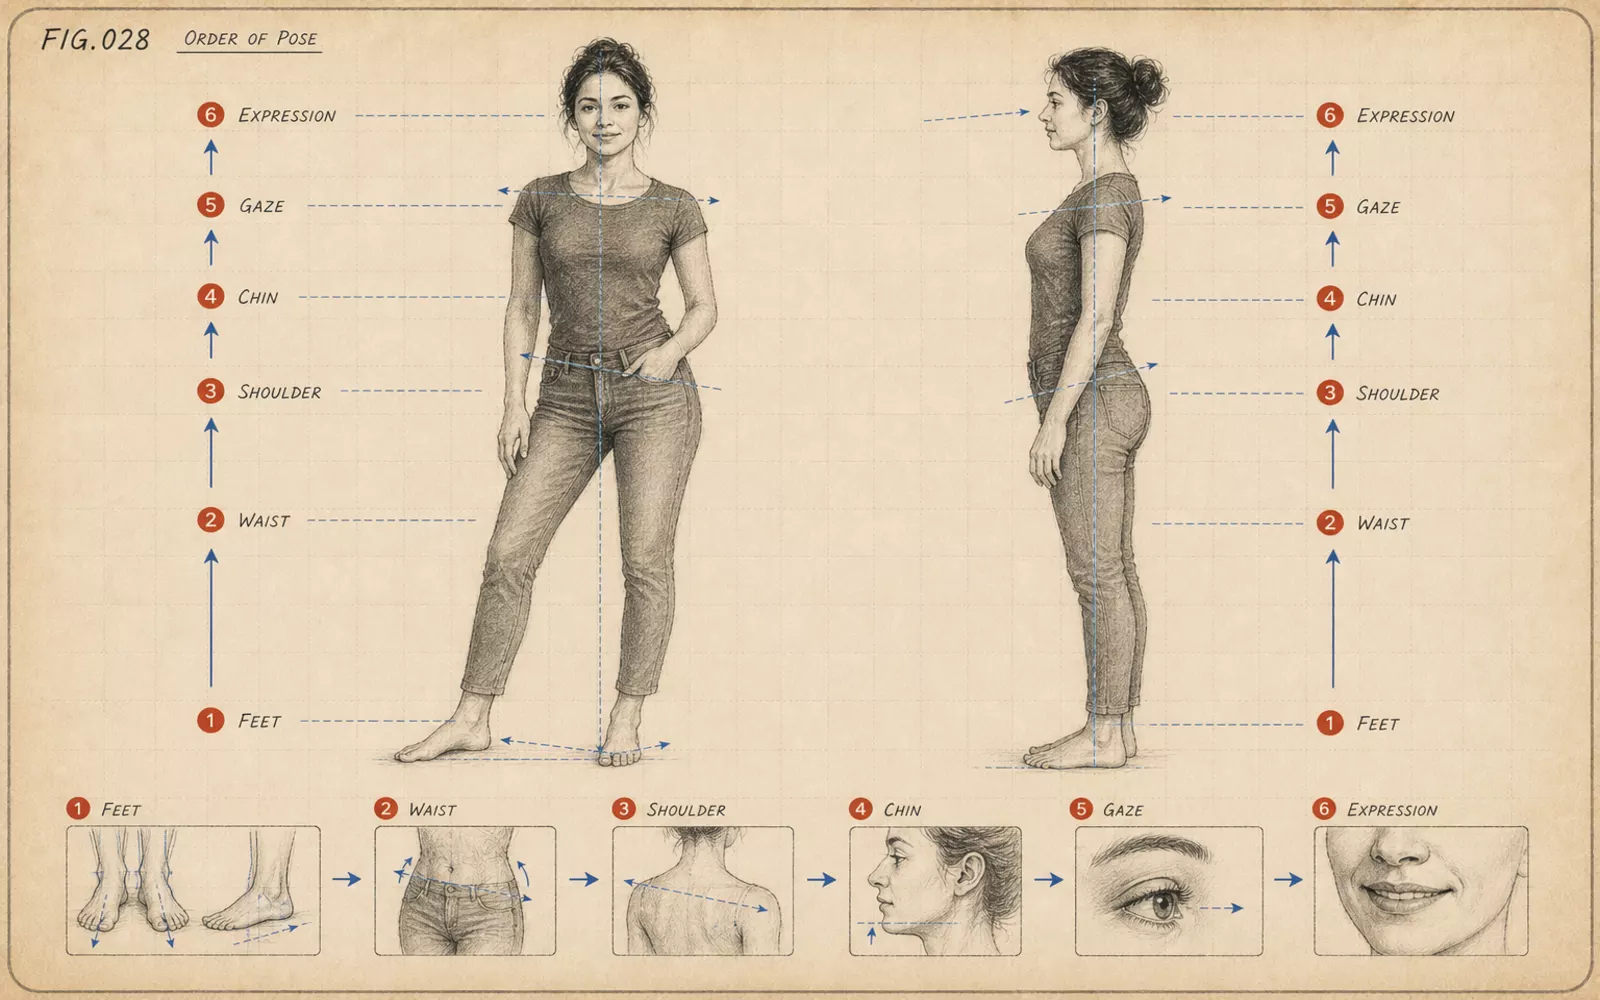 FIG.028The Order to Compose a Pose: Feet → Hips → Shoulders → Chin → Gaze → ExpressionBuild your pose in order: feet, hips, shoulders, chin, gaze, then expression. Leaving expression last prevents facial fatigue.
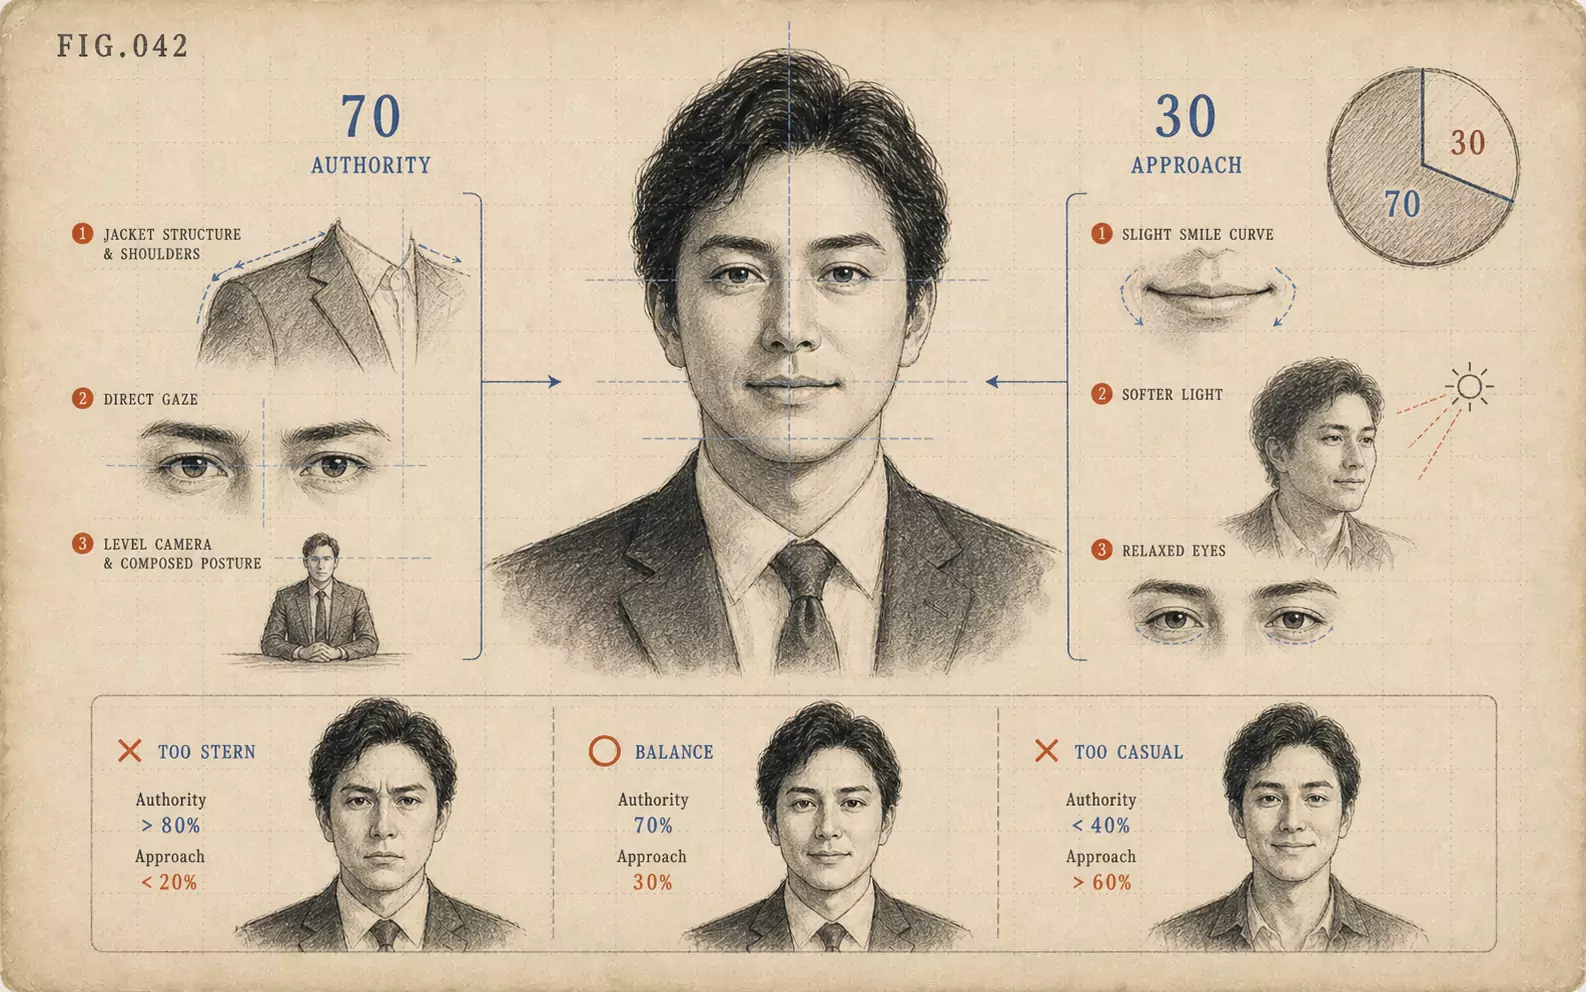 FIG.042Authority 7, Approachability 3 for Executive PhotosIn executive photos, build authority through clothing and add approachability through expression. The guideline ratio is 7 parts authority to 3 parts approachability.