This Article Contains
A Smile Starts from the Cheeks, Not the Mouth
When told "please smile," most people pull the corners of their mouth sideways. The mouth moves, but the cheeks and eyes stay still. The result is a photo where only the mouth is working hard.
The hallmark of a natural smile is raised cheeks. When the cheeks move, the area under the eyes softens and expression reaches the eyes. Having the sense that the cheeks move upward before the mouth corners do is the foundation of a natural smile.
The feeling of moving from the cheeks is easy to forget if you never think about it consciously. That is why "practice" is necessary — but this is closer to "remembering how to move" than to muscle training.
Why Only the Mouth Moves During a Shoot
When you consciously think "smile" during a shoot, the mouth responds first. The mouth is used for many other expressions, so it is an "easy place to move." The zygomatic muscle, on the other hand, is rarely conscious in everyday life, so it responds sluggishly when you try to activate it suddenly.
Going into a shoot without practice means the mouth moves alone while the cheeks stay still. Even though you feel like you are smiling, the photo retains a temperature gap between the mouth and the eyes. This is the reason photos end up looking like a "tried-hard smile."
Keeping the feeling of moving your cheeks in your daily awareness means that during a shoot, the instruction "be conscious of your cheeks" is enough to switch things over. The goal is not to move from zero, but to create a state where you are drawing out a movement you already know.
FIG. 150An educational diagram for switching from a mouth-only smile to one that engages the cheeks.
A Simple 3-Minute Daily Routine
Three minutes a day is enough. There are three steps: ① lift only the cheeks with your mouth closed (hold for 5 seconds). ② Slowly relax the cheeks (5 seconds). ③ Lift the cheeks again. Repeat this 10 times.
Doing it in front of a mirror lets you check whether the area under your eyes moves gently. If it does, the zygomatic muscle is responding. If it does not, imagine "lifting upward" with the cheeks and treat them as a separate area from the mouth.
Once you are comfortable, add a step where the top front teeth become slightly visible (about 3 mm) while the cheeks are raised (see FIG.011). This is the benchmark for a natural-looking smile in professional photos.
Overworking the Muscles Is Counterproductive
Pushing too hard during practice is counterproductive. Facial muscles do not improve simply by moving them forcefully — what matters is "whether you can move them precisely and in small increments." Overexerting creates unnecessary tension around the cheeks and builds a habit of stiff expressions.
Another common mistake is trying to lift the cheeks while also pulling the mouth wide. When the mouth is pulled sideways, cheek movement tends to stop. In the early stages of practice, keep the mouth closed and focus solely on the feeling of moving the cheeks.
The goal of practice is to "remember how to move," not to increase muscle mass. Keeping it short, precise, and consistent is what leads to a natural smile during a shoot.
Building the sense of lifting your cheeks first makes it easier to move past a mouth-only smile.
Steps to Check During Practice and Shoots
During practice, watch the area under your eyes in the mirror. When your cheeks rise, that area puffs up slightly. If you can see it, the zygomatic muscle is moving correctly. Prioritize movement under the eyes over movement at the mouth corners.
Before a shoot, take 30 seconds to do a quick run-through in the waiting room or on location. Even just lifting and relaxing the cheeks twice is enough to make your expression flow more smoothly during the shoot. A brief "reminder" right before is more effective than a long practice session.
After the shoot, zoom in on the eye area of your photos. Photos where the cheeks were raised retain a natural roundness below the eyes. Comparing them with photos where only the mouth corners are pulled sideways makes the difference easy to see. Keep the ones where the cheeks were moving.
- A smile is built not just from the mouth but from the sense of lifting the cheeks. When the cheeks move, a soft expression reaches all the way to the eyes.
- Practice the sequence of lifting the cheeks, relaxing them, and lifting again — 3 minutes a day. Keeping it short and precise is what matters.
- Overworking is counterproductive. Approach it with the feeling of "remembering," and keep it up daily.
References
Related Diagrams
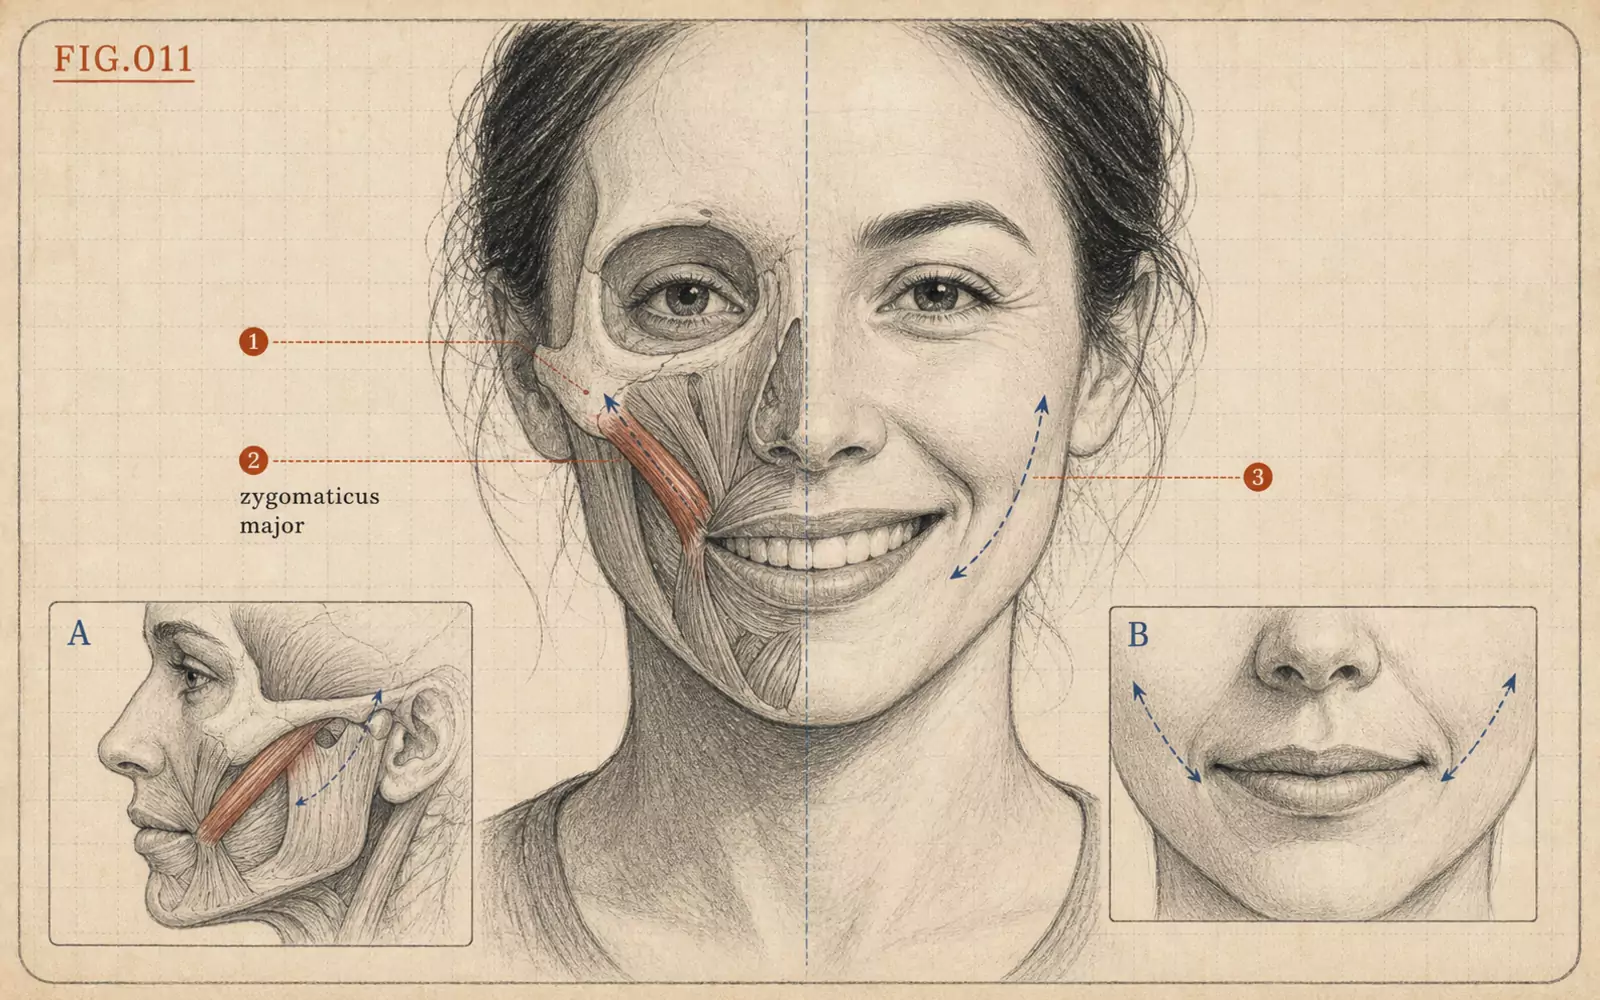 FIG.011A Smile Comes from the Zygomatic Muscle, Not the MouthA smile is made by lifting the cheeks below the eyes, not by pulling the mouth corners sideways. The top front teeth showing 3 mm is the benchmark for professional photos.
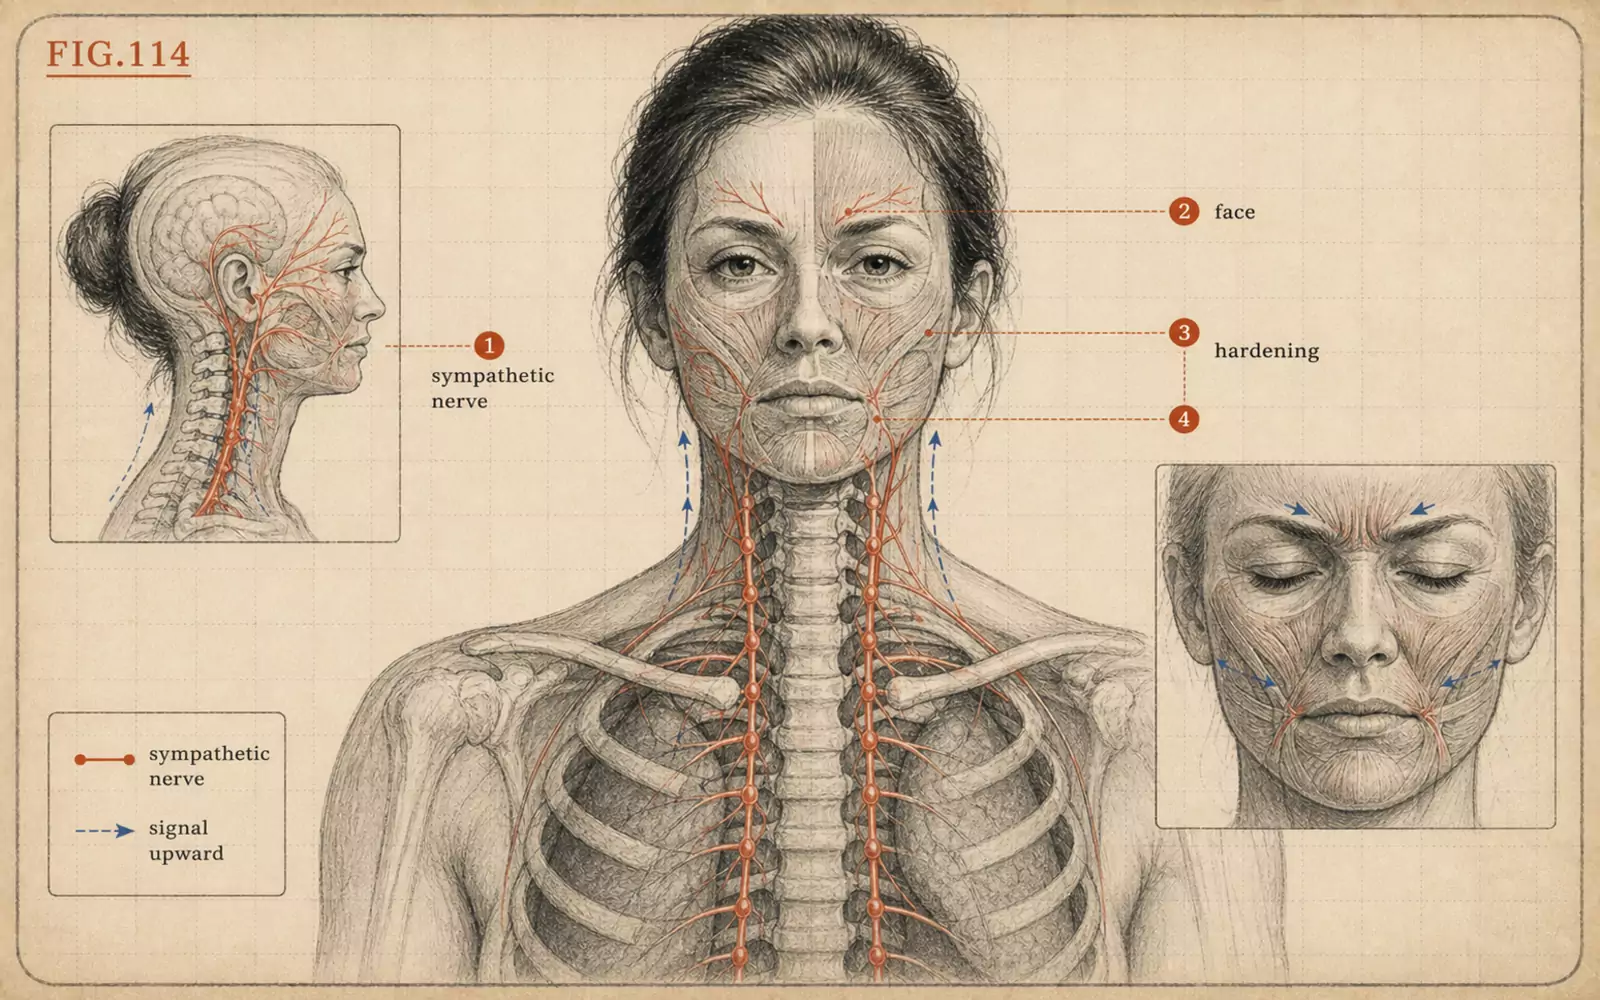 FIG.114How Tension Freezes Your Expression: The Sympathetic Nervous System and Facial MusclesWhen you cannot smile because of nerves, release tension starting from the cheeks and shoulders rather than the mouth. Facial muscle movement is linked to body tension.
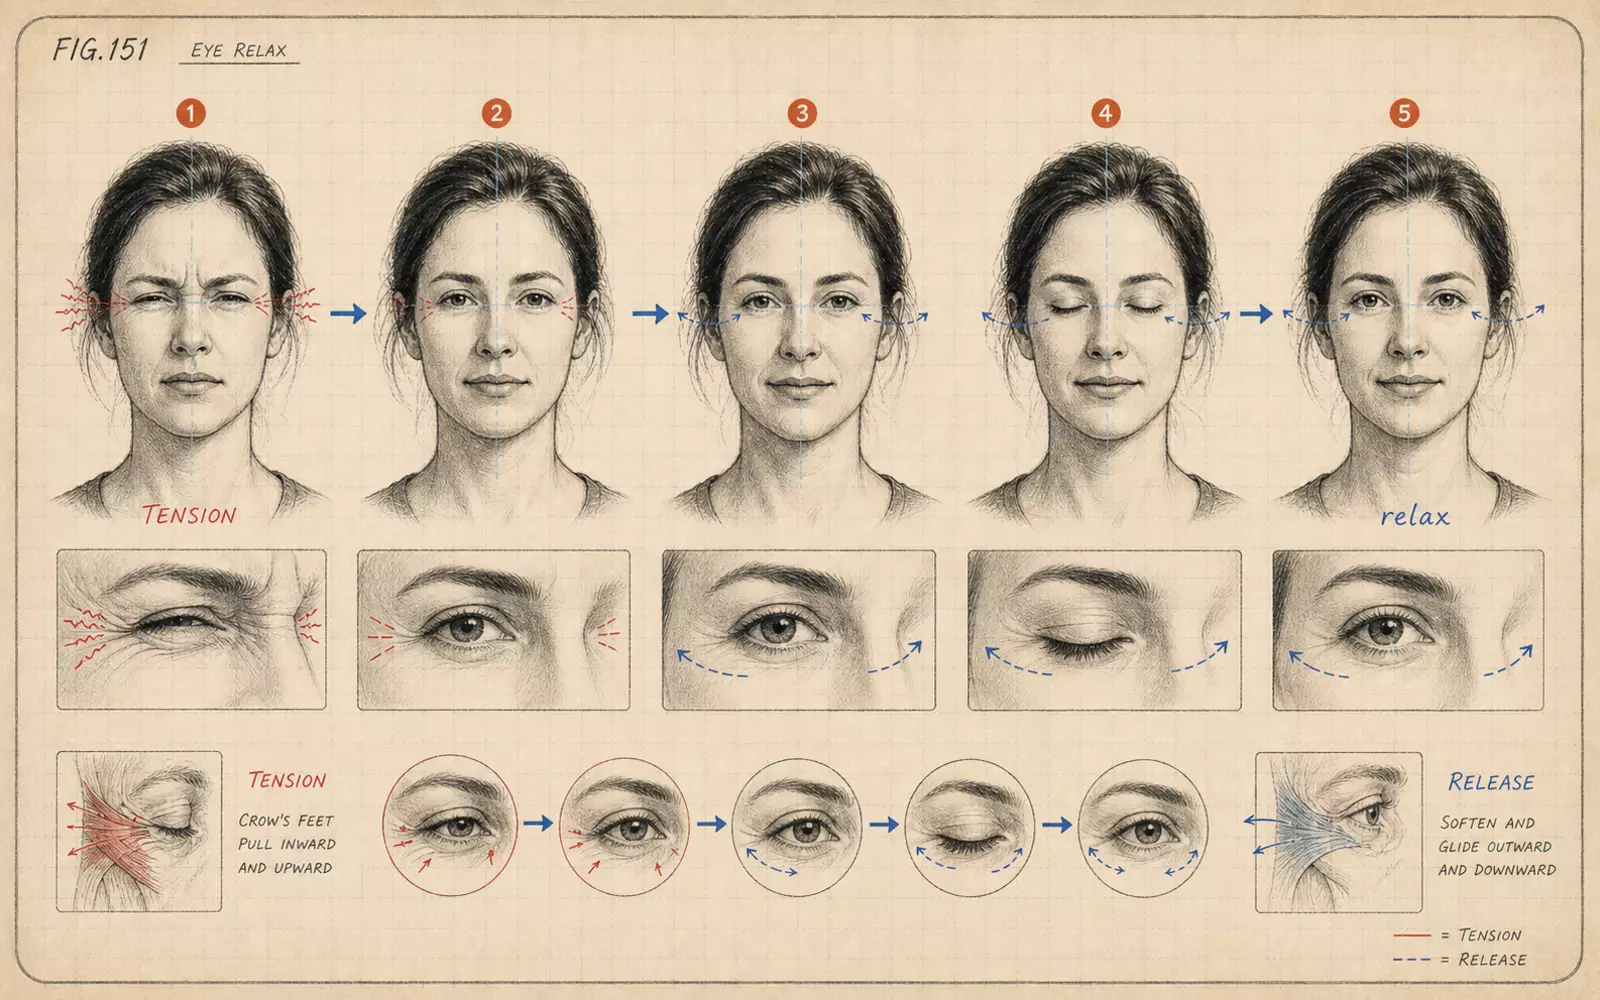 FIG.151Eye-Corner Relaxation Training: 5 Movements to Release TensionInstead of opening your eyes wide, practice releasing the tension at the eye corners to align your expression.