This Article Contains
Right Before: A Short, Quiet Return Is What Helps
Big facial massages or exaggerated warm-up stretches right before a shoot are often hard to do in front of others. Even if there is a waiting room, it can feel awkward with other staff around. That is why what actually works on location is a routine that lets you "return, short and quietly."
"Just 30 seconds with eyes closed and exhale" — "drop the shoulders" — "lift the cheeks once and relax" — these are movements that draw no attention even if someone is watching. That is exactly why they become a preparation you can reliably use in the final seconds before the camera rolls.
A quiet, softening routine is more effective at bringing back expression in the moment than a big, effort-filled preparation.
What Tension Does to Your Breath, Shoulders, and Eyes
Right before a shoot, tension makes breathing shallow, raises the shoulders, and causes tension to build in the eyes. This is not a sign of weak willpower — it is a natural physical response to having a camera pointed at you (see FIG.110).
Shallow breathing makes facial muscles harder to move. Raised shoulders shorten the line from the neck to the jaw, freezing the expression along with it. Tension in the eyes creates a temperature gap with the mouth that leaves an awkward feeling in the photo.
Trying to fix only the face while all three of those remain in place will not bring back the expression. That is why the pre-shoot stretch is designed to settle face, shoulders, and breath in sequence. Think of it the way you adjust your clothes just before the shot — a small tidy-up for your expression too.
FIG. 152An educational diagram for briefly settling face, shoulders, and breath right before a shoot.
4 Steps to Return in 30 Seconds: Cheeks, Eye Corners, Shoulders, Breath
Four steps that take 30 seconds. ① Lift the cheeks (move only the cheeks upward with the mouth closed). ② Relax the eye corners (close the eyes, open them slightly, look into the distance once). ③ Drop the shoulders (let them fall naturally). ④ Exhale (breathe all the way out slowly).
The order matters. First settle the face with the cheeks and eye corners, then release the body with the shoulders and breath. Reversing the order (starting with breath) also works, but starting from the face is easier to turn into a habit on location.
Each step takes 5 to 10 seconds. Once you are used to it, the full sequence fits in 30 seconds. Studio waiting rooms, venue restrooms, stand-by time before the shoot — the movements are composed entirely of actions that look natural even in front of others, so no hidden corner is required.
Adding New Exercises Right Before Is Counterproductive
A common mistake is trying out many new exercises right before the shoot. Adding more and more movements — "let me try this too," "and that too" — means unfamiliar actions that cause extra tension in the face. Use the time immediately before to "recall movements you already know."
Another mistake is rushing to move only the face. With the shoulders still raised, the eyes and mouth tend to remain stiff. Following the sequence releases a wider range of tension.
Practice a little every day; on the day itself, only review — this division is what leads to natural expression during the shoot. Introduce no new movements; run through the known routine reliably.
For last-minute preparation, a quiet, softening approach is more practical than a big, effortful one.
Checklist for Before and During the Shoot
Before the shoot, run through these 4 steps in the waiting room or on the way to the location. If there is a mirror, check whether the cheeks are lifted and the shoulders are down. Even without a mirror, your own sense of "shoulders that were up have now dropped" is enough.
During the shoot, if you sense your expression has stiffened, run briefly through the 4 steps again. A quick word to the photographer — "can I just catch my breath?" — gives you space to reset at your own pace. There is no need to return to perfect; "soften a little, then shoot again" is the realistic approach on location.
When reviewing photos after the shoot, look not only at the expression but also at tension in the eyes and shoulders. Keep the shots where the expression — and the neck and shoulders — look settled. Photos taken when the pre-shoot stretch worked well carry no residual tension.
- Right before a shoot, a quiet 30-second preparation is more useful than a big warm-up. Choose small movements you can do in front of others.
- Work through the 4 steps — cheeks, eye corners, shoulders, breath — in order. Releasing all the way to the shoulders and breath makes it easier for expression to return.
- Do not add new exercises at the last minute. Use that time to reliably review what you already know.
References
Related Diagrams
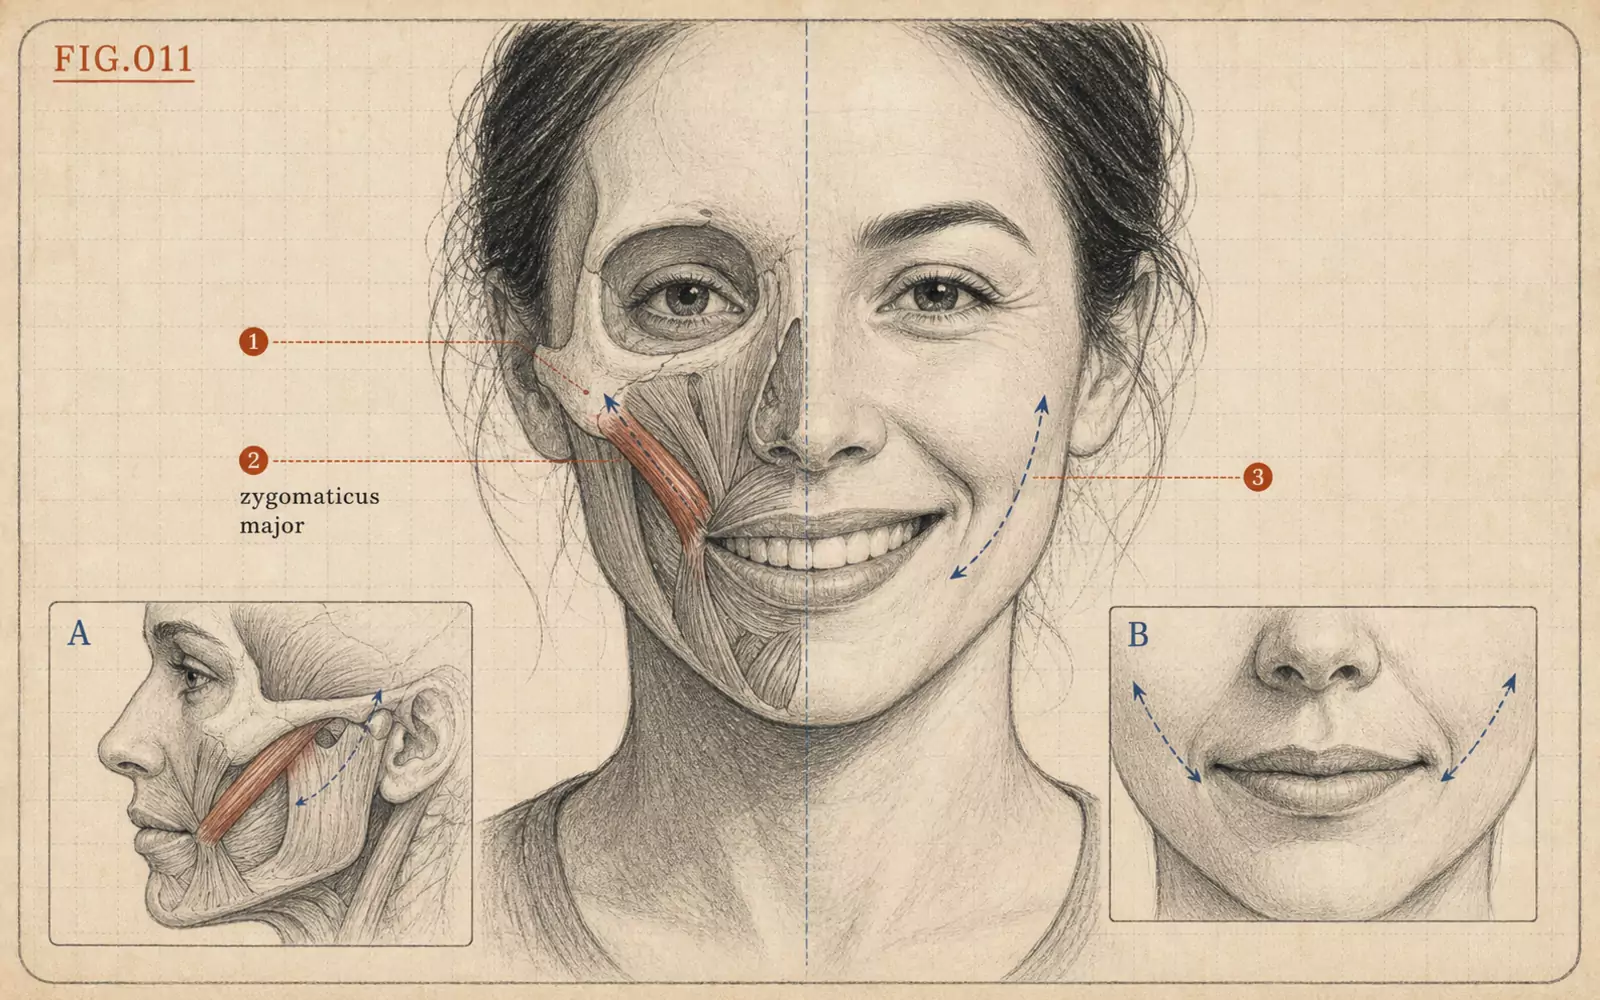 FIG.011A Smile Comes from the Zygomatic Muscle, Not the MouthA smile is made by lifting the cheeks below the eyes, not by pulling the mouth corners sideways. The top front teeth showing 3 mm is the benchmark for professional photos.
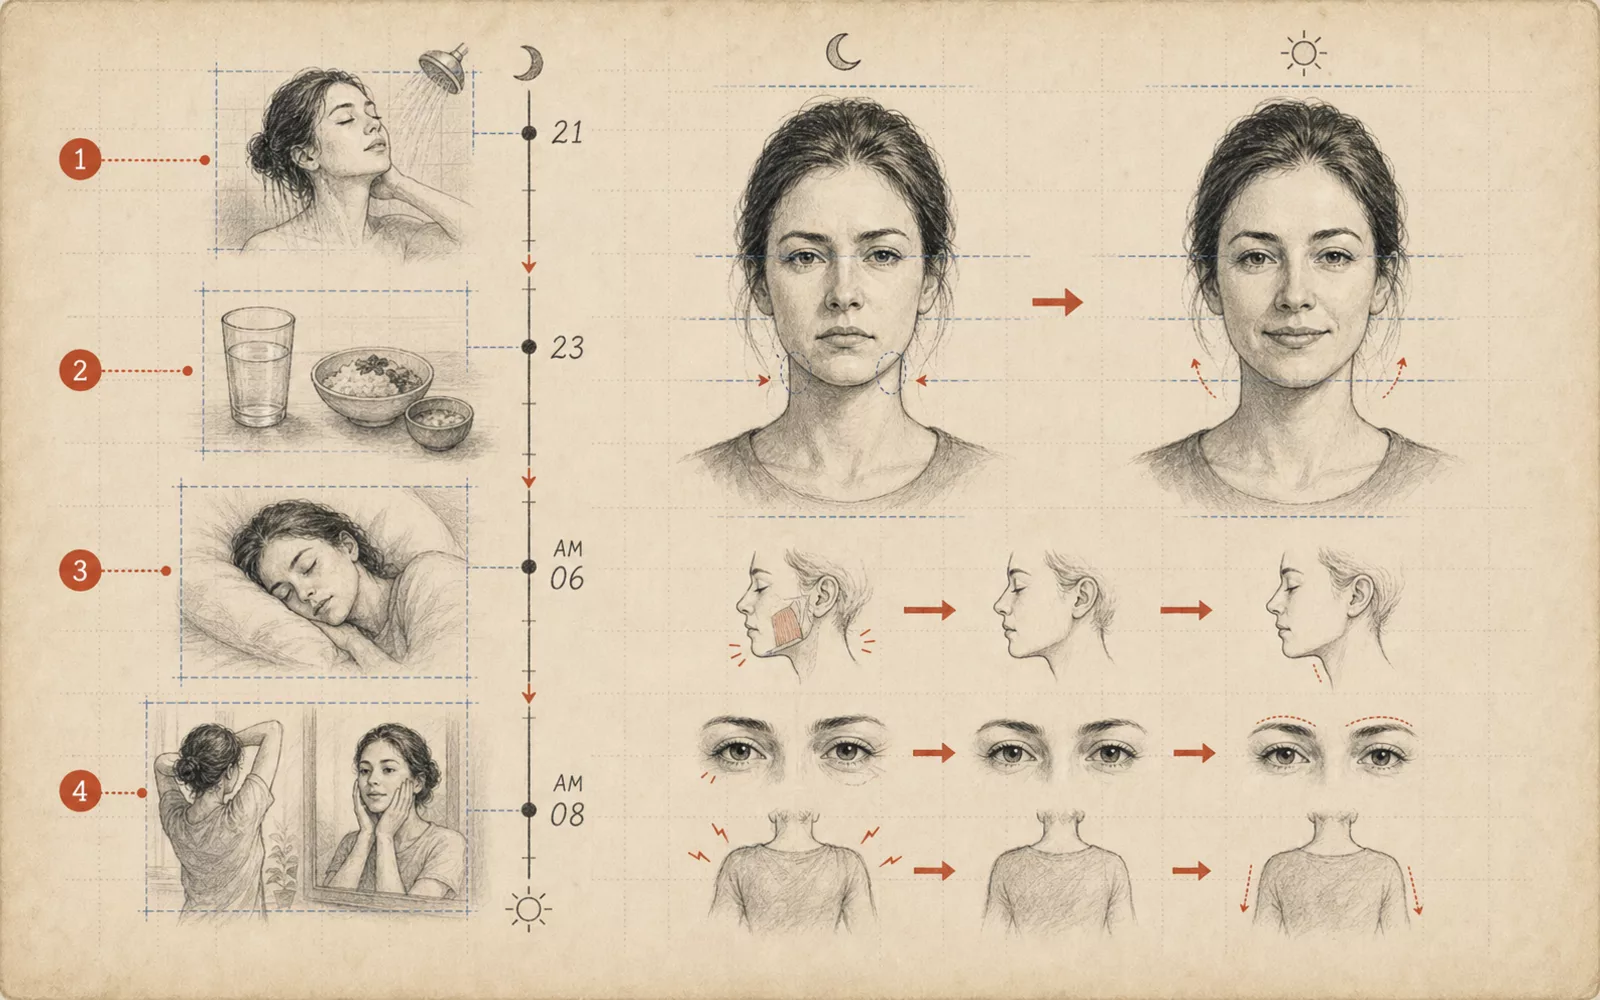 FIG.111How to Handle Pre-Shoot Anxiety the Night BeforePre-shoot anxiety the night before is eased more by reducing decisions than by adding more preparation. Lock in your outfit, belongings, and questions the day before.
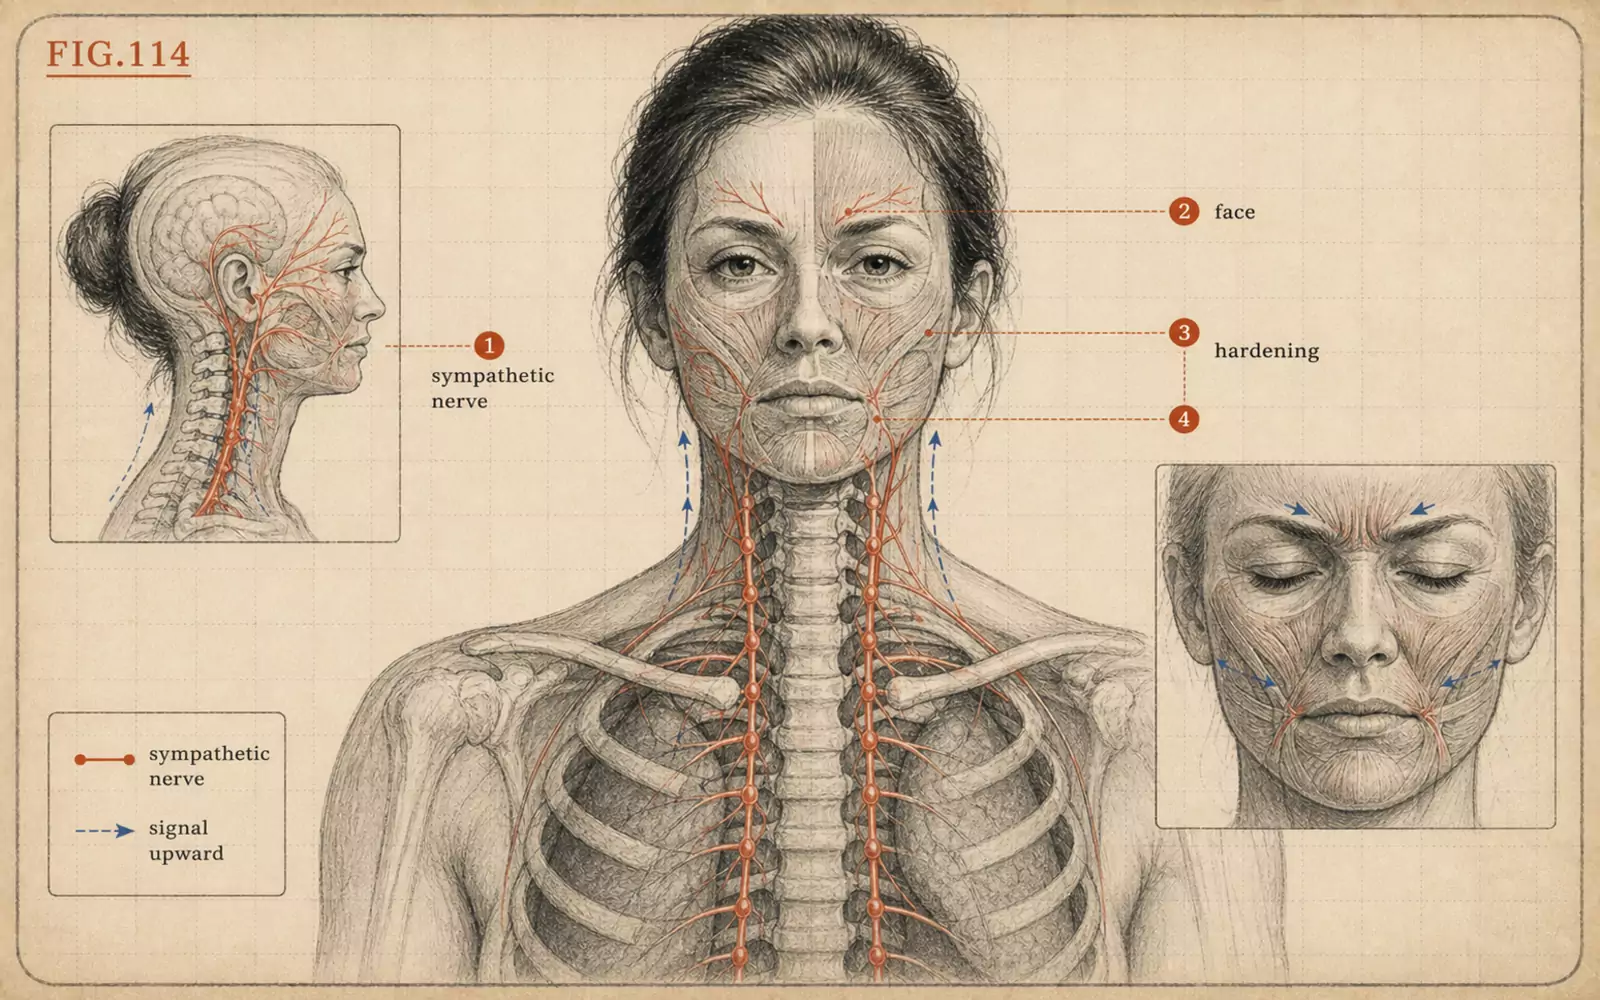 FIG.114How Tension Freezes Your Expression: The Sympathetic Nervous System and Facial MusclesWhen you cannot smile because of nerves, release tension starting from the cheeks and shoulders rather than the mouth. Facial muscle movement is linked to body tension.