This Article Contains
Conditions That Bring Lower Facial Volume Forward
For pear-shaped and heavy-lower face types, lower facial volume tends to come forward depending on shooting conditions. The more conditions overlap, the greater the impact — but the impression can be changed by changing the conditions.
The three main conditions that bring volume forward are: (1) the chin is raised — the lower side of the face moves closer to the camera and tends to appear larger; (2) light is entering from below — the shadow that would naturally form under the chin disappears, making the outline boundaries hard to read; (3) the neckline is closed — the line from neck to chin appears shorter, leaving the lower facial volume in place.
These are conditions of posture, light, and clothing during the shoot — not facial features.
How Chin Angle and Light Direction Change the Volume
When the chin is raised, the lower half of the face (below the chin and cheekbones) moves closer to the camera. Due to the perspective effect where parts closer to the camera appear larger (see FIG.081), the volume from cheek to chin tends to come forward.
Problems also arise when light enters from below. When the natural shadow that forms under the chin and around the neck disappears, the outline boundaries become hard to read. The volume ends up reading as "uniformly spread." This is why light easily enters from below when you place a smartphone on a table for a selfie.
When soft light from above (window light, ceiling lighting) reaches the face, a subtle shadow forms under the chin. This shadow creates the outline boundary, making the lower face appear naturally defined.
FIG. 123A diagram summarizing how to adjust chin angle, light, and neckline conditions for a pear-shaped (heavy lower) face type.
Using Soft Light from Above and Vertical Lines
Pull the chin slightly to move the lower face away from the camera. The correct way to pull it is not to lower the whole neck, but to keep the back of the head up and draw just the chin tip slightly back (see FIG.003). This alone changes how the cheek-to-chin area appears.
Light should come from above. Soft ceiling lighting or light entering from a high window position creates a subtle shadow under the chin. This shadow makes the outline boundary visible. Soft, diffused light is more natural than a spotlight-type strong light for producing shadow.
Creating vertical lines at the neckline of clothing is also effective. Shirt openings, V-necks, and jacket lapels — these create a downward vertical flow below the face, refining the impression from neck to chin. Conversely, turtlenecks and polo necks can make the line from neck to chin appear shorter, which may not suit a pear-shaped face.
What Happens When You Smile with the Chin Raised
When you try to appear cheerful by smiling with the chin still raised, the lower face moves forward toward the camera. The smiling expression and the lower facial volume both come through strongly at the same time, creating a photo where both tend to be prominent.
Also, when the cheeks lift with a smile, the lower facial volume can come even further forward. While creating a smile by lifting the cheeks is the basic approach (see FIG.011), setting the chin position first is the priority. Getting both the chin pull and the smile naturally in place is what makes the expression the main subject of the impression.
Necklines that close around the neck also need attention. Turtlenecks and polo necks make the line from neck to chin appear shorter, which keeps the lower facial volume in place. Within the range that suits the intended use, creating a little openness at the neckline lightens the impression.
Photos that appear heavy in the lower face are refined through the chin, light, and neckline.
Pre-Shoot and On-Set Checklist
Before the shoot, check the neckline of your clothing. For work photos, choose something that maintains cleanliness while having a vertical line at the neckline. Options include V-neck shirts, appropriately open jackets, and scarves used vertically — select according to the intended use.
During the shoot, check the chin position, light direction, and expression in that order. First pull the chin slightly (at the chin tip, not the whole neck). Then confirm that light is hitting the face from above. Finally, set the expression.
When selecting photos, prioritize photos where a subtle shadow appears under the chin. Photos without shadow have outline boundaries that are hard to read. Keep photos where both the expression and outline are clearly coming through.
- Lower facial volume tends to come forward when conditions overlap: a raised chin, light entering from below, and a closed neckline.
- Pulling the chin slightly (at the chin tip only), introducing soft light from above, and creating vertical lines at the neckline refines the impression.
- Setting the chin position before forming a smile makes the expression the main subject of the impression.
References
Related Diagrams
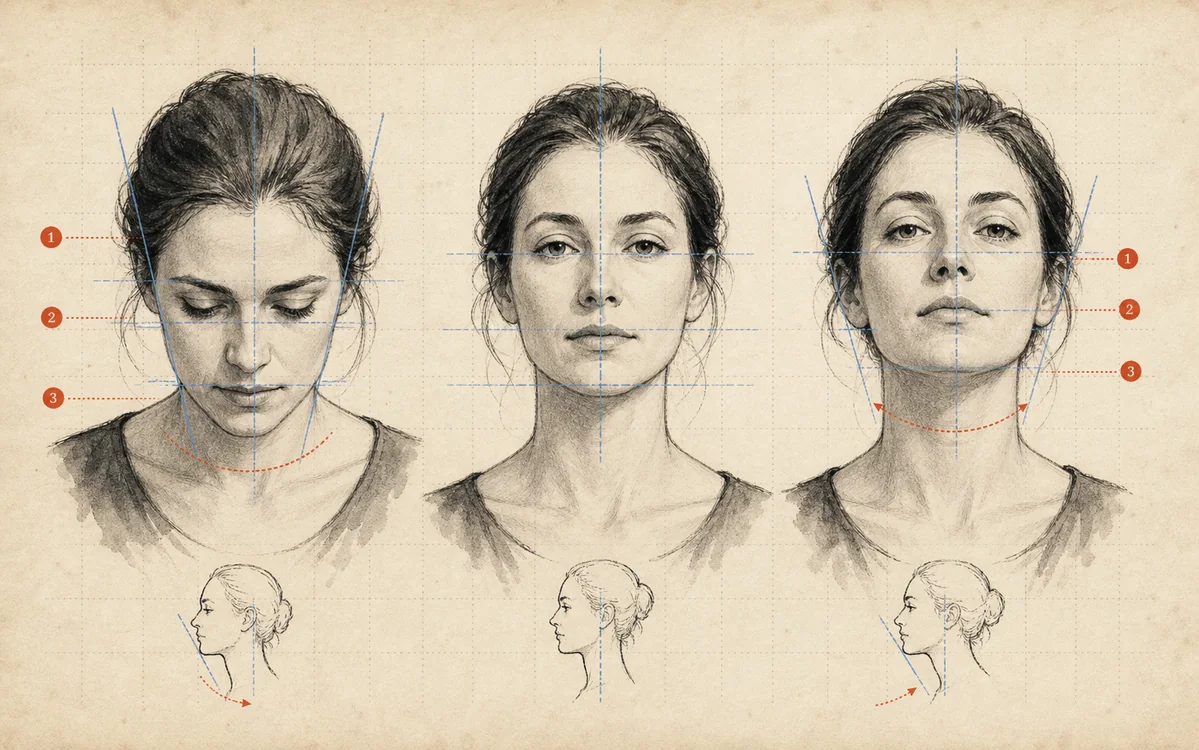 FIG.003Pull the Chin 1cm and the Jawline Looks Cleaner in PhotosWithout lowering the whole neck, keeping the back of the head up while drawing just the chin tip back makes the jawline and neck area easier to define.
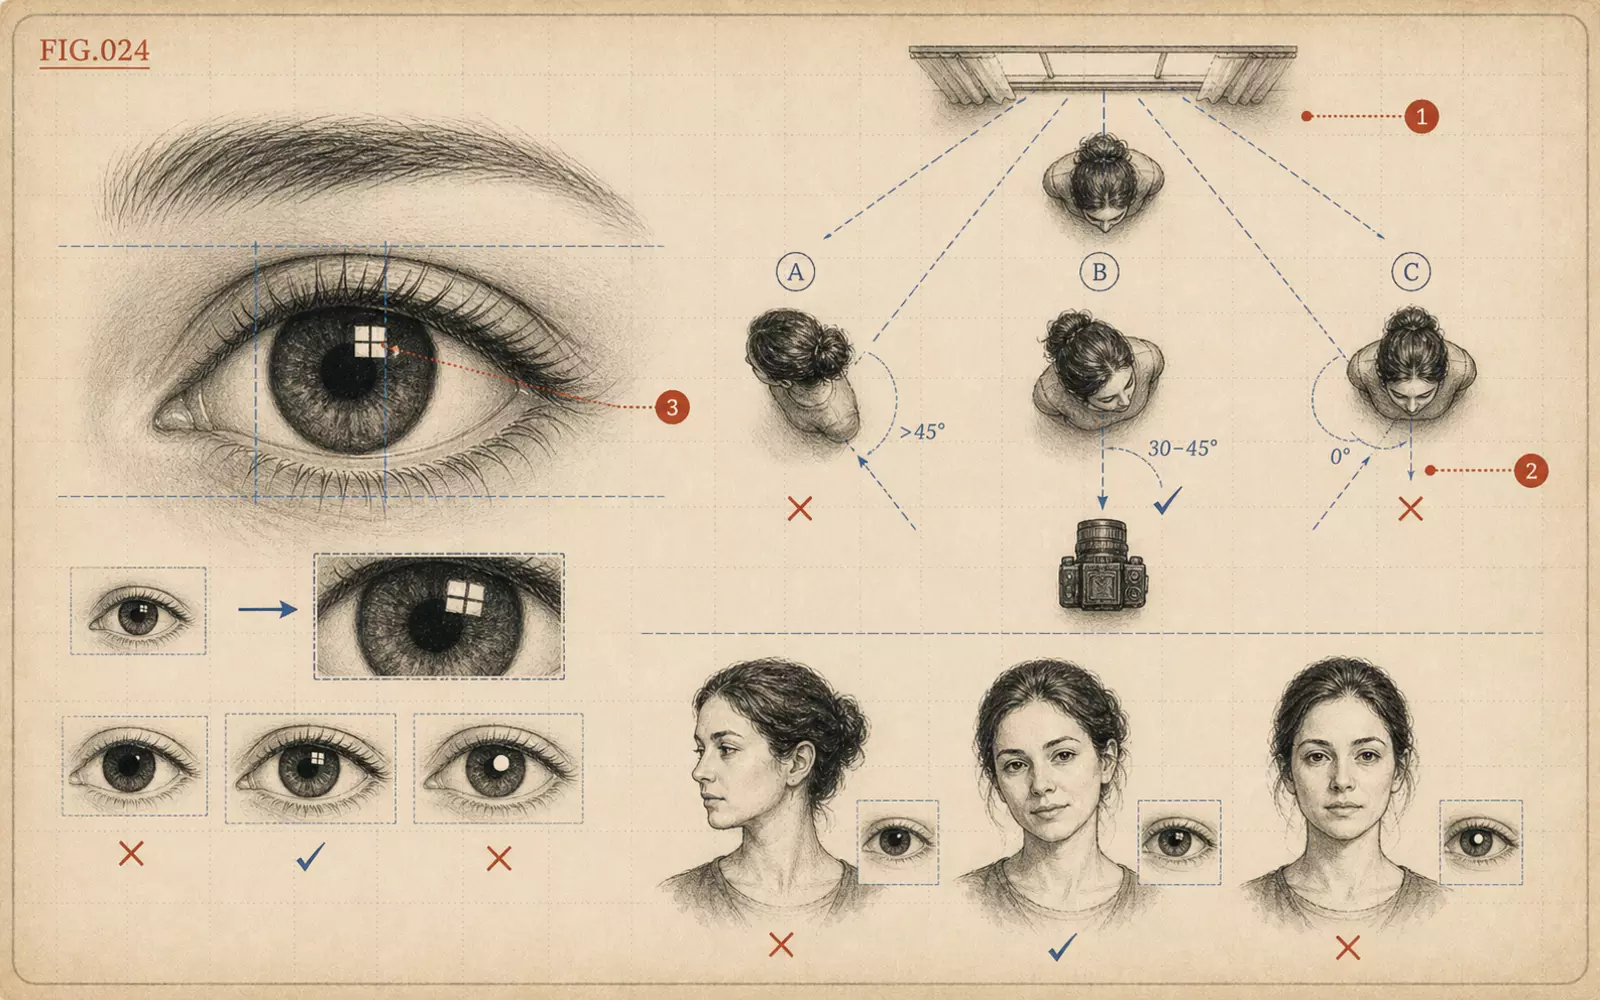 FIG.024How to Orient Your Body to Get Catchlights in Your EyesCatchlights are the small highlights reflected in the pupils. Angling not just the face but also the chest toward the light makes them easier to capture.
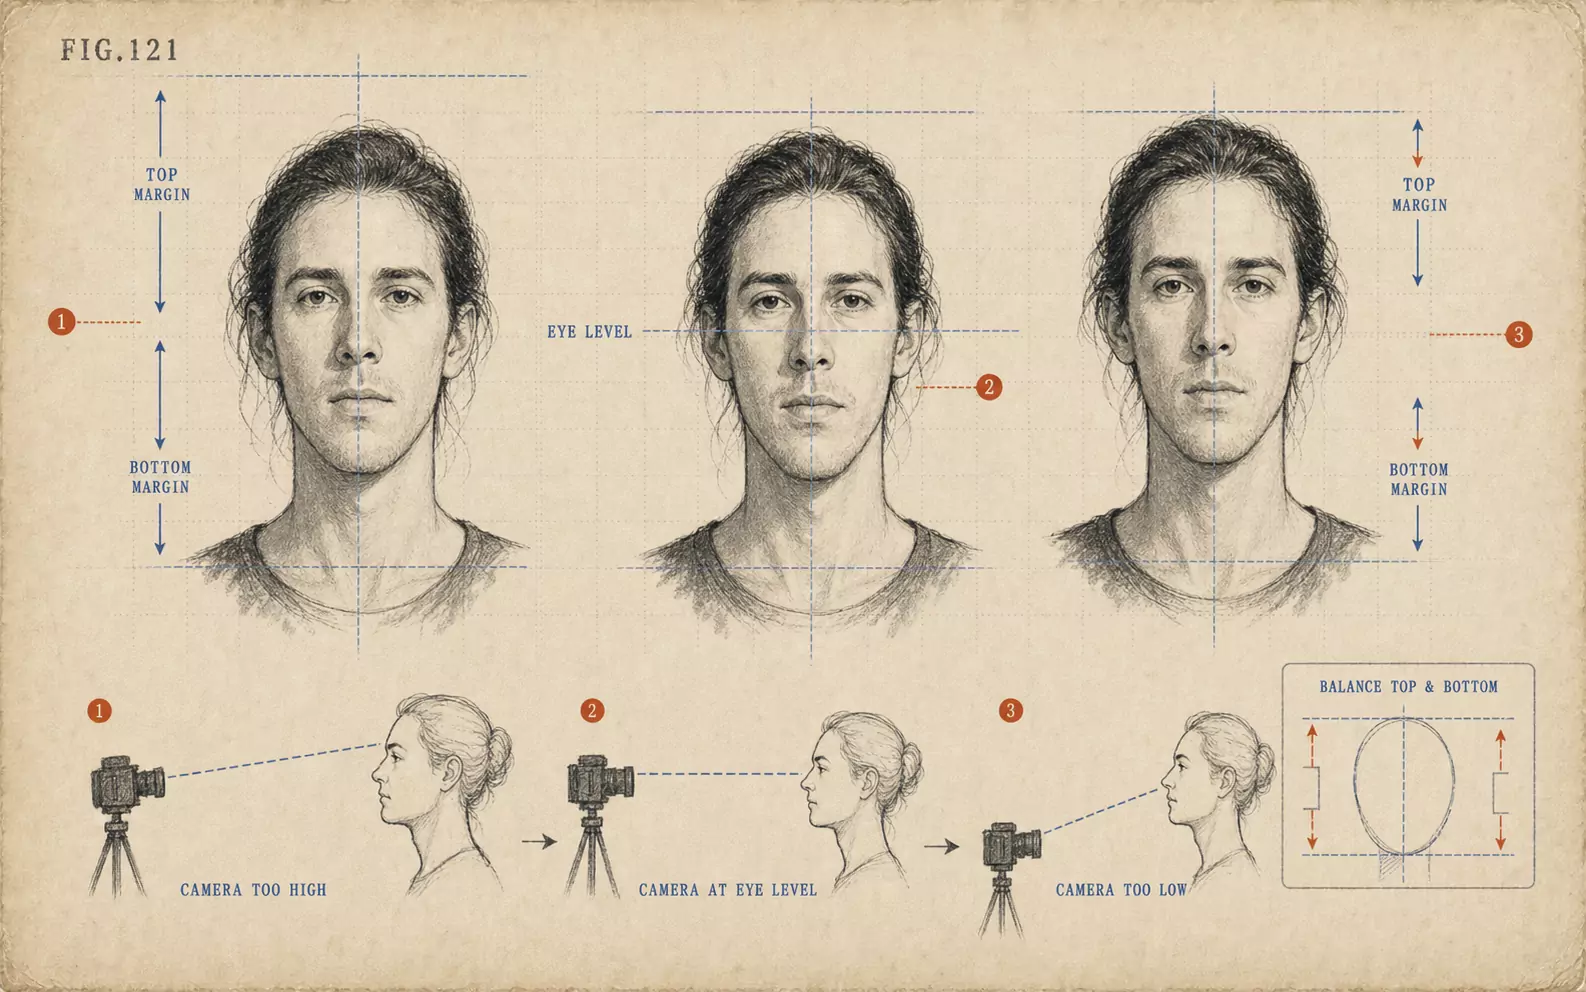 FIG.121How to Be Photographed with an Oblong Face: Framing That Softens a Vertical ImpressionPhotos that make an oblong face appear elongated can be adjusted through chin angle, camera position, and headroom.